Skip to content
site-logo

Thimble Bee's Sewing School

  • Home
  • Sewing Summer Camp
  • Learn To Sew
    • Learn To Sew I Kids
    • Learn to Sew Kids: Beyond the Basics
    • Learn To Sew I Adults
    • Learn To Sew II Adults
    • Virtual Classes
  • Kids Classes
    • Learn To Sew I
    • Learn to Sew Kids: Beyond the Basics
    • Fashion Kids (ages 9-12)
    • Fashion Tweens & Teens (ages 9-15)
    • Homeschool Sewing Classes
  • Adult Classes
    • Learn To Sew I Adults
    • Learn To Sew II Adults
    • Garment Fundamentals
  • Workshops
    • Kids Workshops
    • Adult Workshops
    • Teacher Workday & School Break Camp
  • Virtual Classes
    • Virtual Classes
  • The Thimble Bee’s Sewciety
Tutorials

Simple Side Satchel (for 18″ Dolls)

December 30, 2016October 5, 2023 Comments Off on Simple Side Satchel (for 18″ Dolls)
Simple Side Satchel (for 18″ Dolls)

To make this satchel you will need the following:

(1) 4.5″ x 6″ Felt Remnant (thick felt works best/wool felt)

(1) 2.5″ x 3.5″ Felt Remnant (thick felt works best/wool felt)

(1) 12″ piece of 3/8″ ribbon

(1) 1/2″ button

all purpose thread

Note: In this tutorial, I’m using brightly colored thread so you can easily see my stitches. But, you will want to choose a thread that closely matches your fabric.  This will keep your stitches from showing and make for a prettier project!

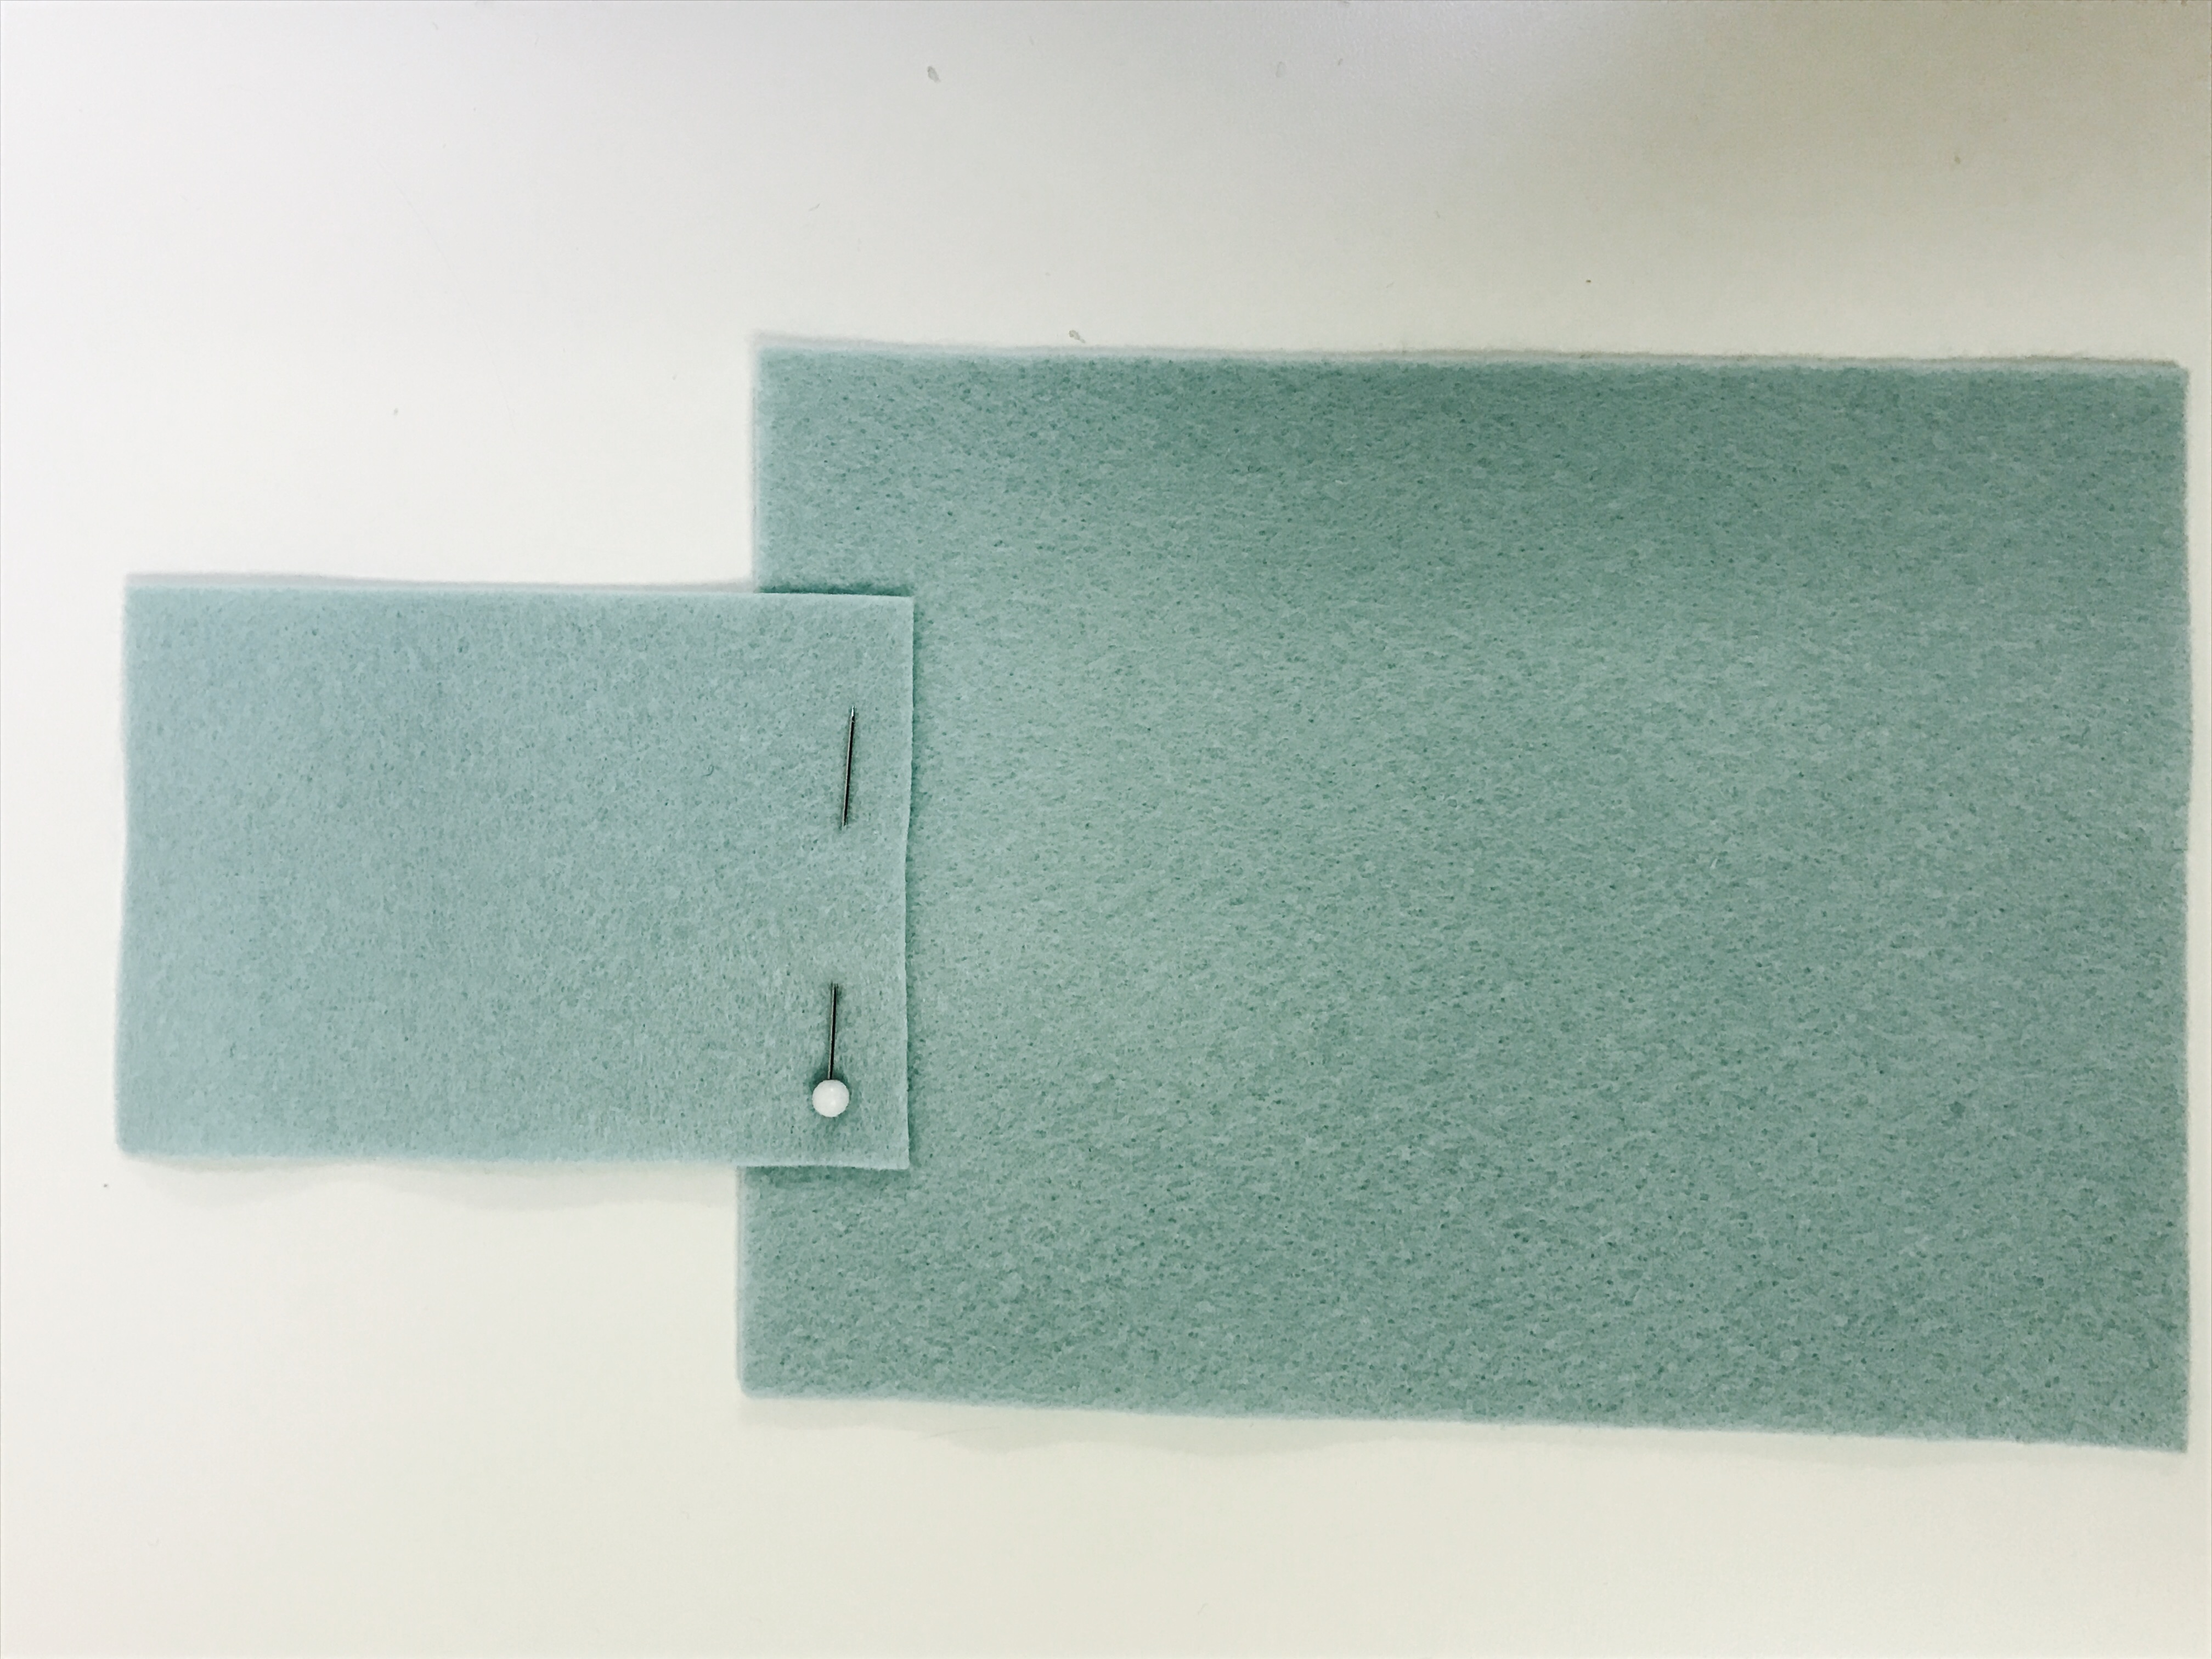
Step 1: Attaching the flap

Pin the smaller rectangle to the larger rectangle.  Make sure you center it along one of the short ends.  It should overlap about 1/2″ onto the large rectangle.  Like this:

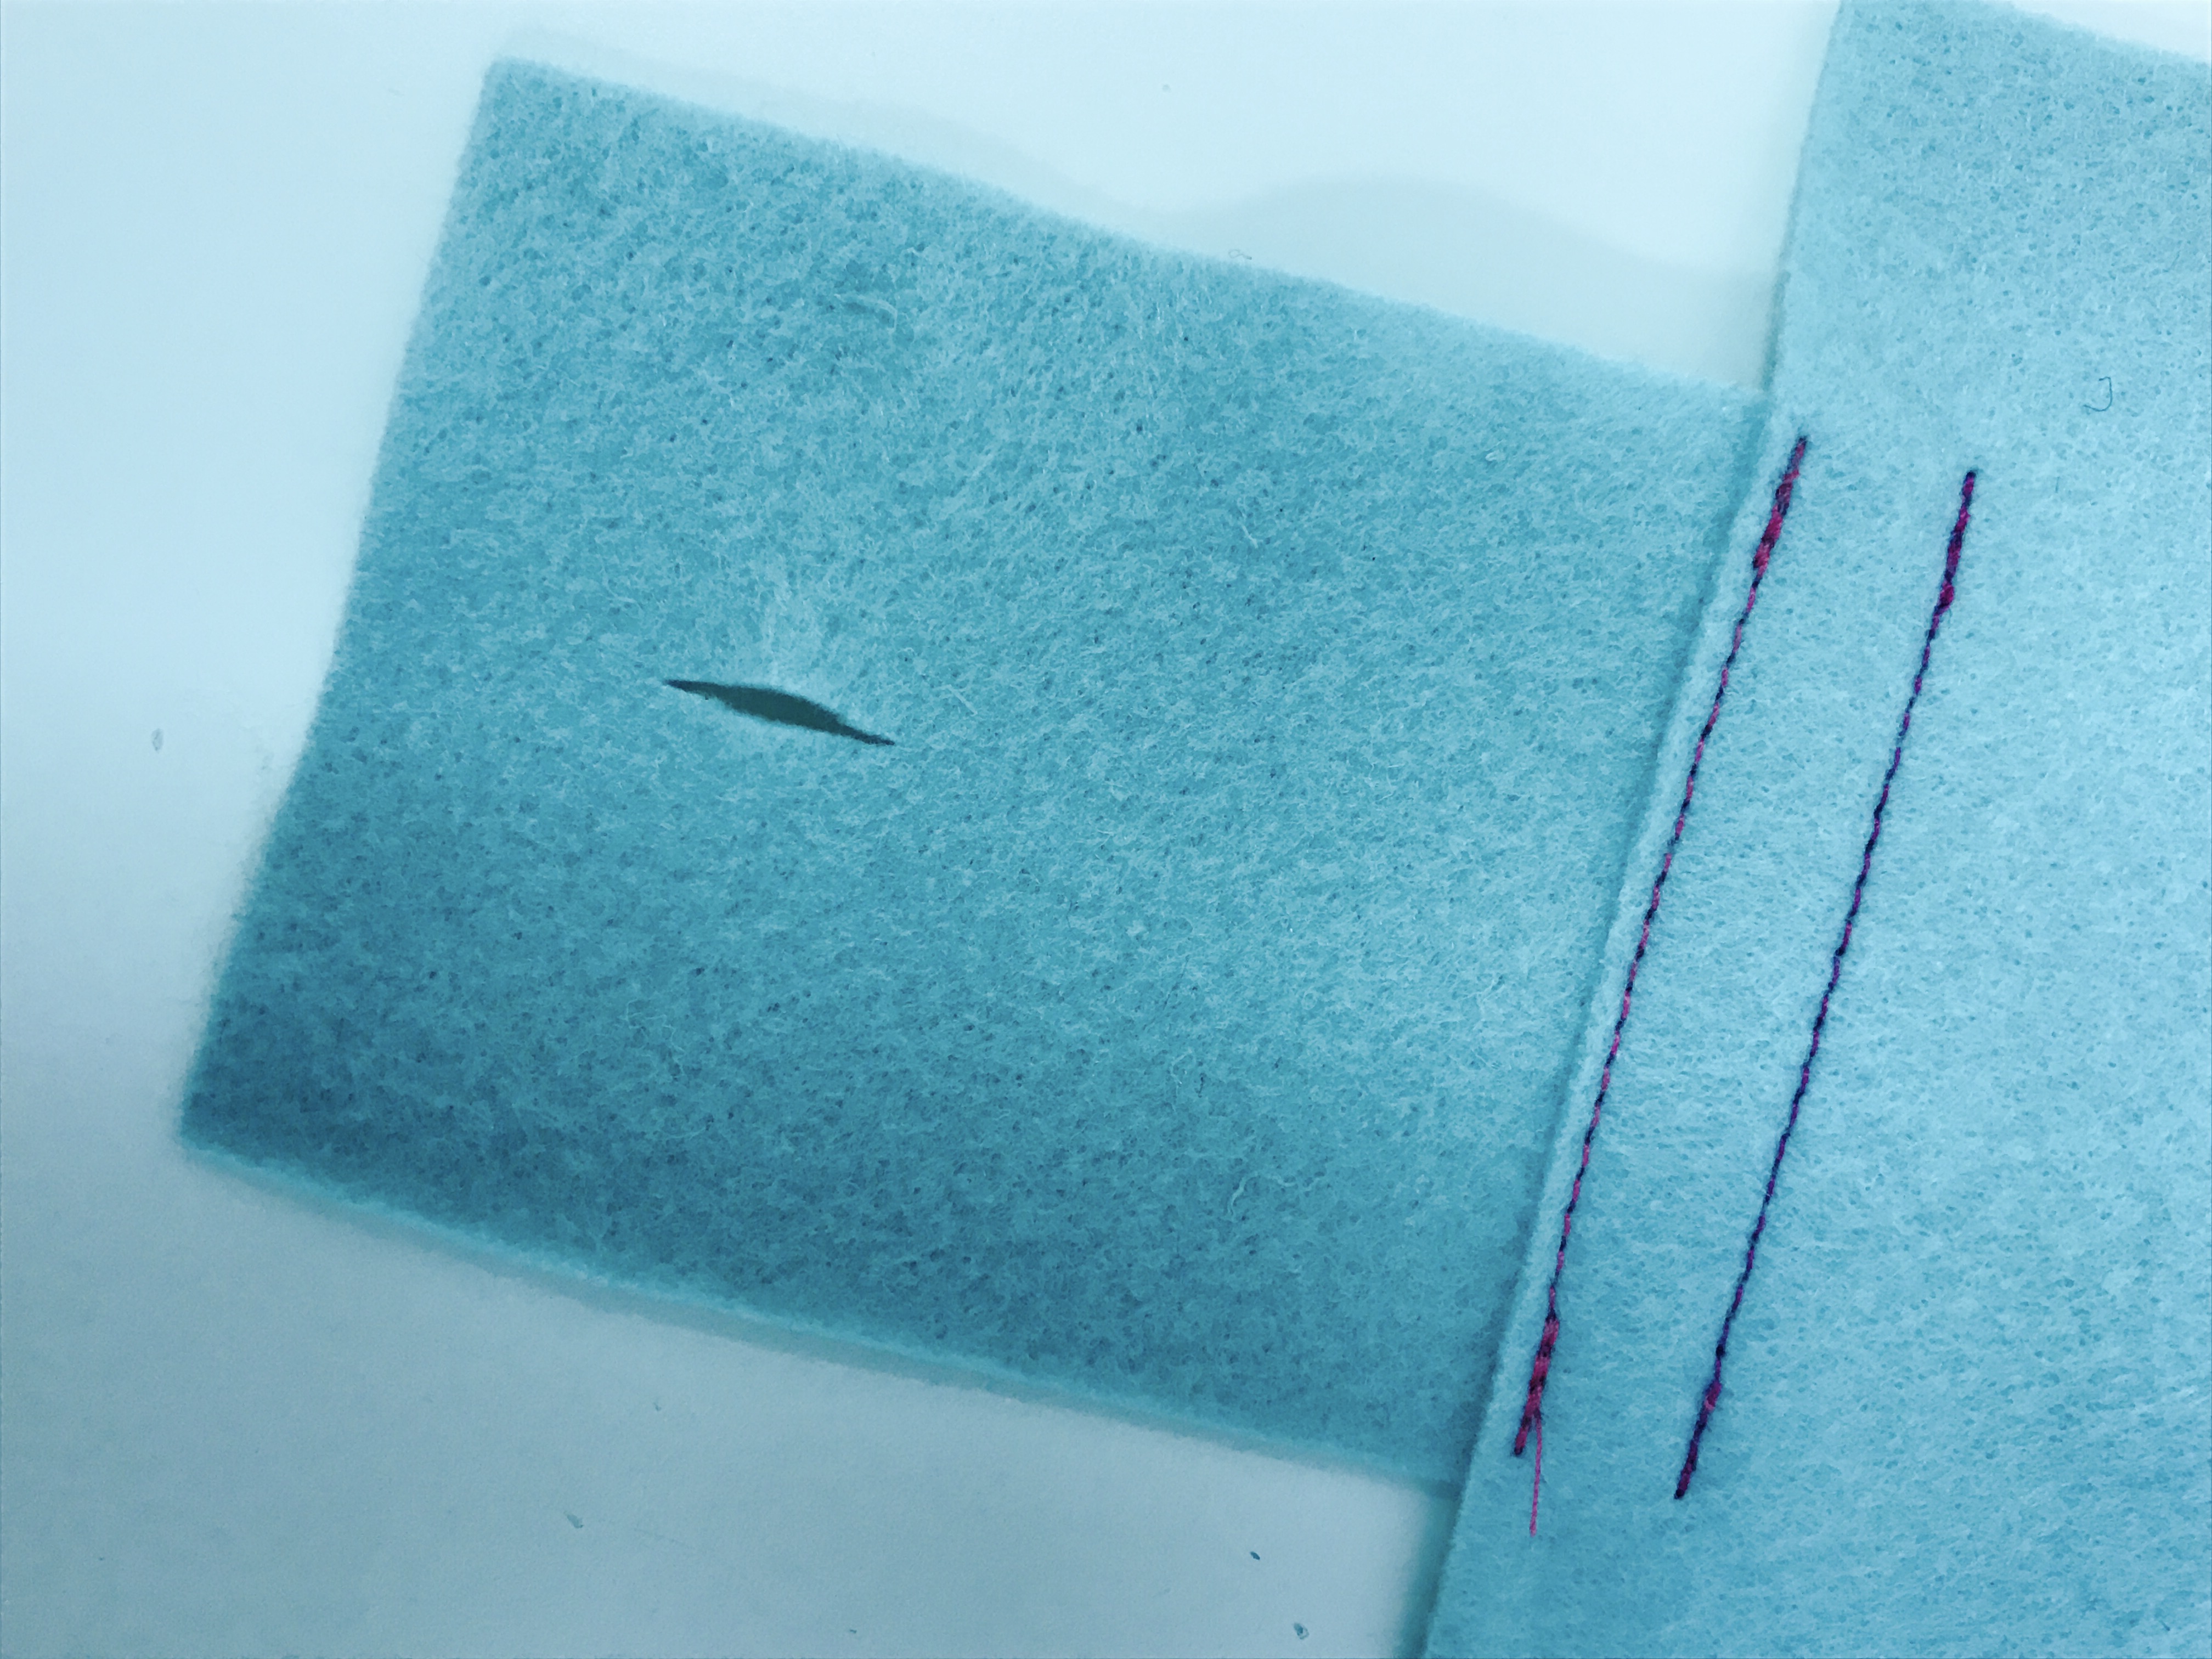
Step 2: Sewing the flap

Using a basic straight stitch, sew two rows of stitching from the top of the flap to the bottom.  It should look like this when you’re done:
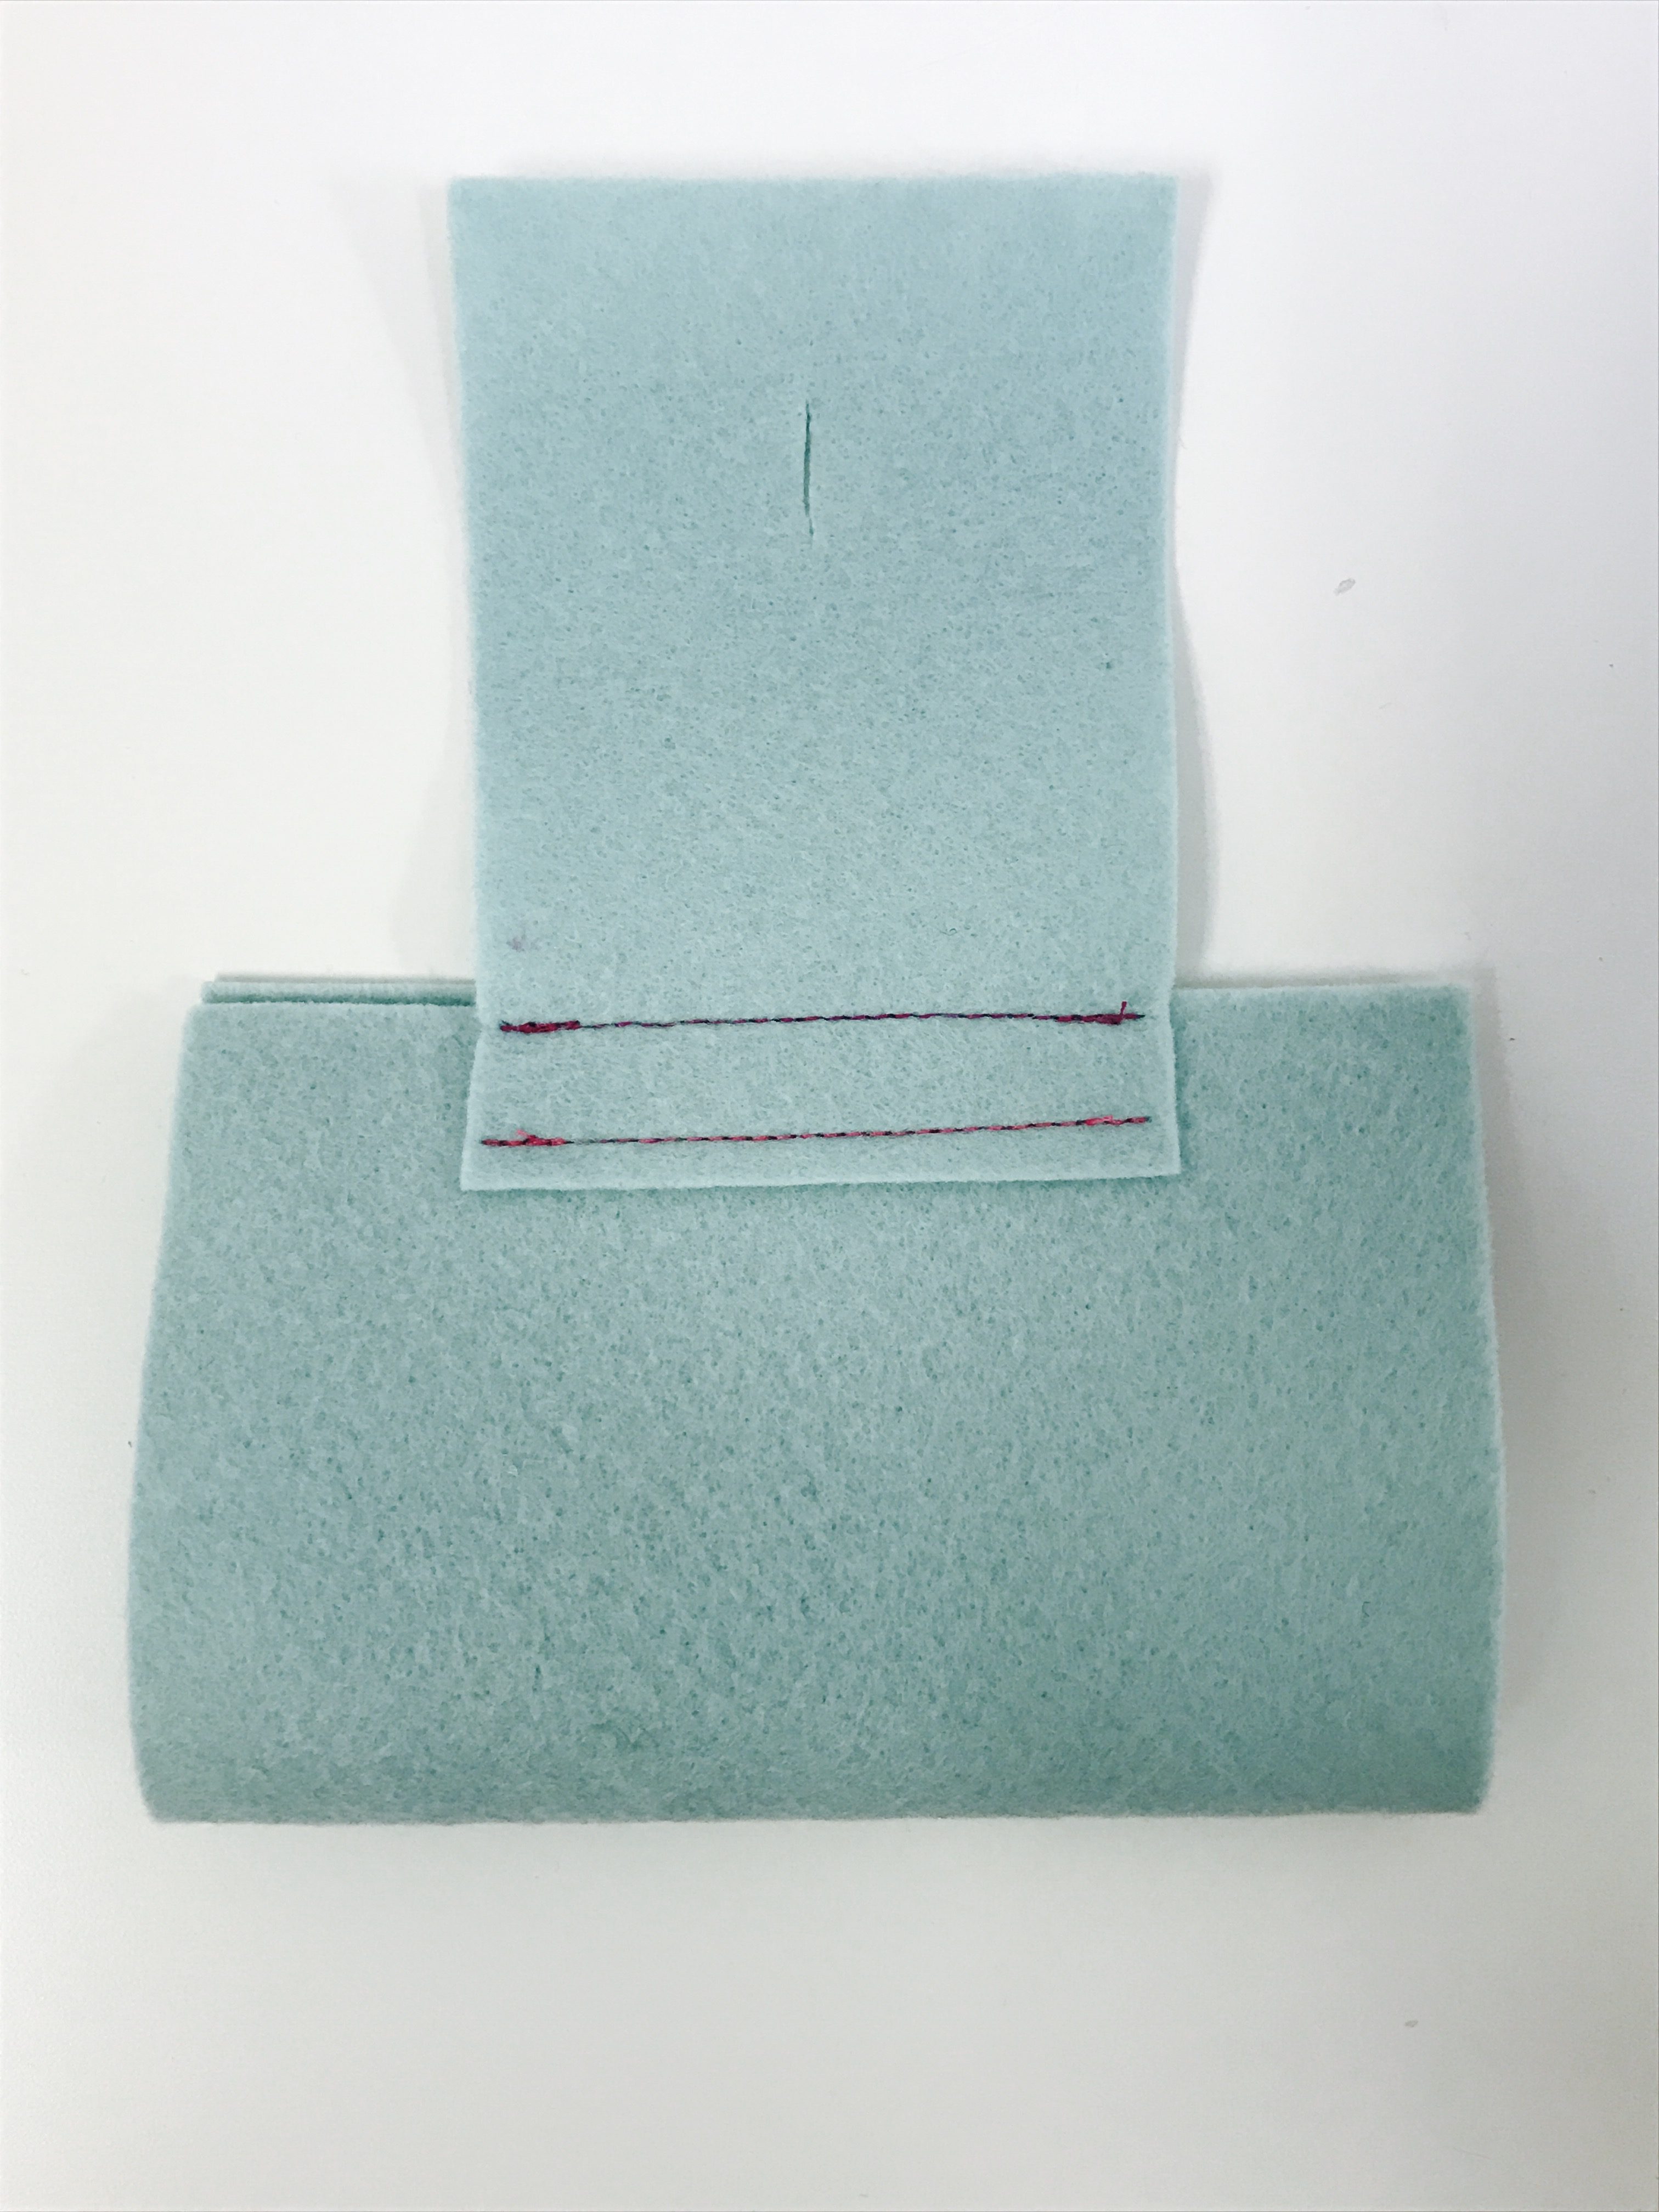
Step 3: Buttonhole

Along the end of the flap, fold down 1″ and make a small cut for the buttonhole opening.
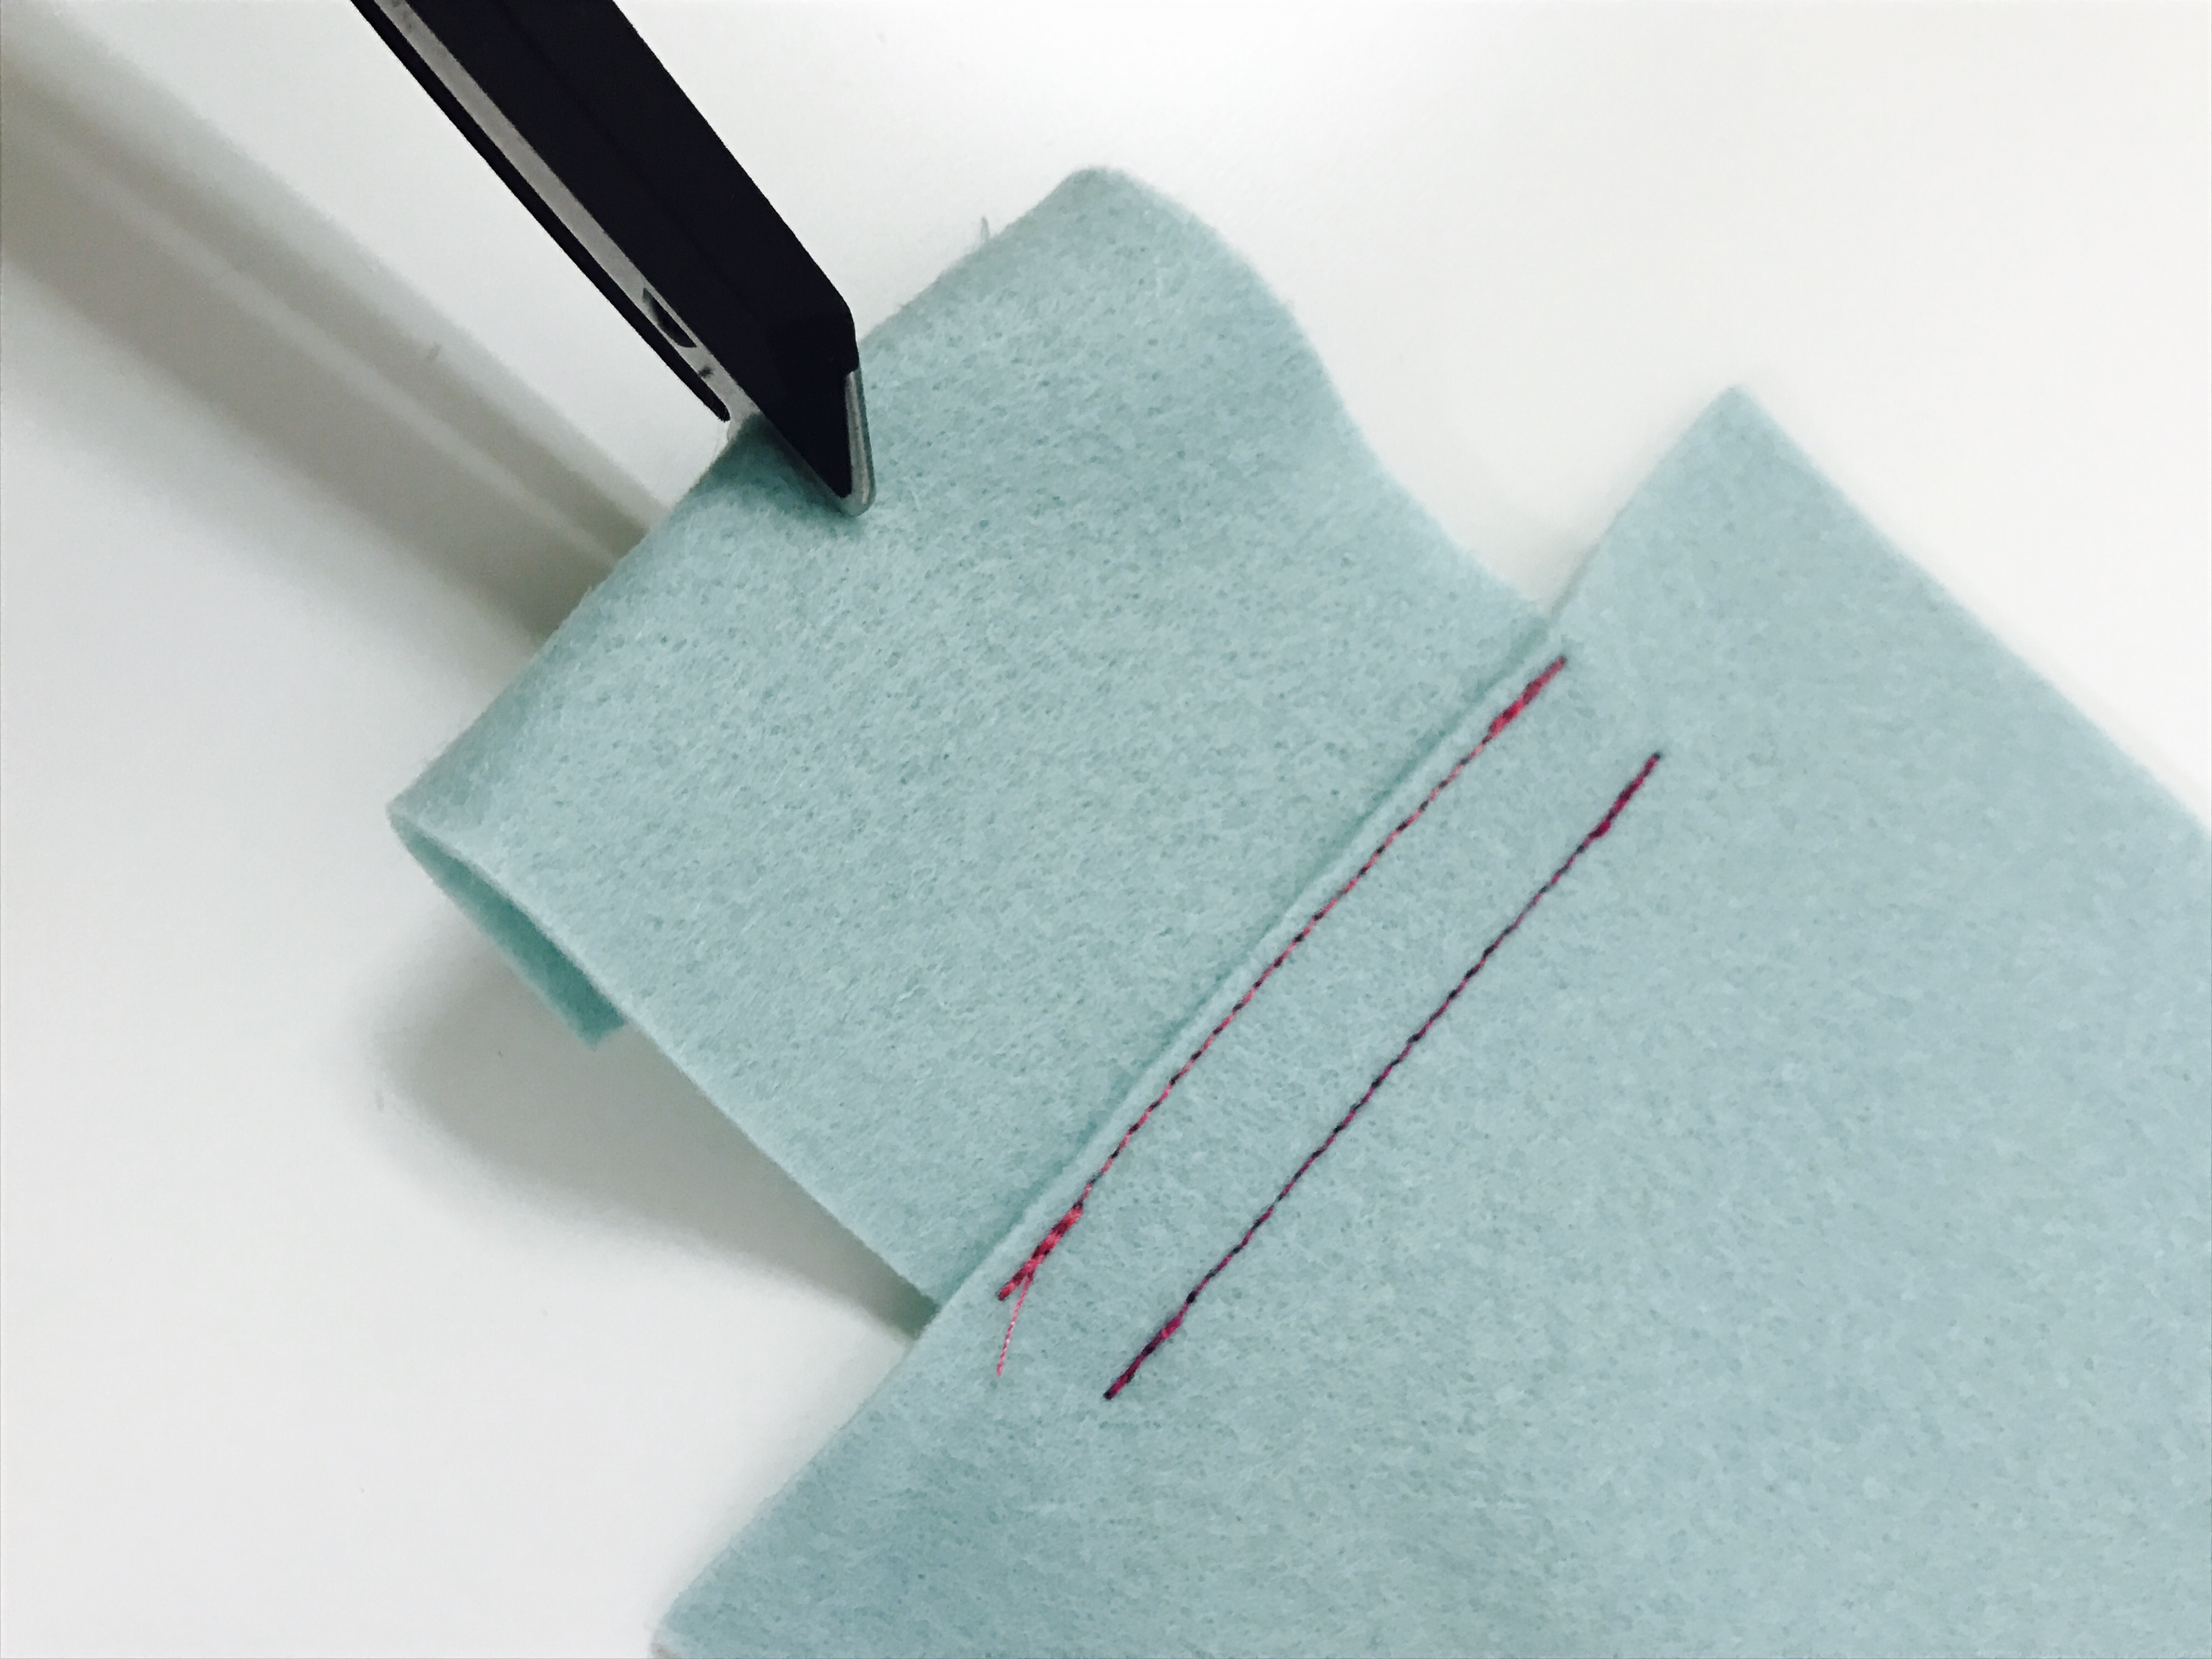
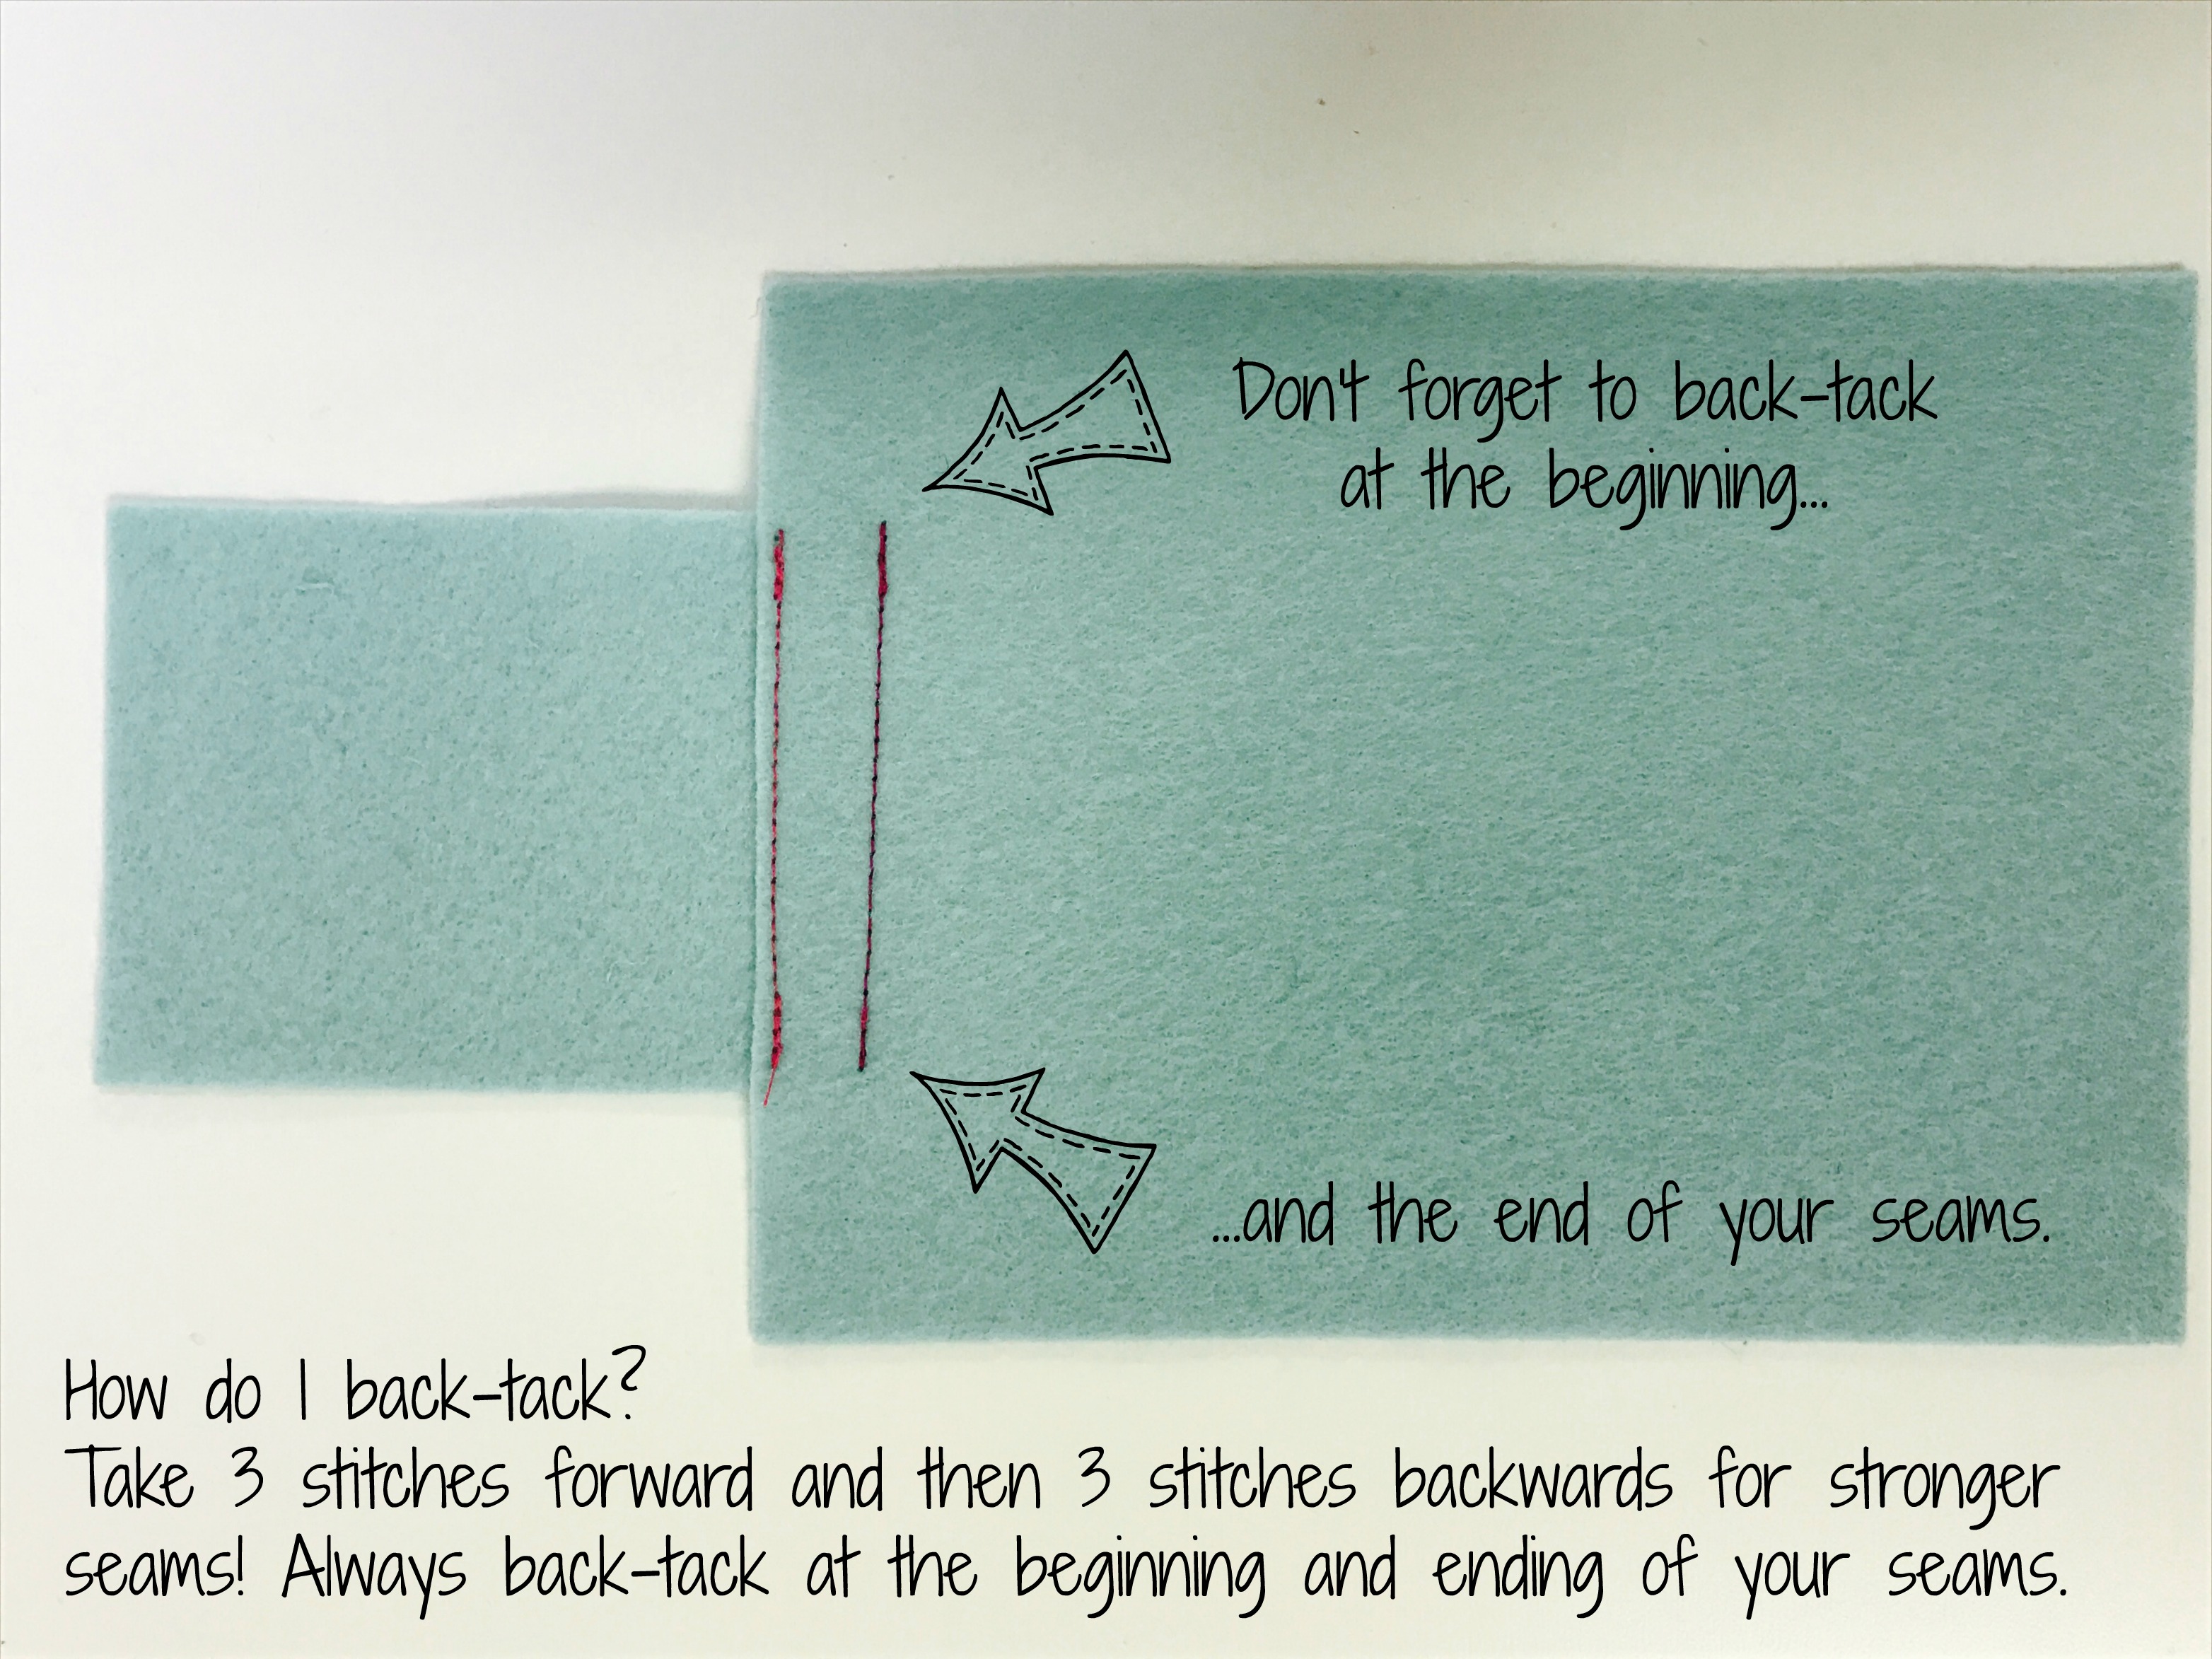
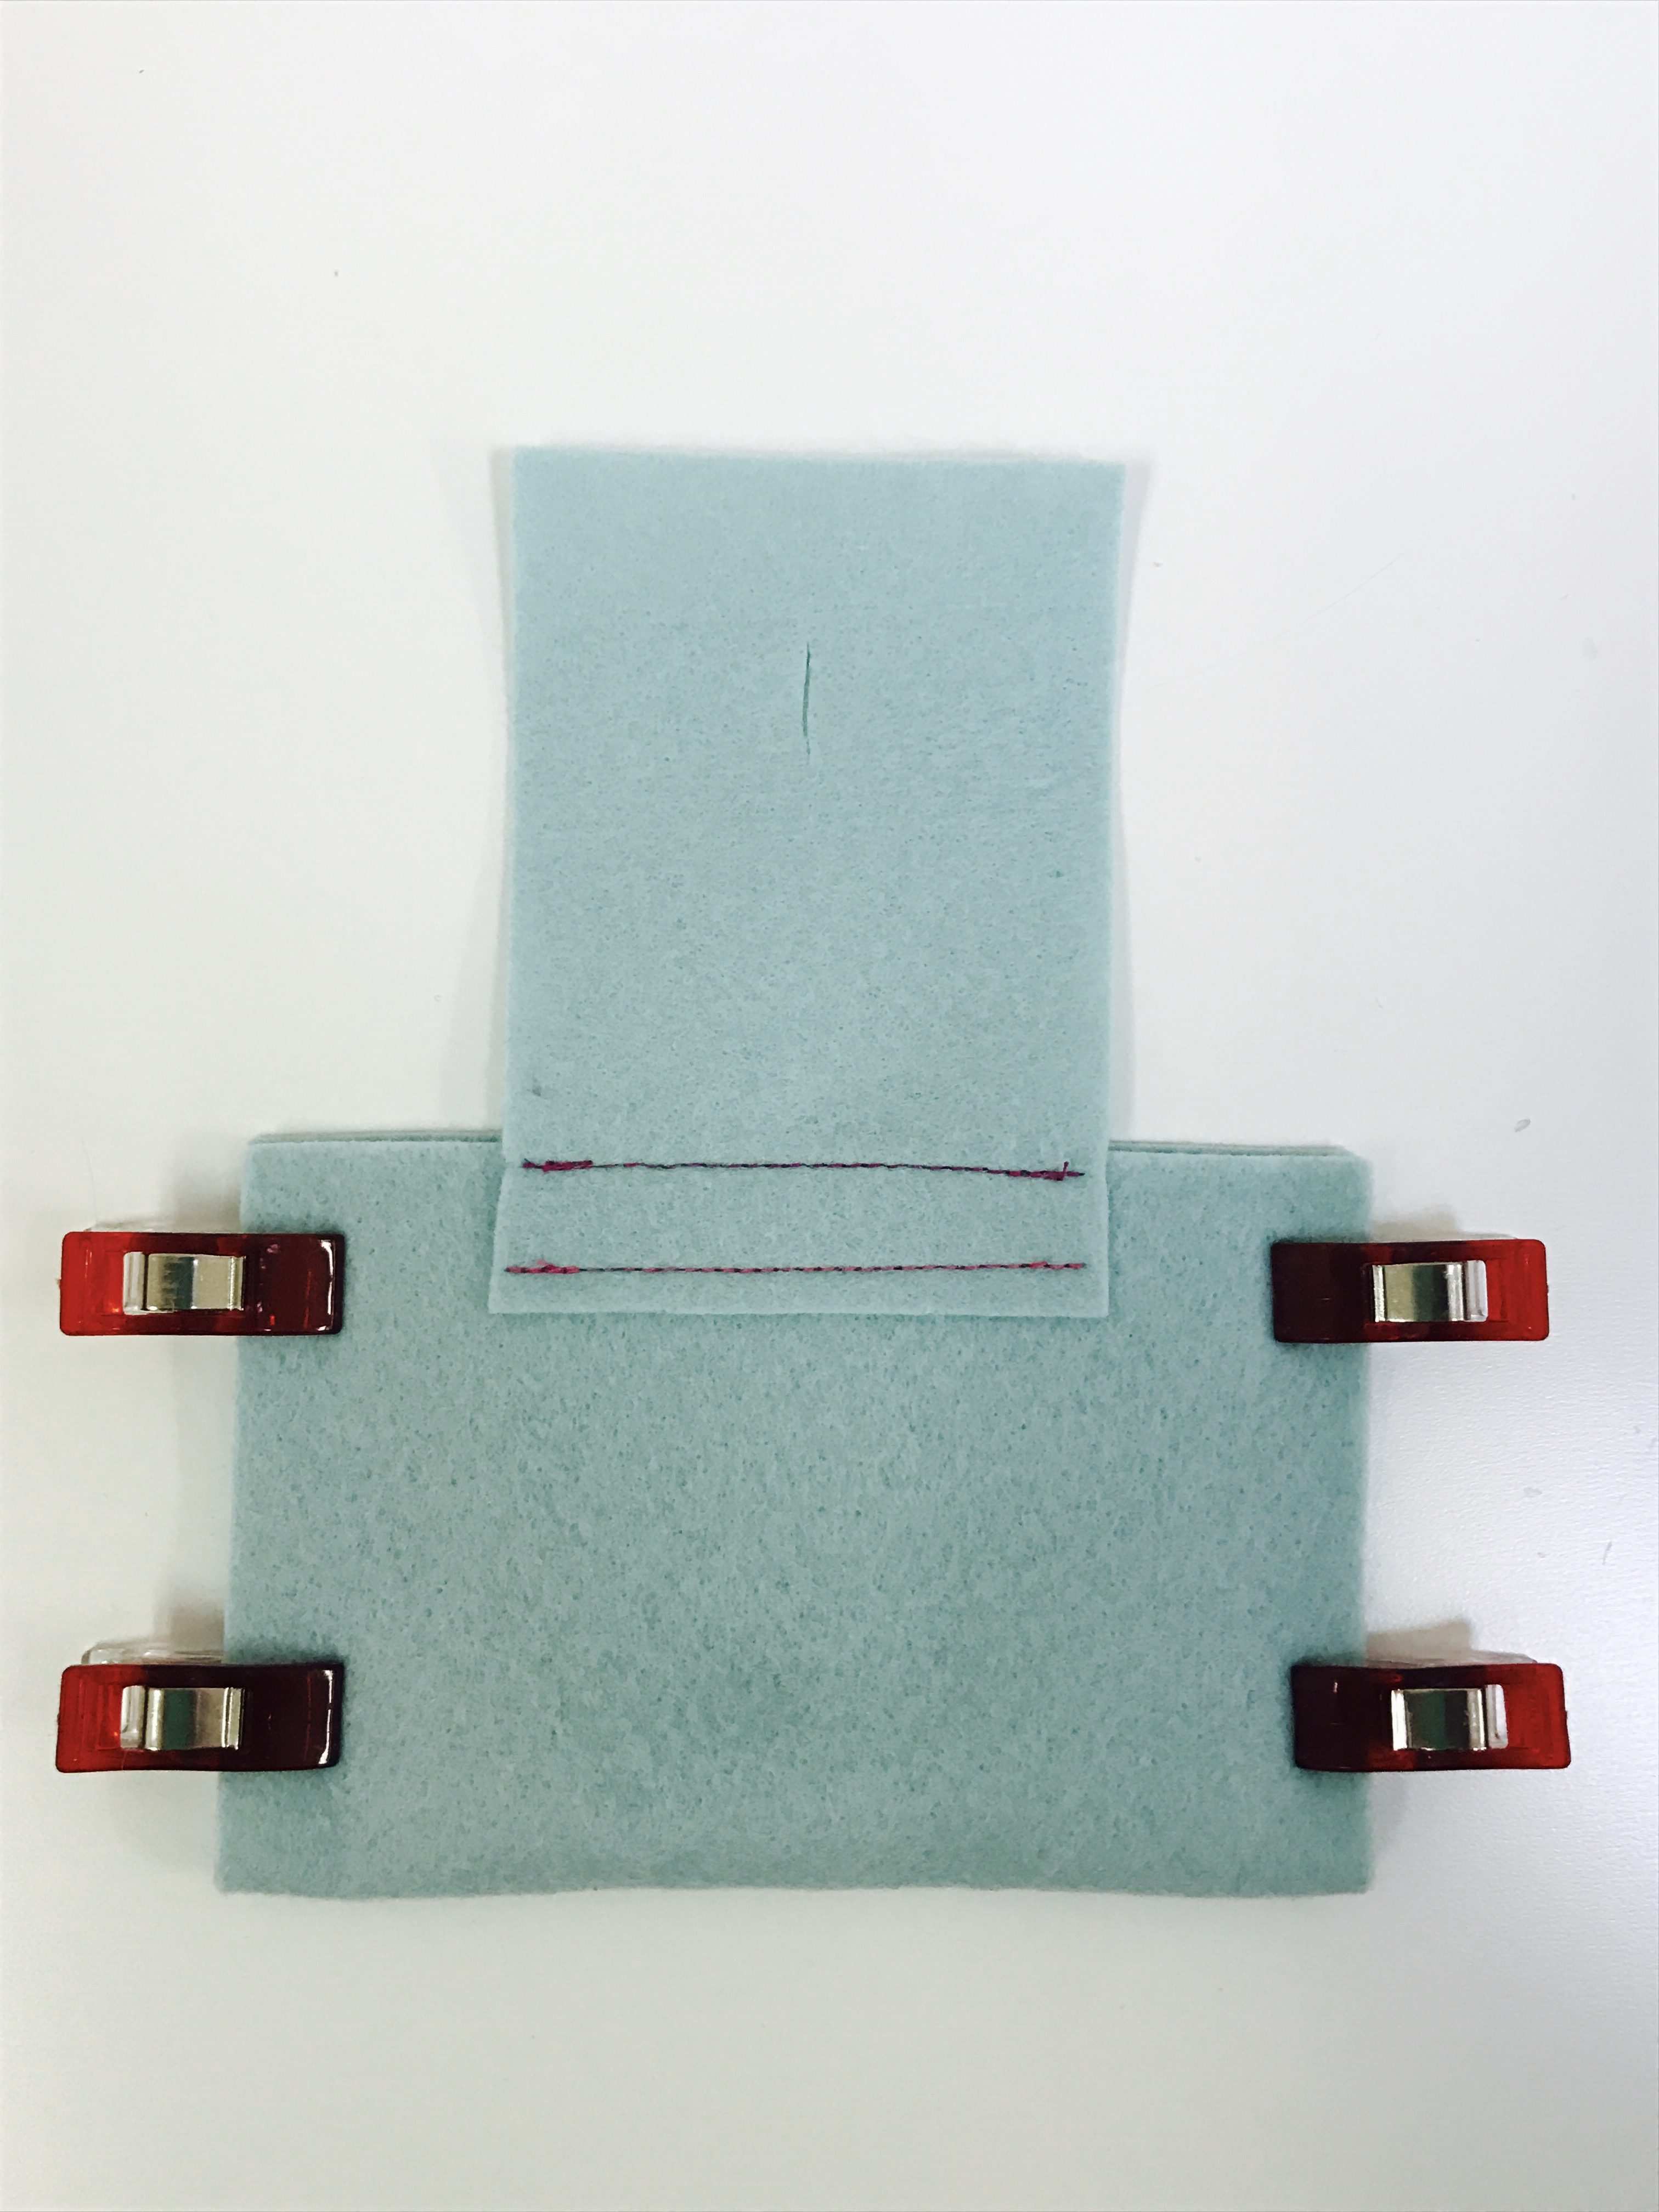
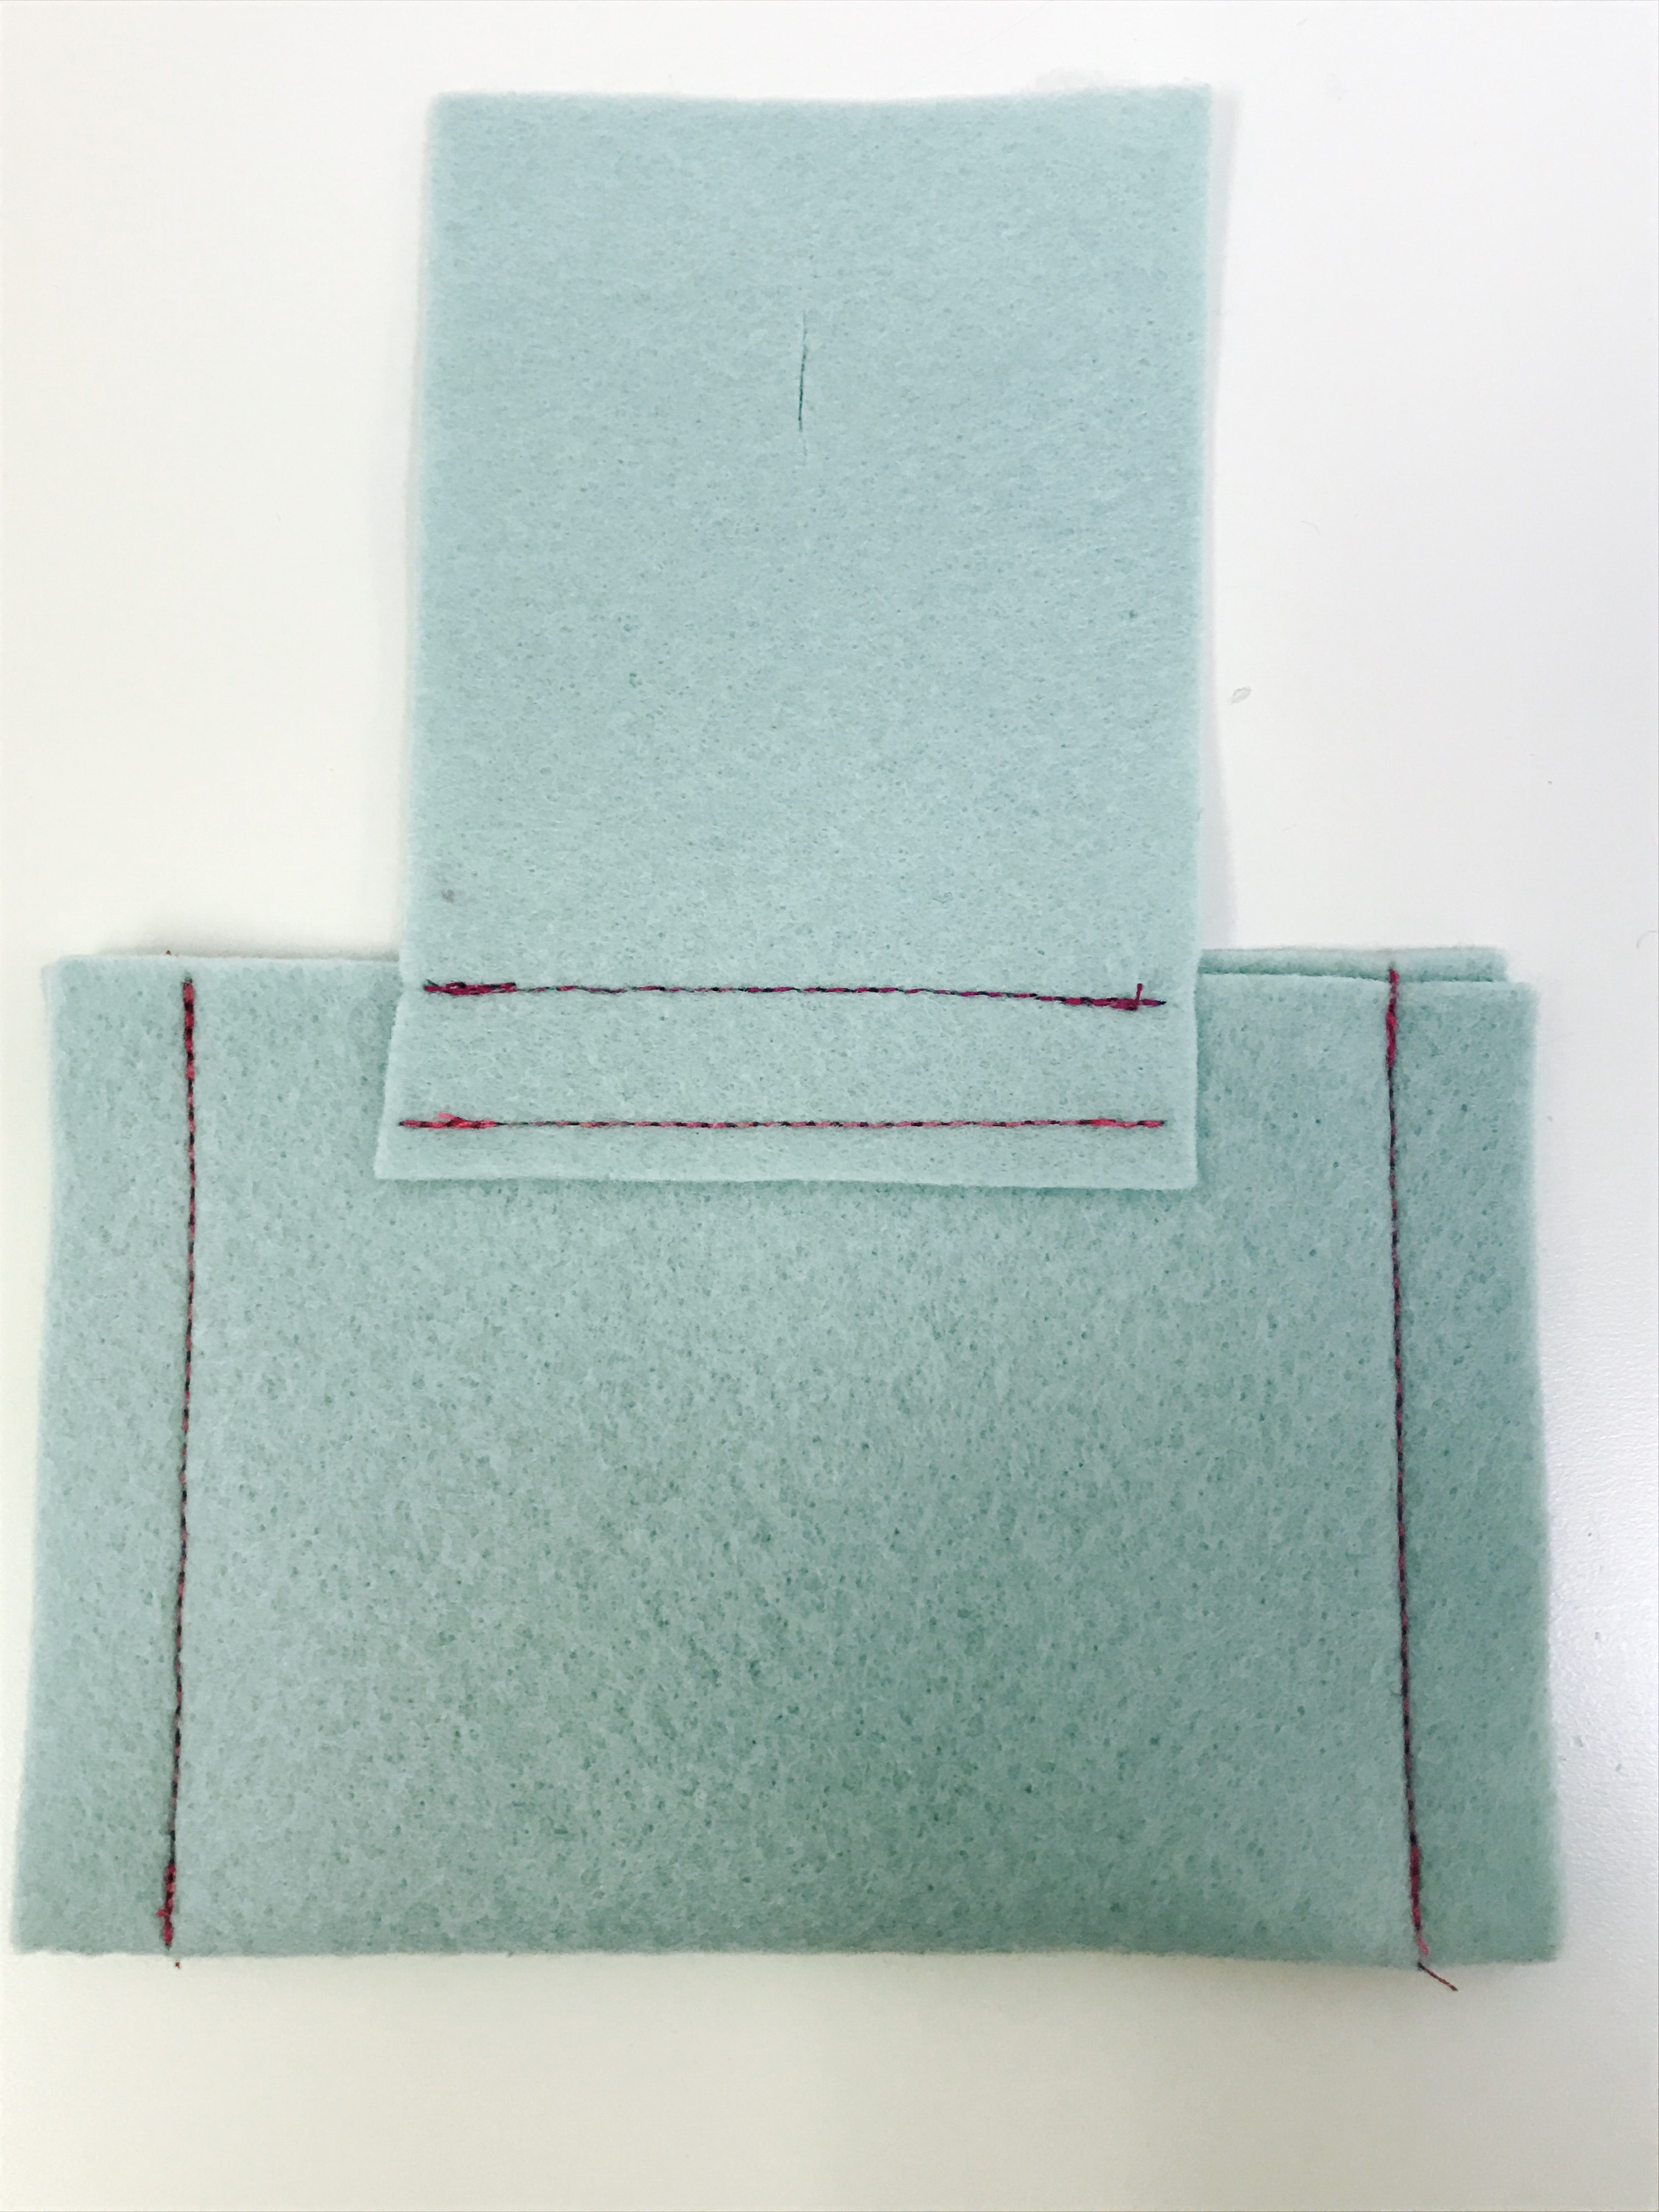
Step 4: Side seams

Fold the large rectangle in half, matching side edges evenly.  Like this:

Pin the side seams using straight pins or clips, like this:

Now sew along the side seams, making sure you back-tack at the beginning and end of your seams.

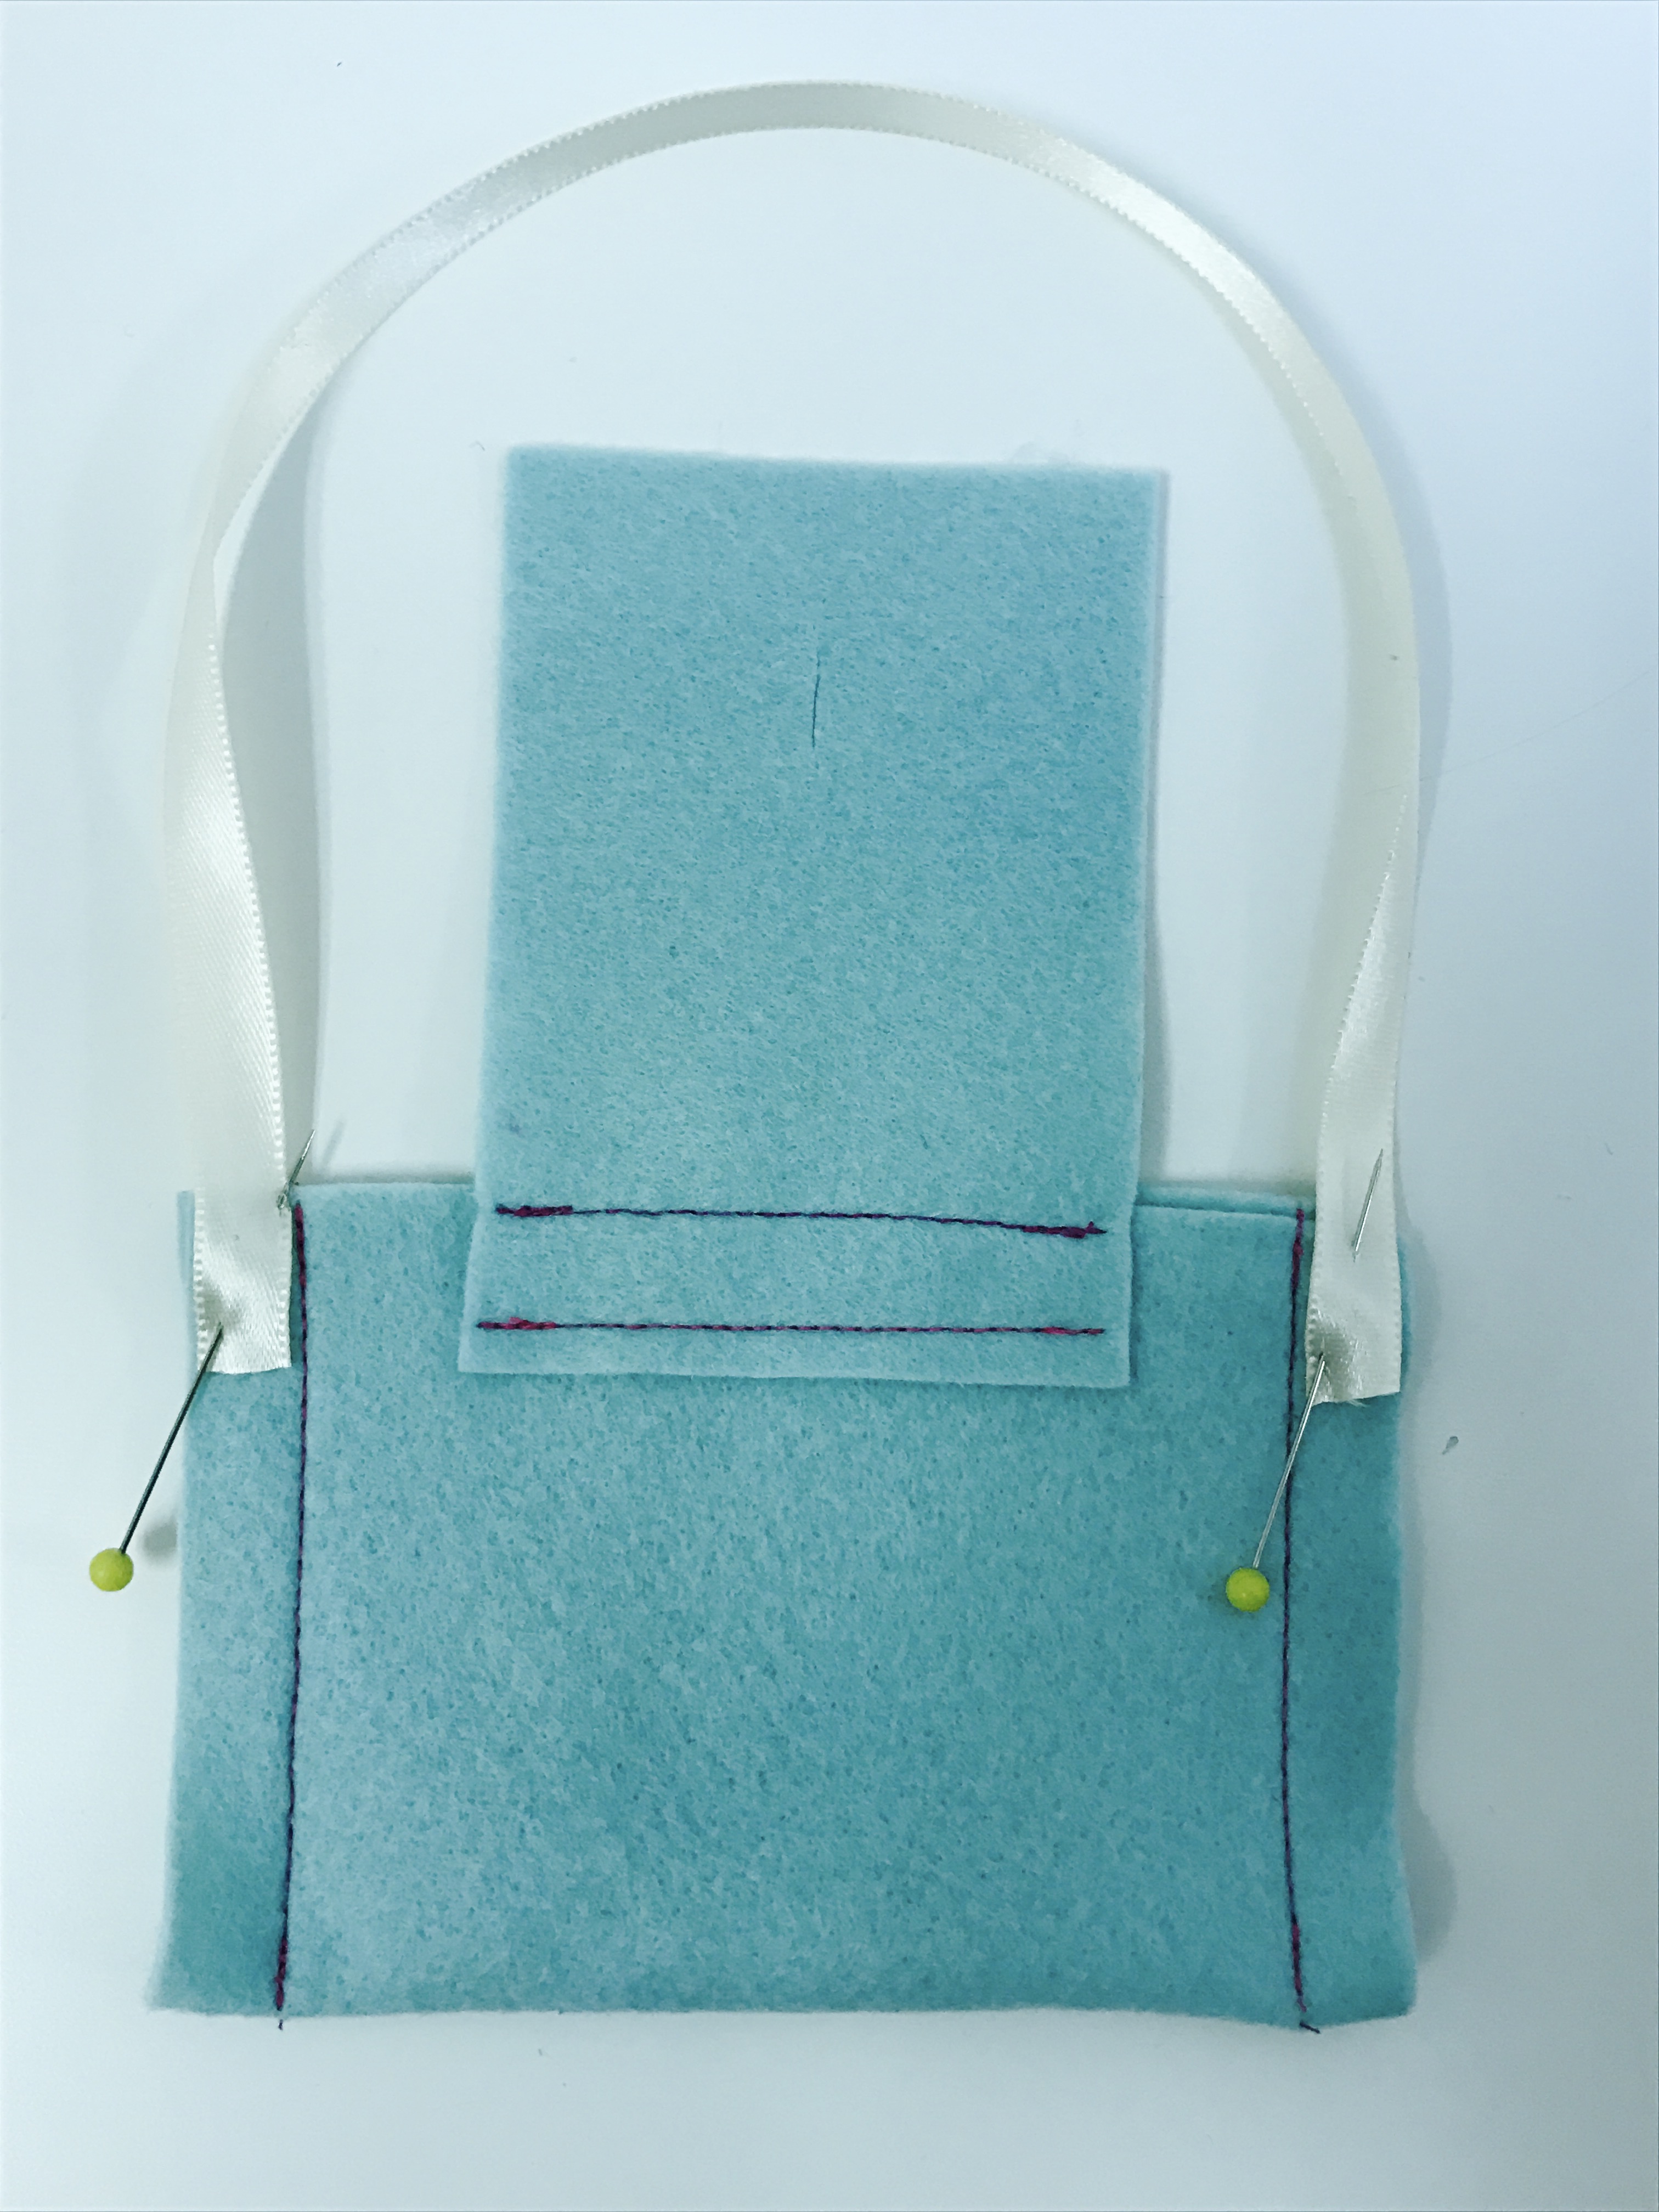
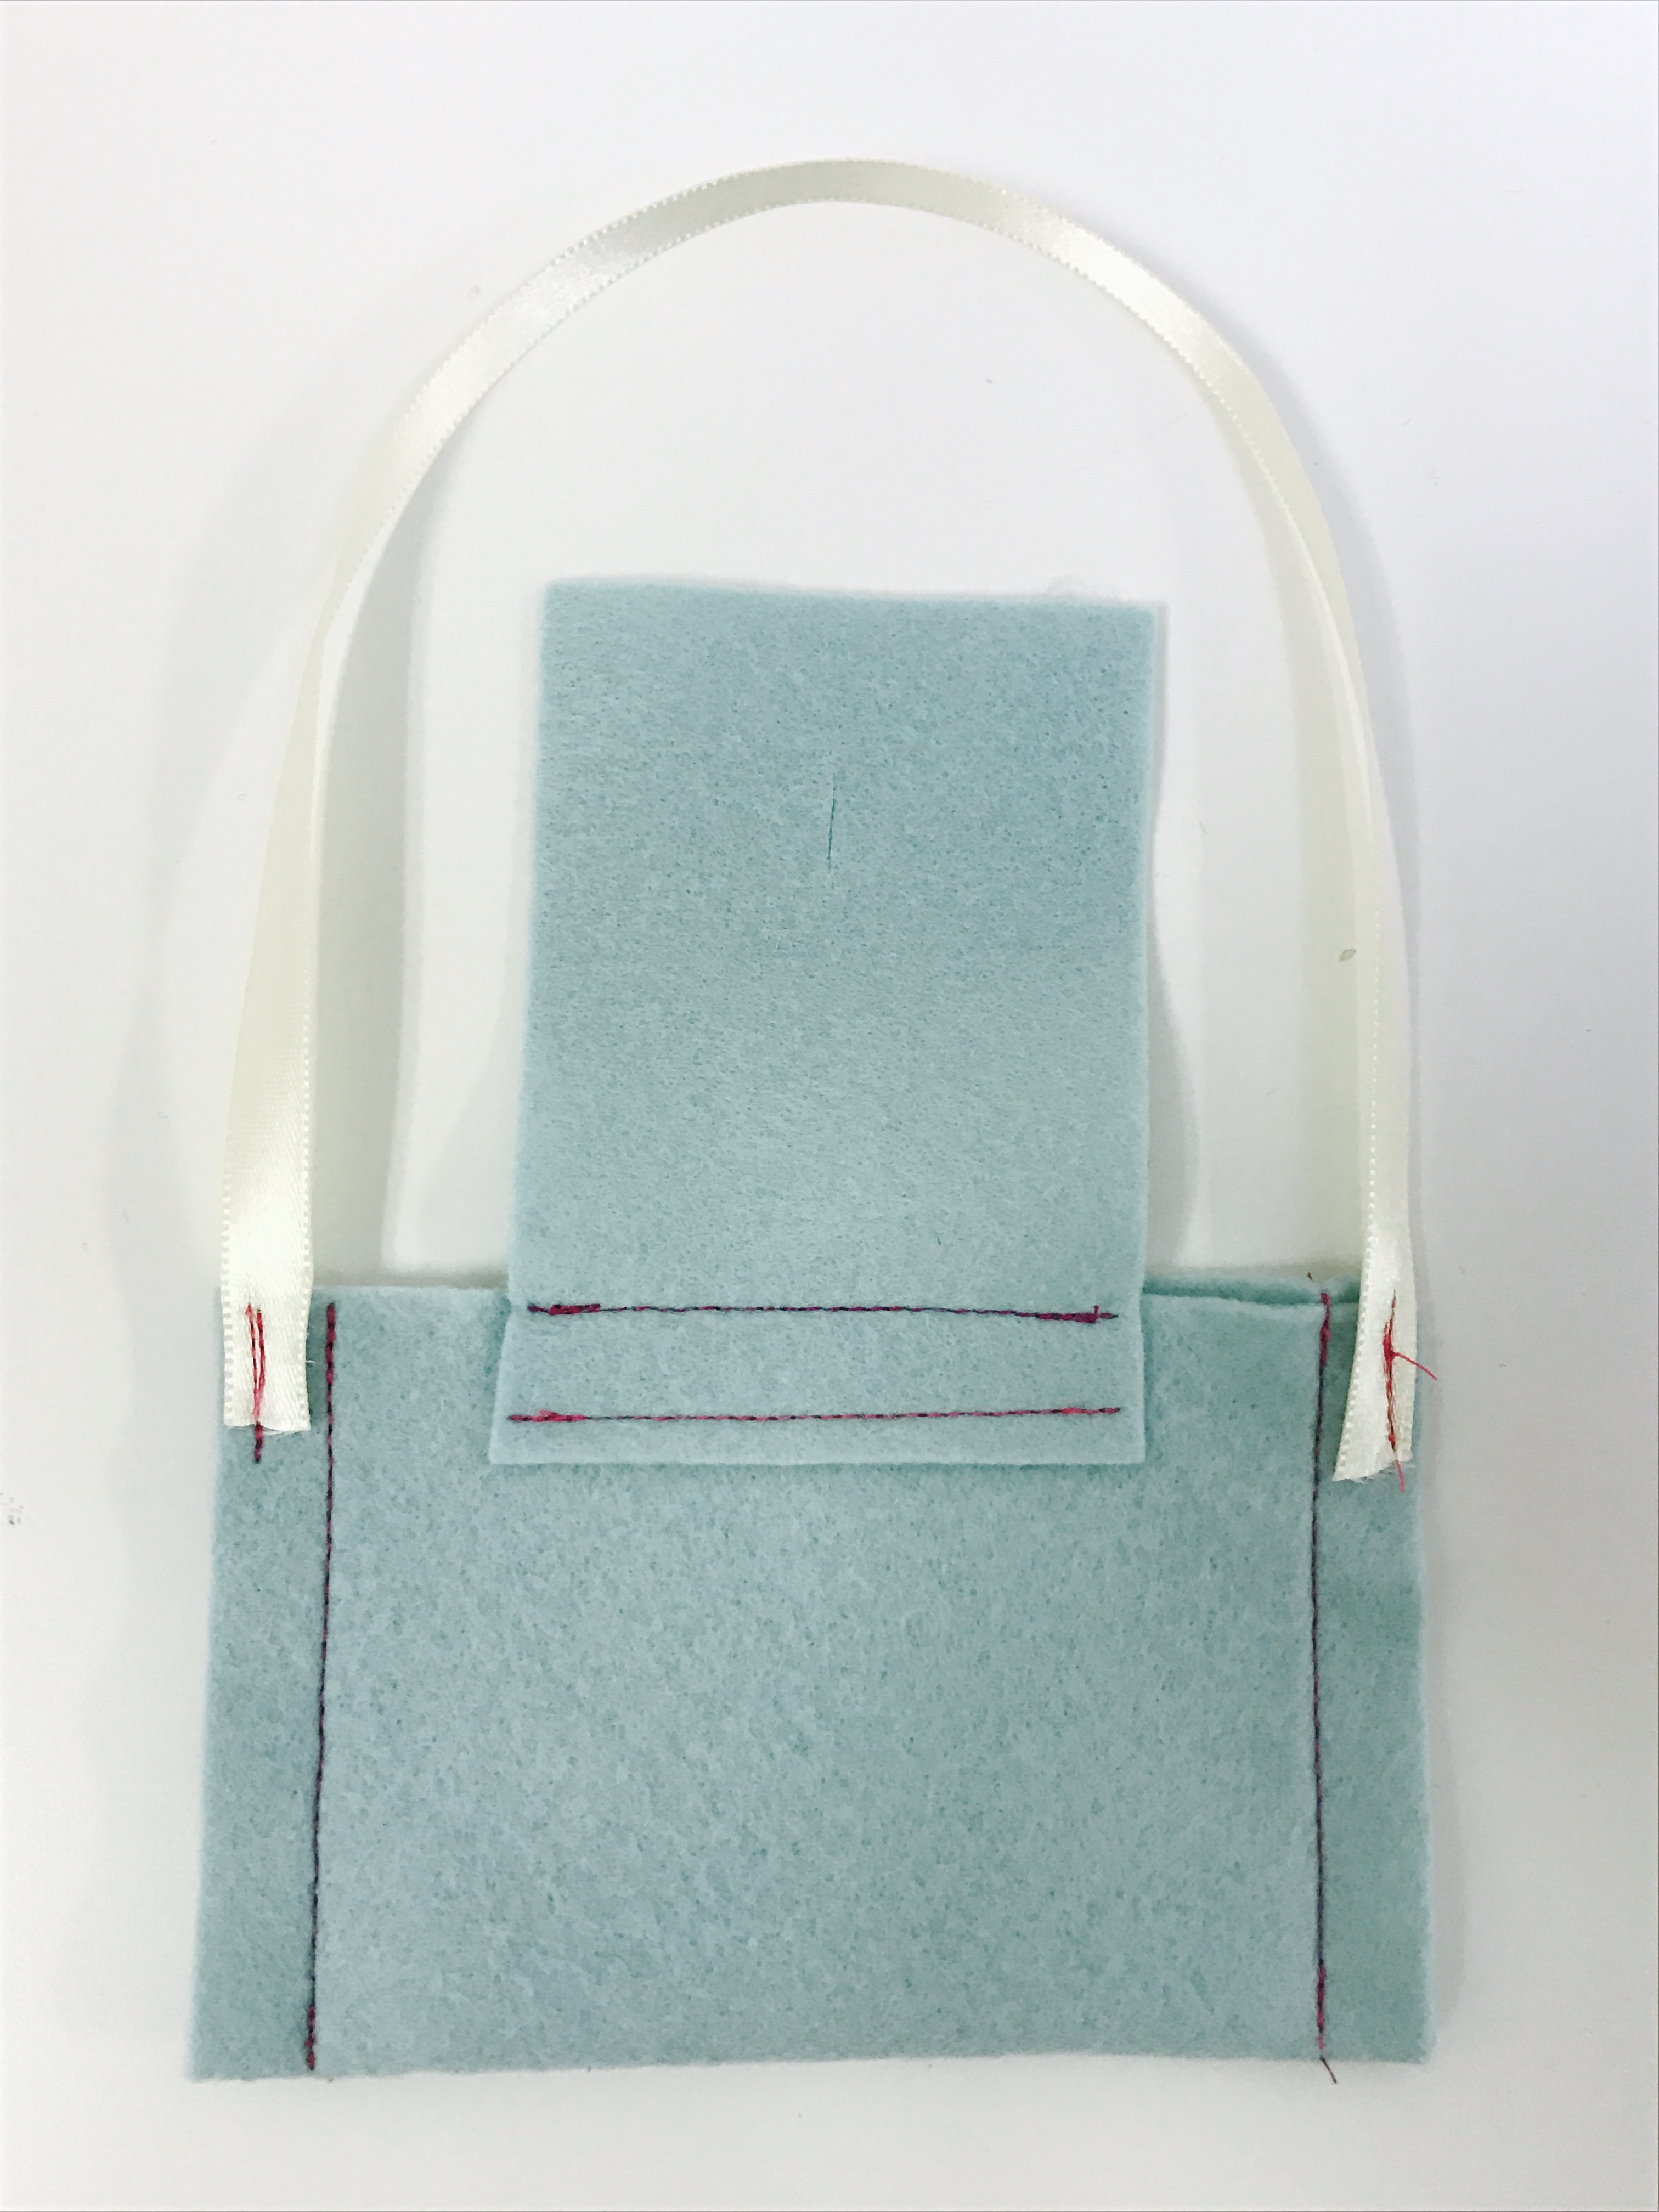
Step 5: Ribbon Strap

You’re almost finished!  But, if you need to take a break, go grab a cup of hot chocolate with whipped cream on top!

This step is pretty easy.  Taking your 12″ ribbon, pin one end to the left side seam area and the other end to the right side seam area.  Like this:

Using a straight or zigzag stitch, simply tack the ends of the ribbon, like this:

Step 6: Flip pretty side out

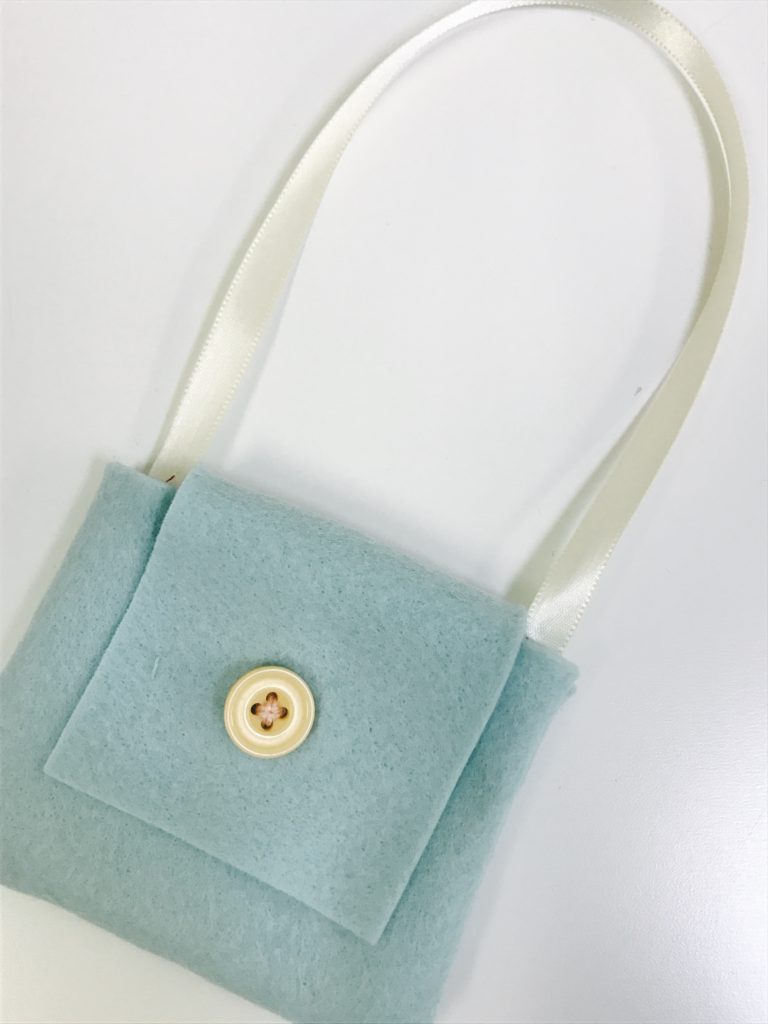
Flip your bag “pretty side out” and hand-sew the button onto the front of the purse.

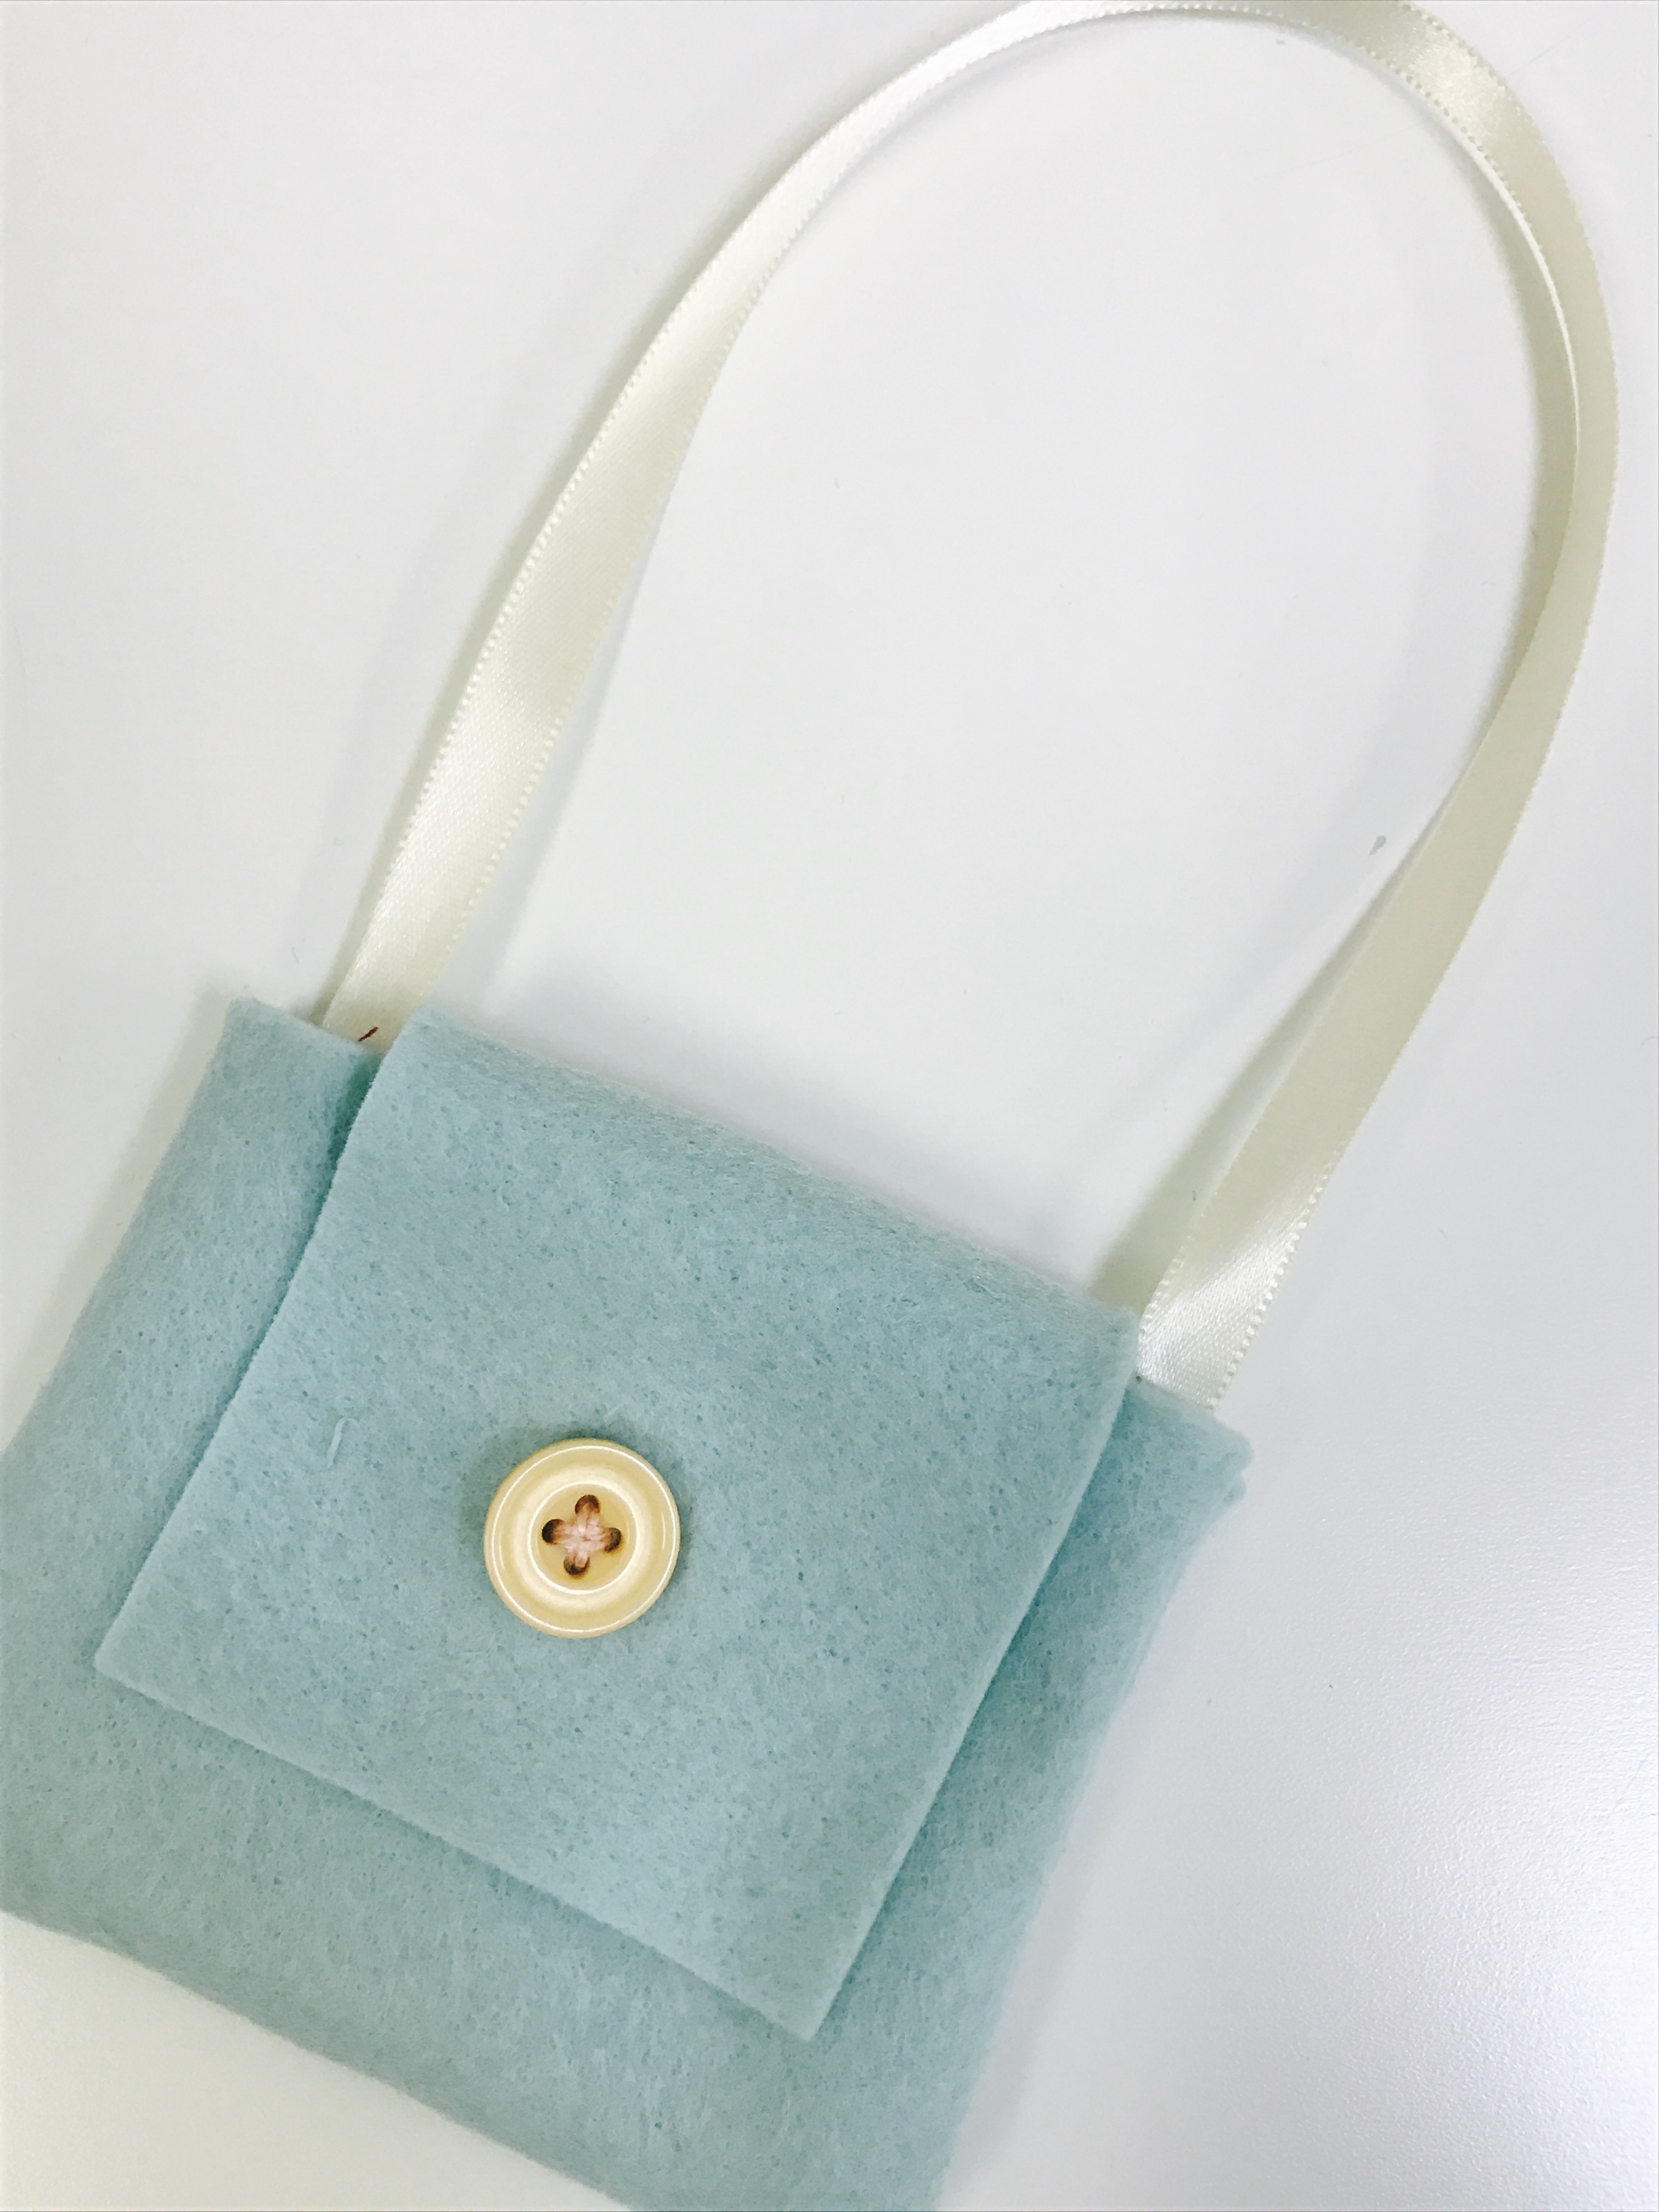
And that’s it, congratulations on making your simple side satchel!

Hugs!

Jen

About Jen

About Jen

I started Thimble Bee’s in 2009 to share my love and joy for sewing with the next generation. I’m so blessed to have met so many families in the Charlotte area and I’m glad you’re here. I hope you find Thimble Bee’s a comfortable place to learn, be encouraged, and grow in your skill every day.

Post navigation

Simple Skirt Tutorial – 18″ Doll Clothes
Reversible Mini Infinity Scarf (Fits 18″ Dolls)
Hey, there!

Hey, there!

Jen Taylor, Owner

I started Thimble Bee’s in 2009 to share my love and joy for sewing with the next generation. I’m so blessed to have met so many families in the Charlotte area and I’m glad you’re here. I hope you find Thimble Bee’s a comfortable place to learn, be encouraged, and grow in your skill every day.

Now at the Studio

Join us for one of our fun and creative workshops, classes, or camps!

Register Today Learn More
Now at the Studio

SUBSCRIBE NOW

Stay up to date on our classes and workshops by subscribing to our newsletter!

Select list(s) to subscribe to


By submitting this form, you are consenting to receive marketing emails from: Thimble Bee's Sewing School. You can revoke your consent to receive emails at any time by using the SafeUnsubscribe® link, found at the bottom of every email. Emails are serviced by Constant Contact

Spreading JOY one stitch at a time!

Pages

  • Adult Classes
    • Garment Fundamentals
  • Adult Sewing Workshops
  • Beginner Garment Class
  • Blog
  • Classes
  • Fashion FUNDAMENTALS
  • Fashion Teens
  • Gift Cards
  • Girl Scouts
  • Hi, I’m Jen!
  • Home
  • Homeschool Sewing Classes
  • Kids Sewing Workshops
  • Learn To Sew I Adults
  • Learn To Sew I Kids
  • Learn To Sew II Adults
  • Learn to Sew III Adults
  • Learn to Sew Kids: Beyond the Basics
  • Learn To Sew Series
  • Policies + Procedures
  • Sewing Summer Camp
  • Sewing Workshops
  • Teacher Workday & School Break Camp
  • The Thimble Bee’s Sewciety
  • Thimble Bee’s Learn to Quilt Series: Create Your First Quilt!
  • Virtual Classes
  • About
  • Email Us
  • Blog
  • Gift Cards
Thimble Bee's Sewing School © 2025 | All Rights Reserved | 3512 Providence Rd S, Waxhaw, NC 28173