Skip to content
site-logo

Thimble Bee's Sewing School

  • Home
  • Sewing Summer Camp
  • Learn To Sew
    • Learn To Sew I Kids
    • Learn to Sew Kids: Beyond the Basics
    • Learn To Sew I Adults
    • Learn To Sew II Adults
    • Virtual Classes
  • Kids Classes
    • Learn To Sew I
    • Learn to Sew Kids: Beyond the Basics
    • Fashion Kids (ages 9-12)
    • Fashion Tweens & Teens (ages 9-15)
    • Homeschool Sewing Classes
  • Adult Classes
    • Learn To Sew I Adults
    • Learn To Sew II Adults
    • Garment Fundamentals
  • Workshops
    • Kids Workshops
    • Adult Workshops
    • Teacher Workday & School Break Camp
  • Virtual Classes
    • Virtual Classes
  • The Thimble Bee’s Sewciety
Tutorials

Simple Skirt Tutorial – 18″ Doll Clothes

July 9, 2016October 16, 2023 Comments Off on Simple Skirt Tutorial – 18″ Doll Clothes
Simple Skirt Tutorial – 18″ Doll Clothes

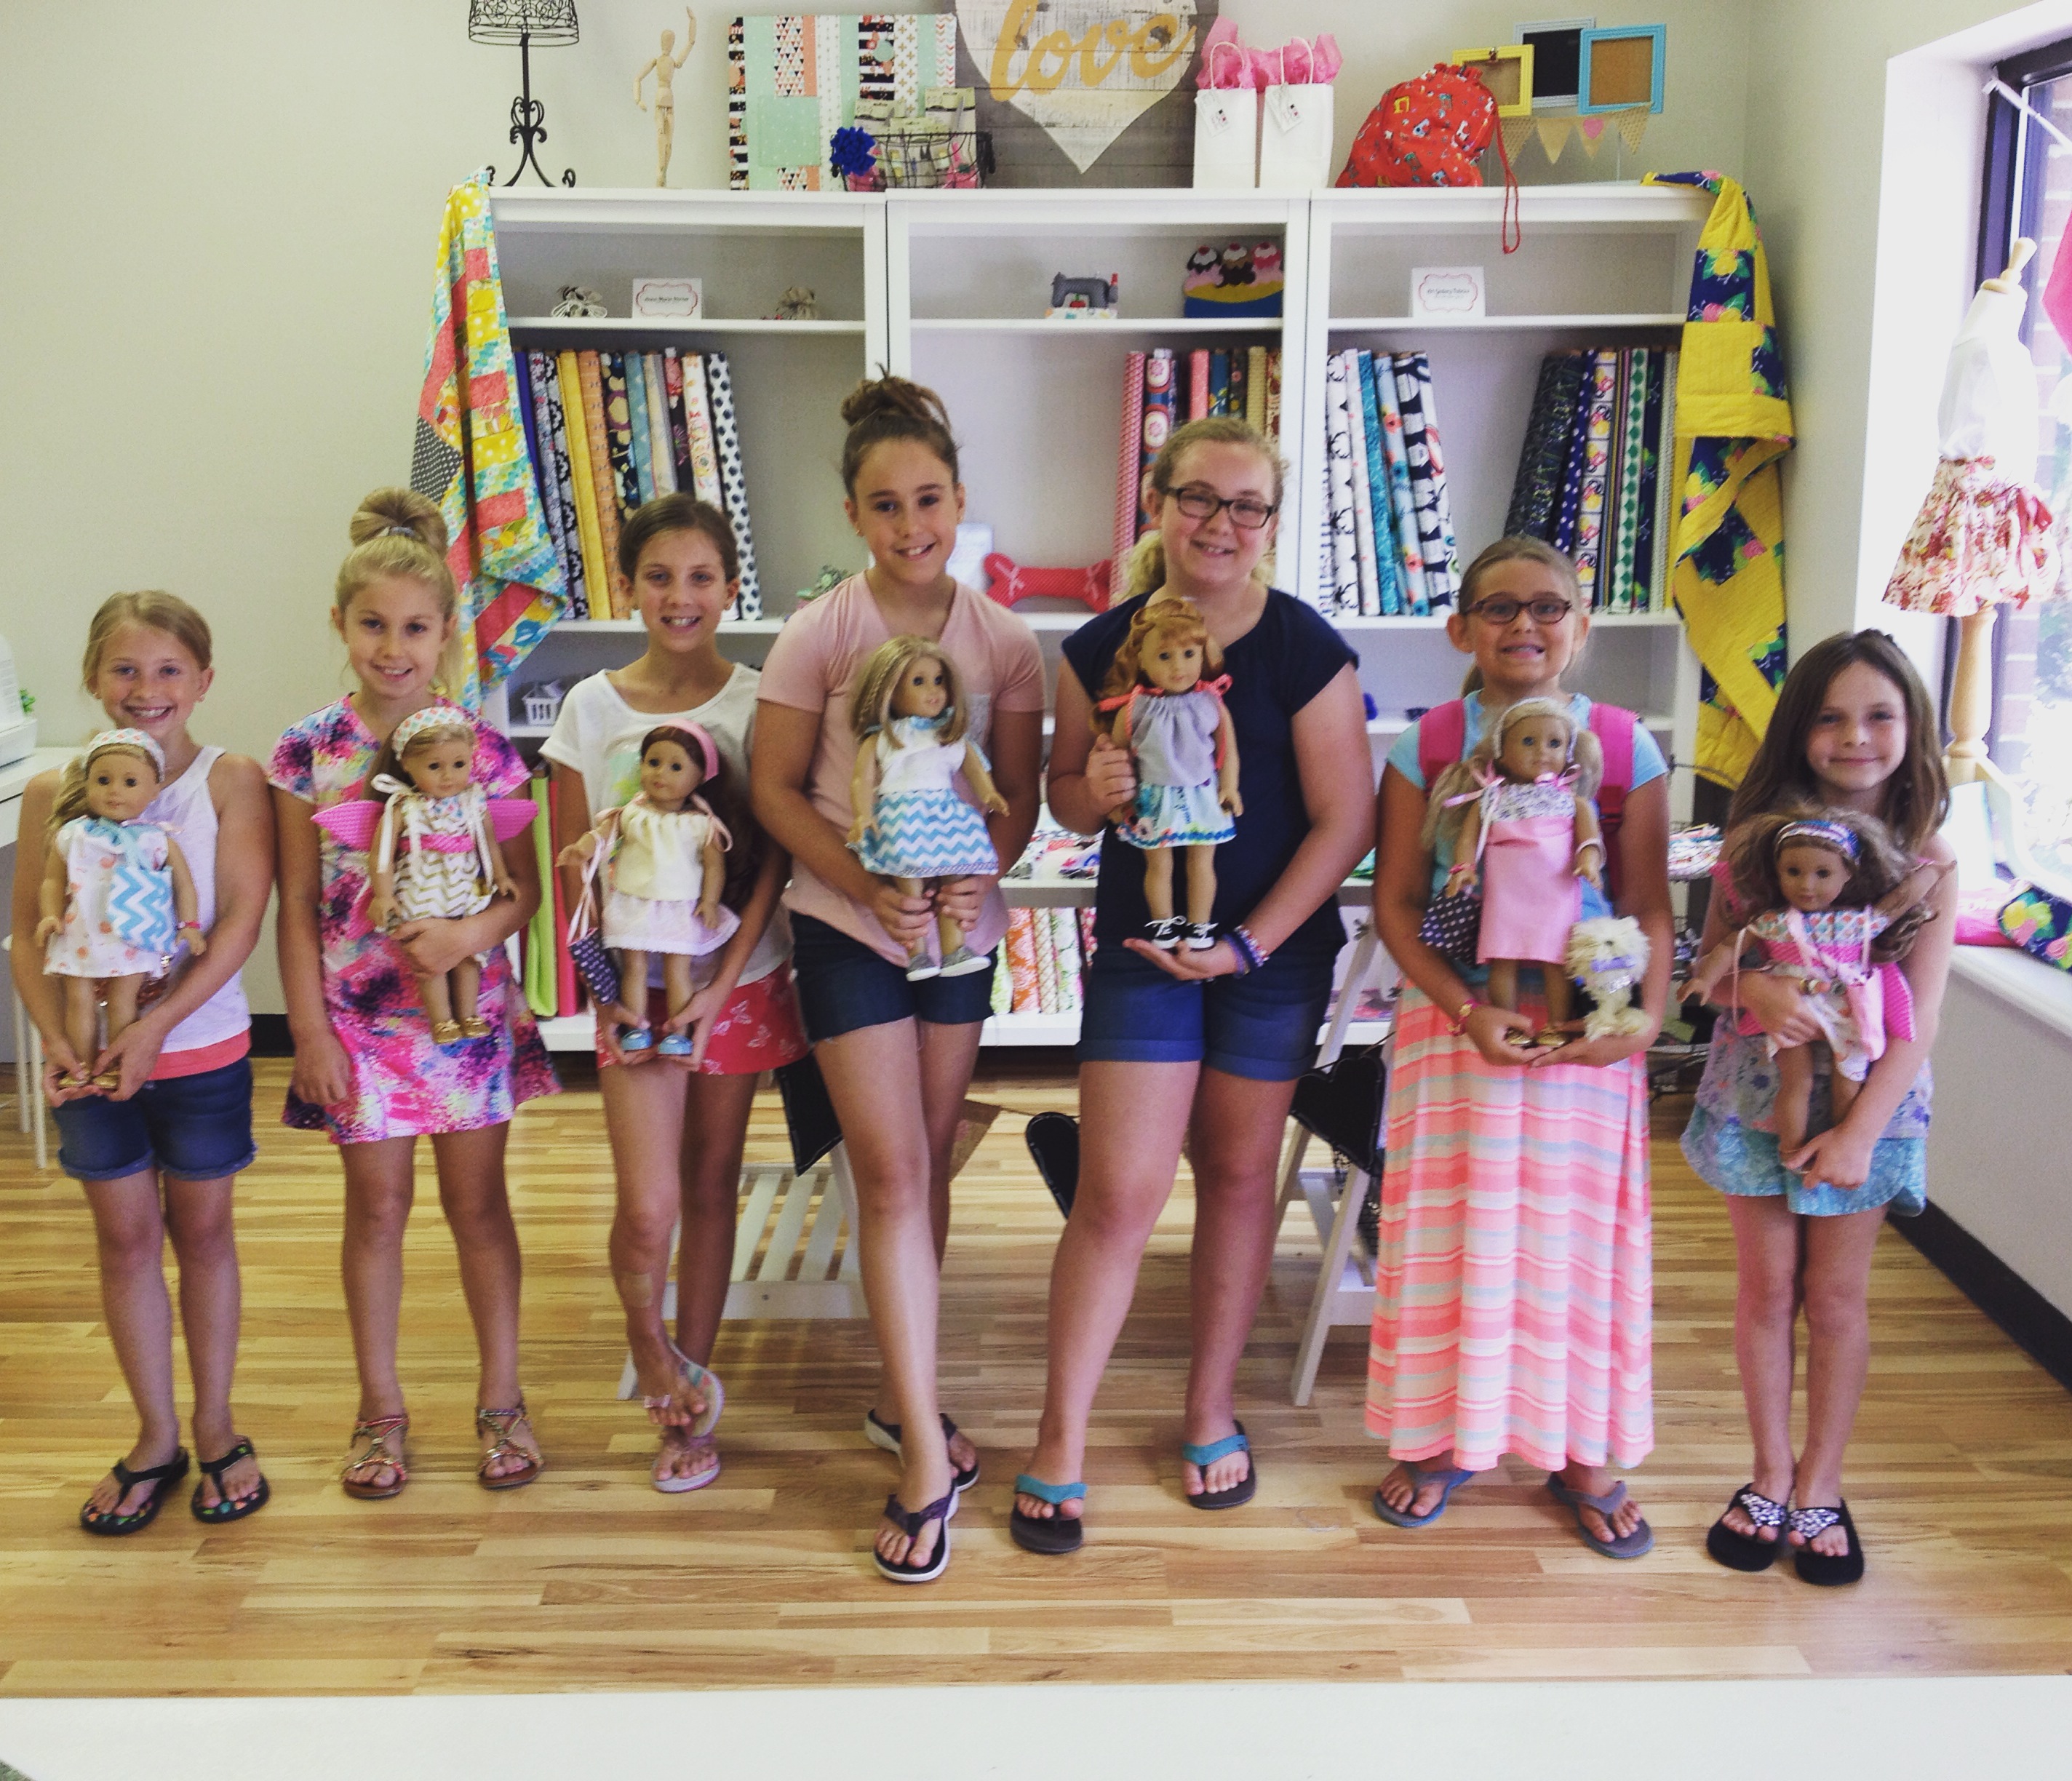
We just wrapped up a great week at the studio!  Our campers stayed busy sewing up a storm of doll clothes.  We made everything from shorts and capris to pillowcase dresses, fairy wings, and everything in between!  It was a delight working with these girls, they are young but full of sewing talent already!

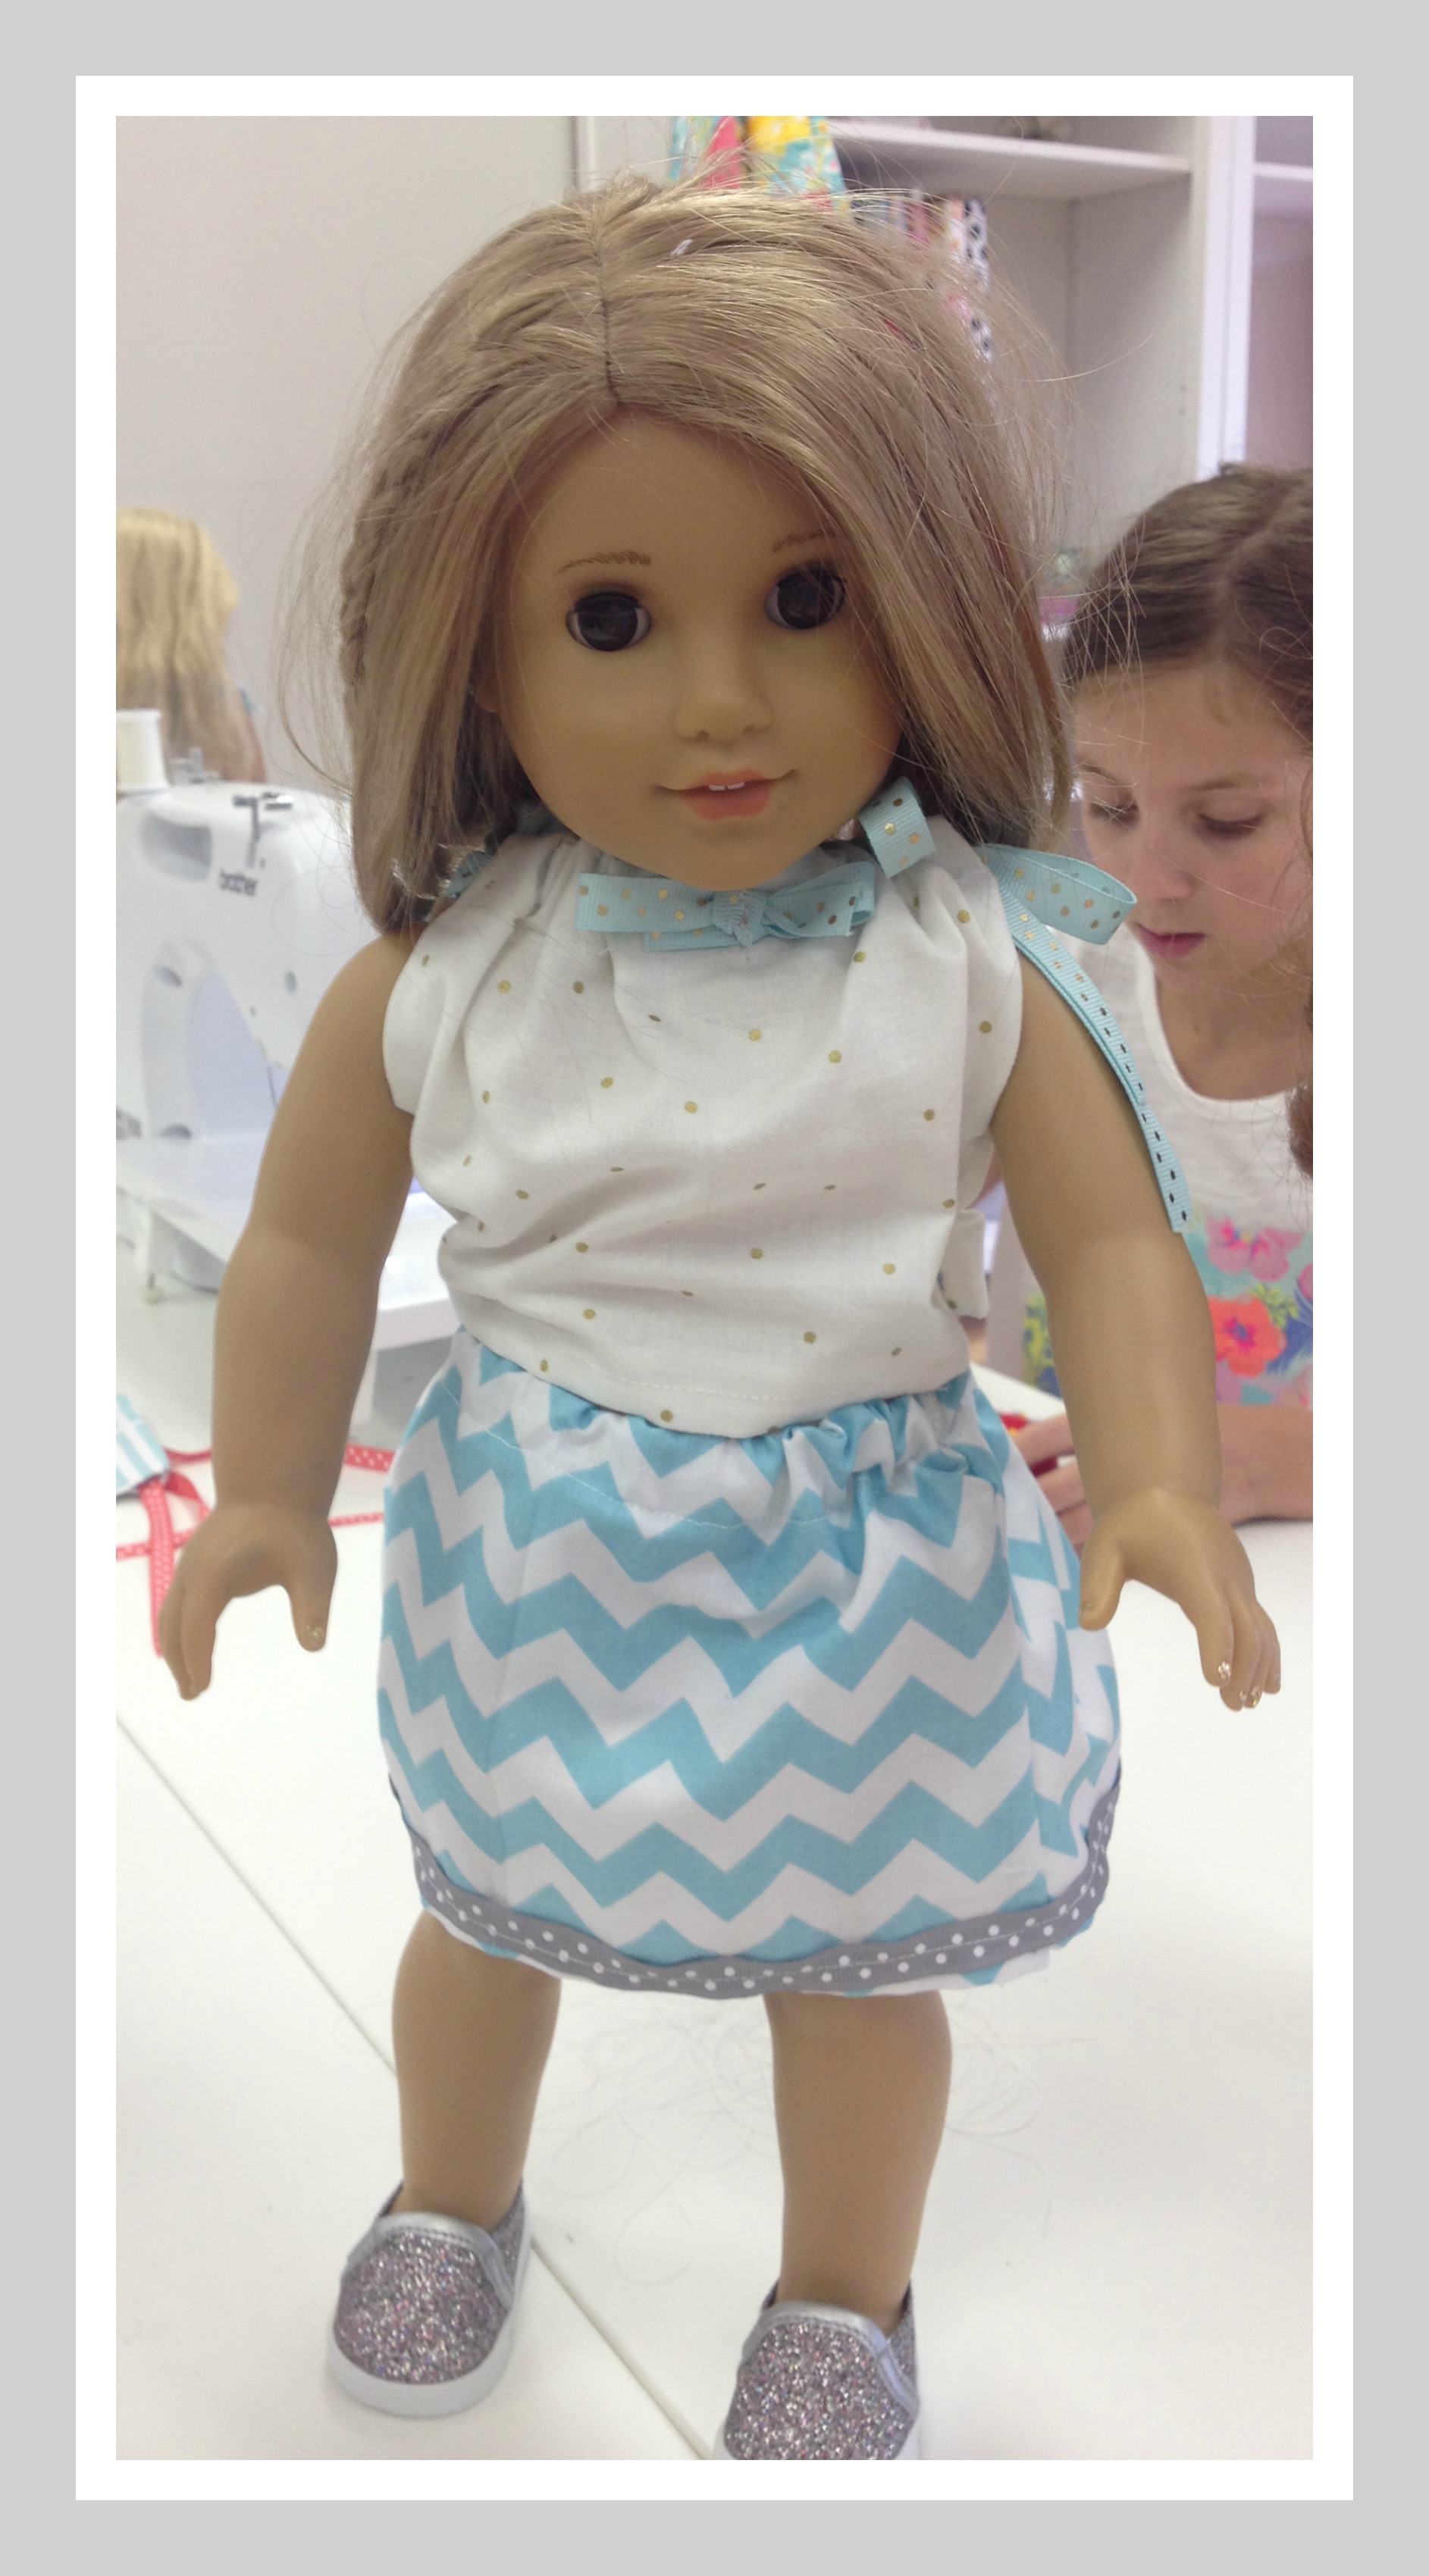
Here are a few pics from this week!

photo 5 (2)

photo 3 (3)

IMG_1871

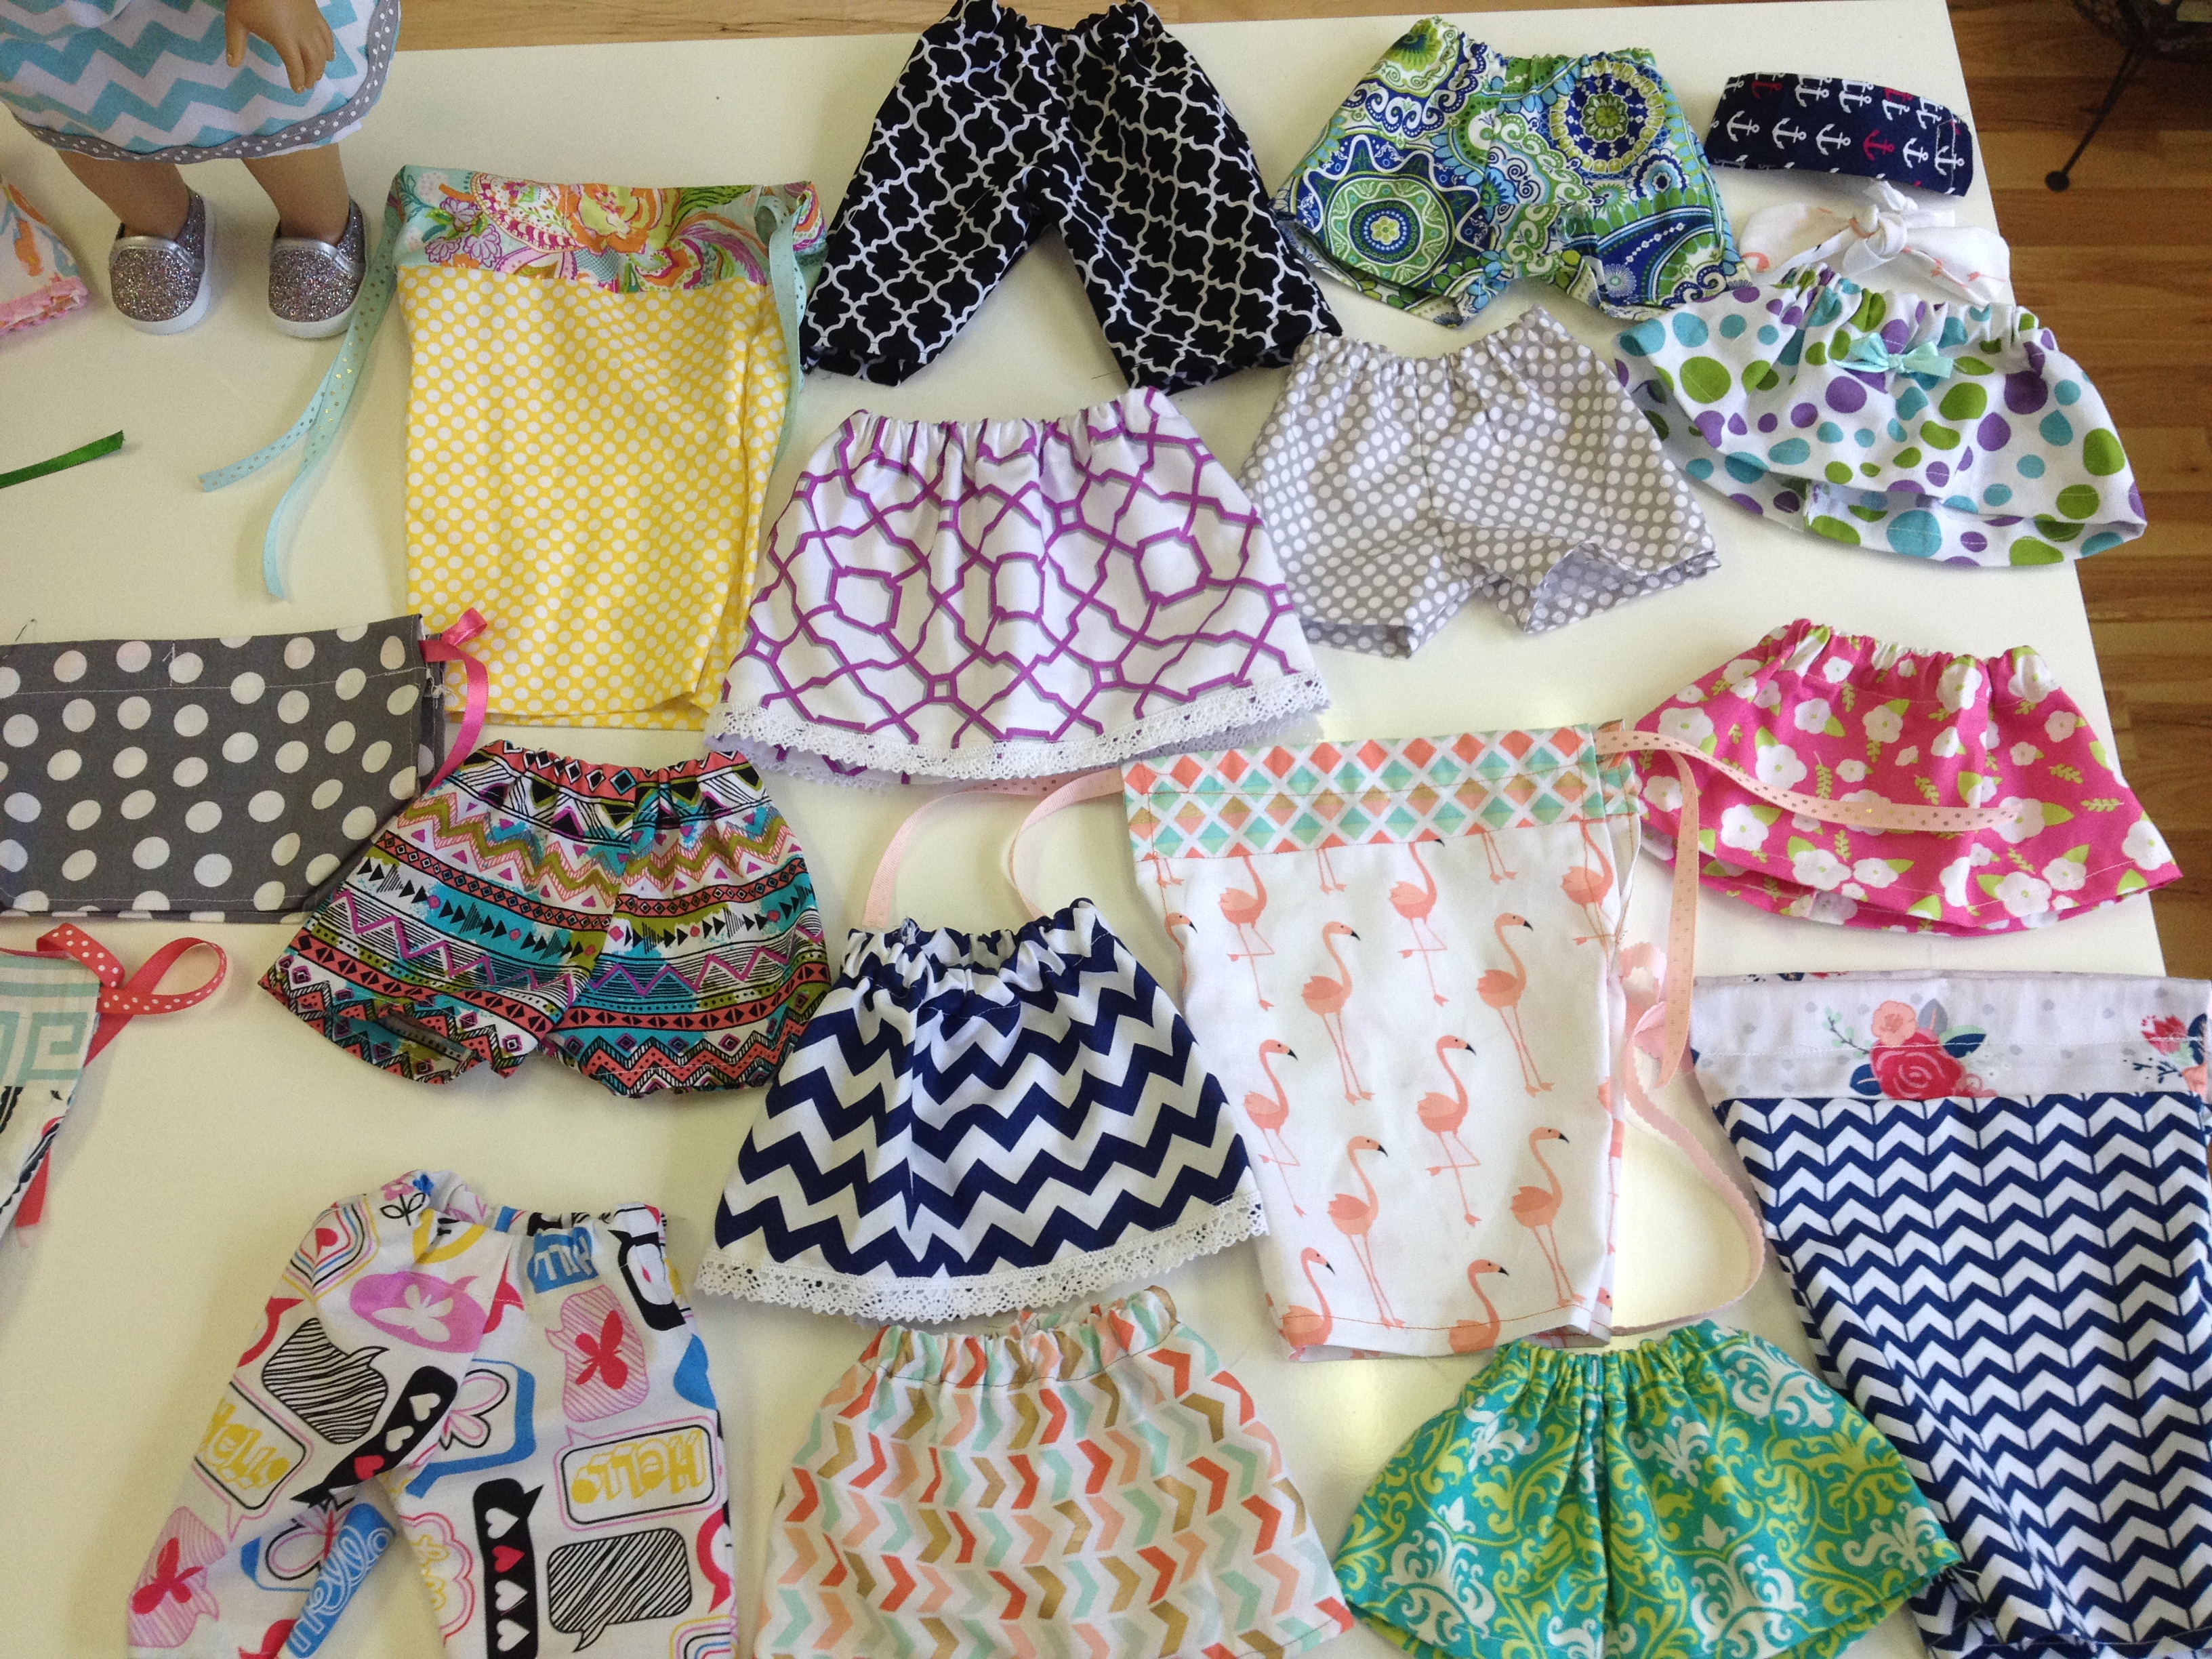
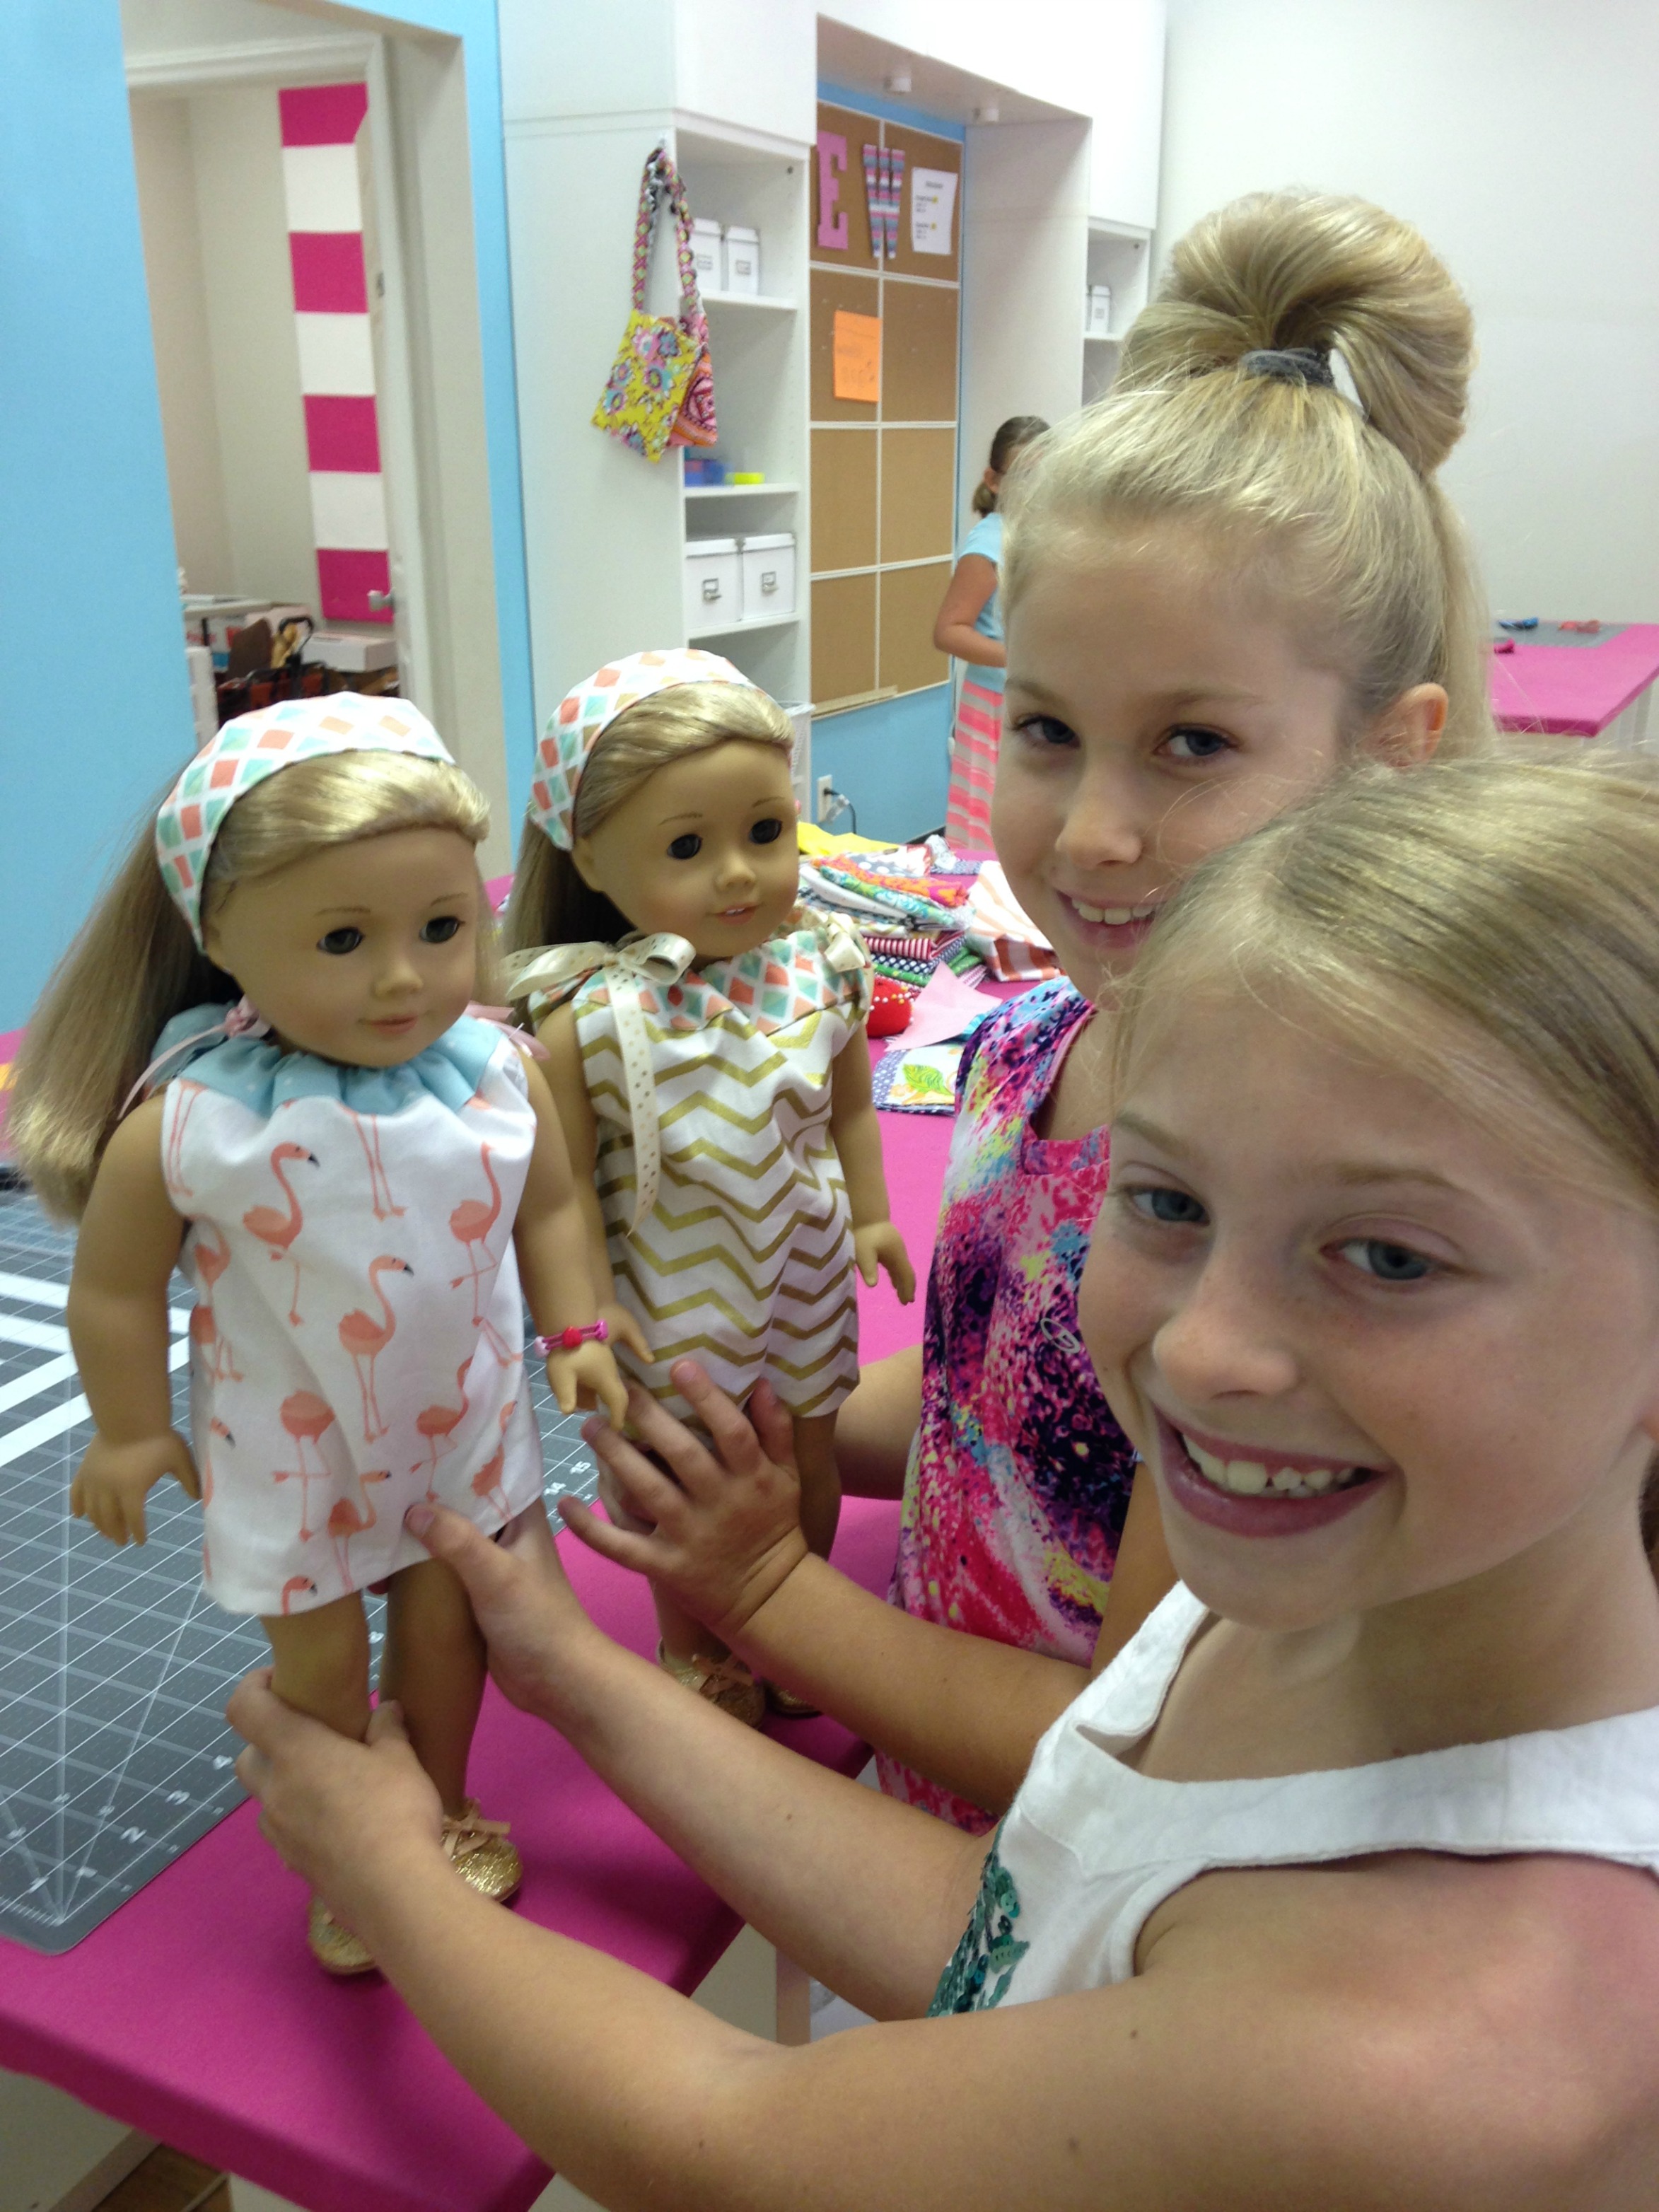
Yep, it was loads of fun!

photo (11)

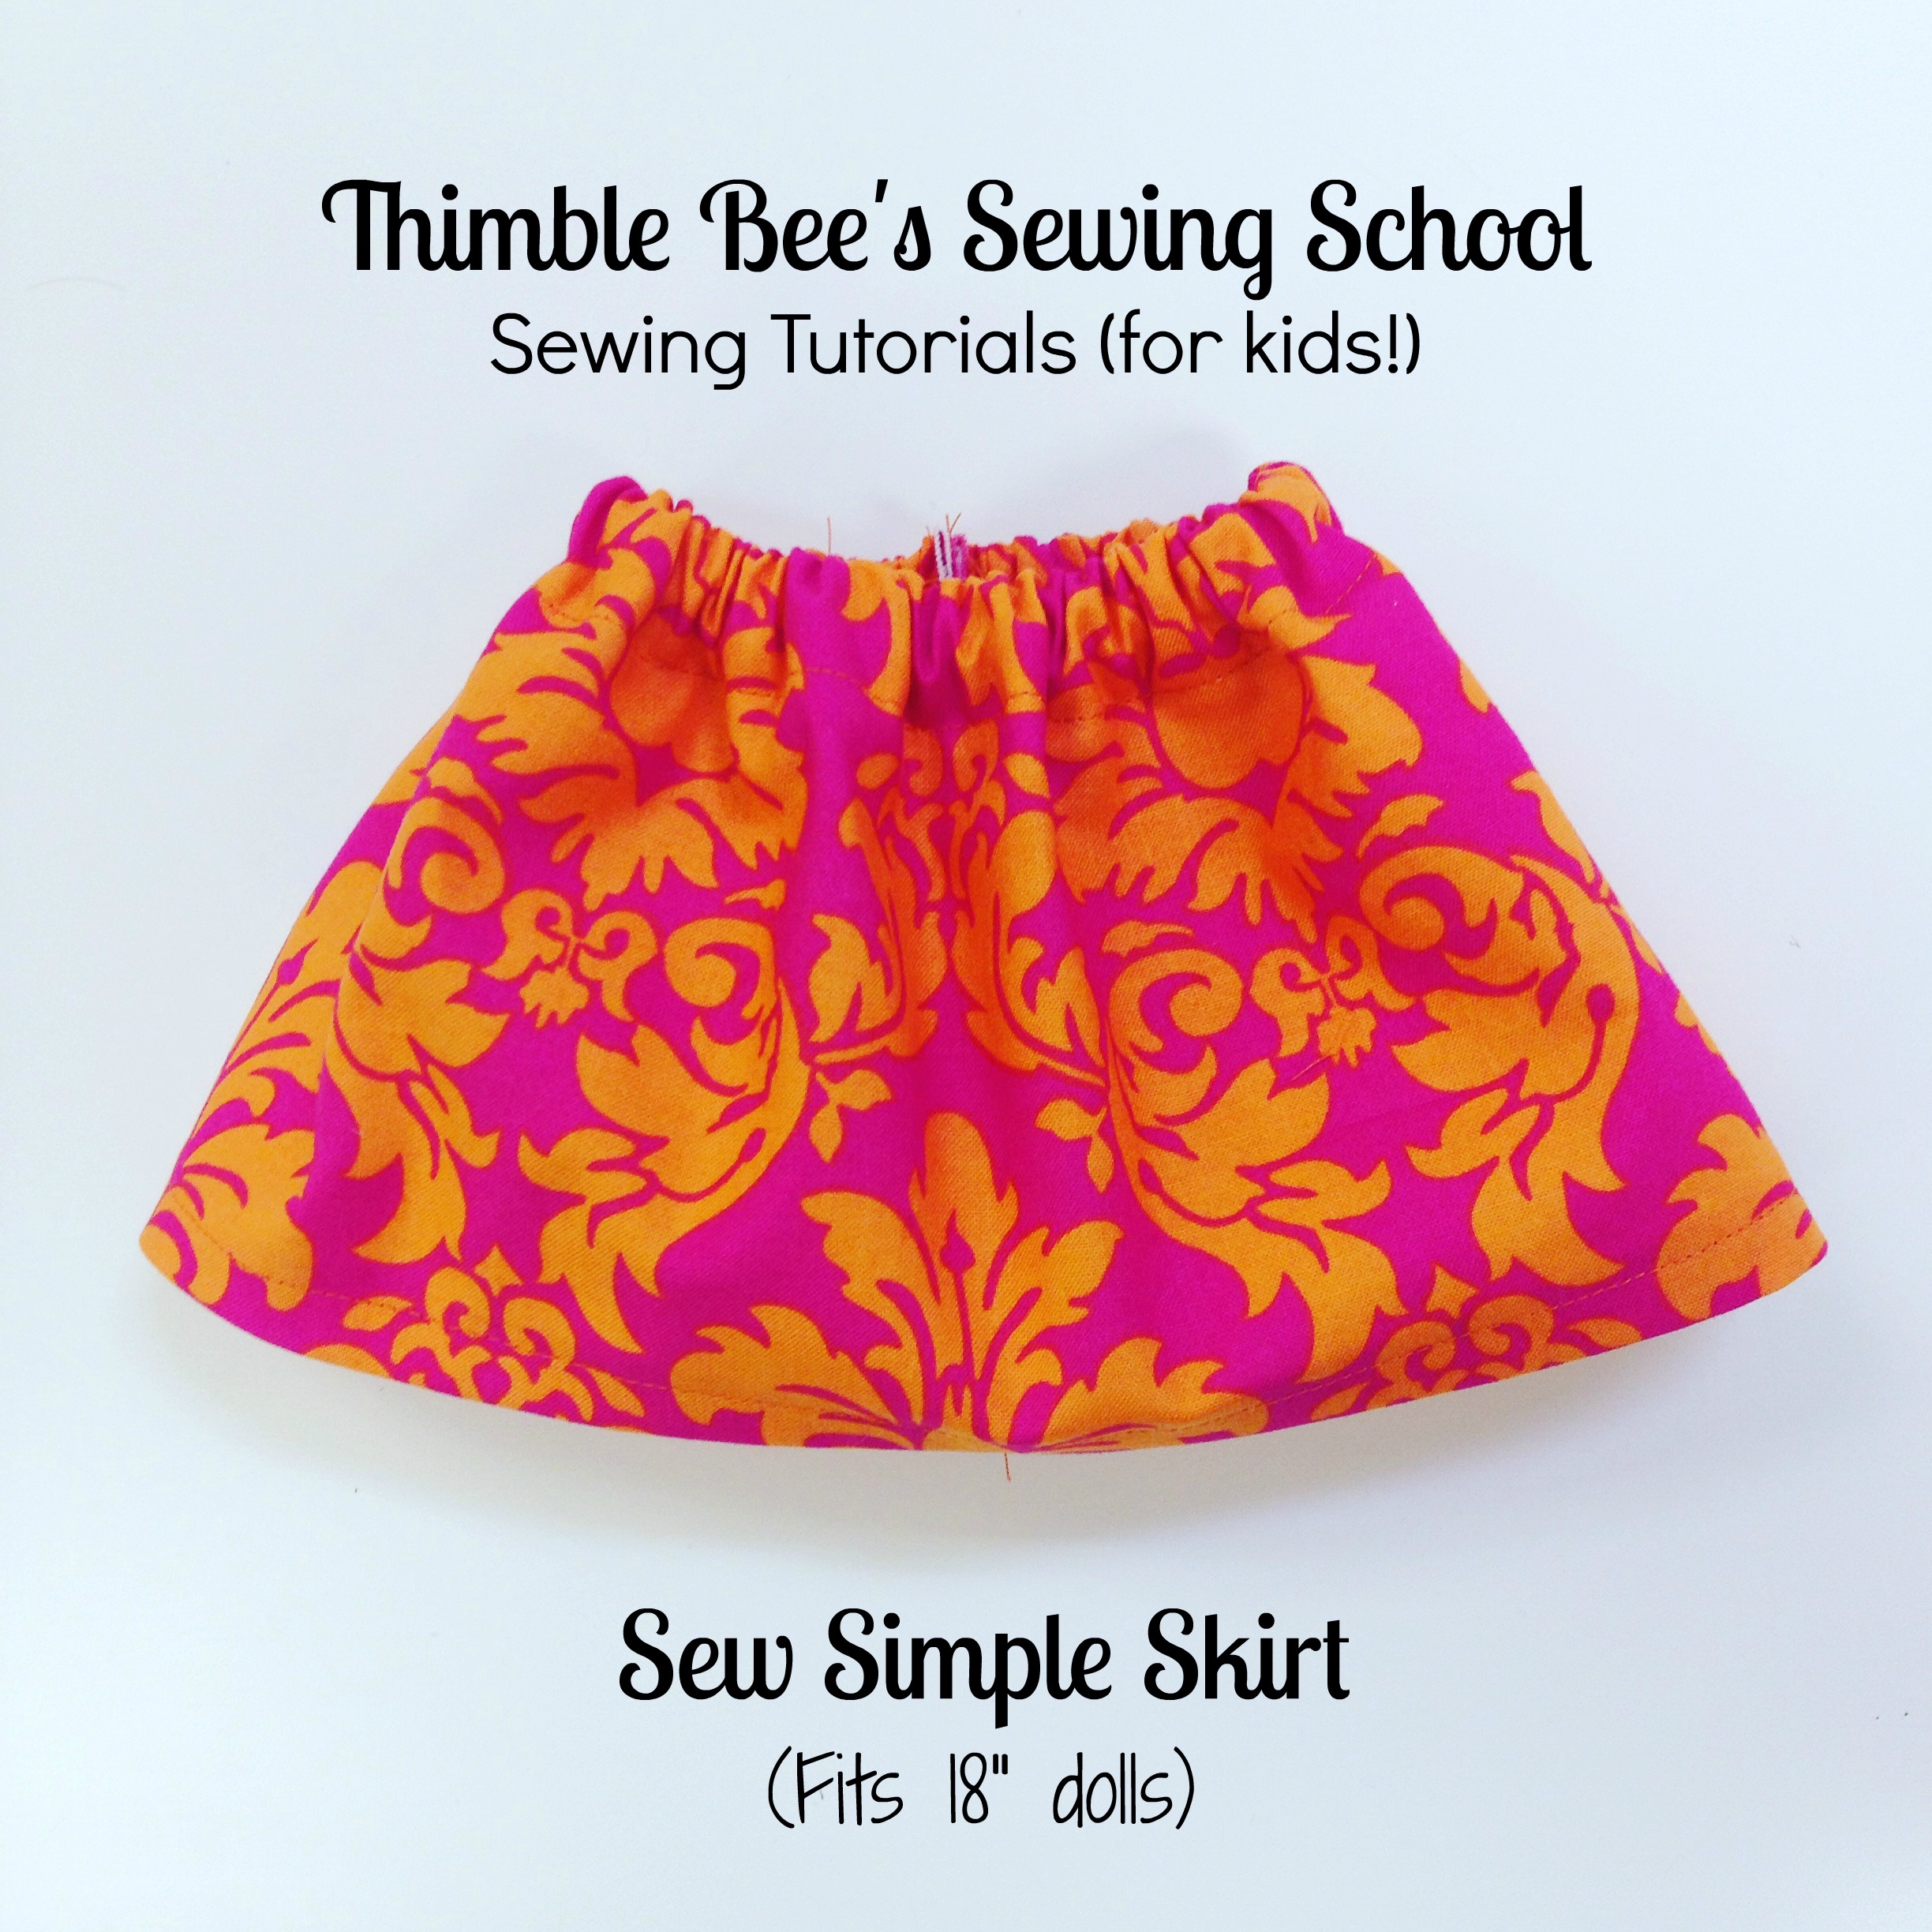
In fact, I had so much fun that somewhere in the mix, I promised the girls to share a simple skirt tutorial online!  There are so MANY ways to make doll clothing.  But, today I’m sharing a super simple version that still produces a nice finished look.  This skirt is oh-sew-simple!  After you make one, you won’t be able to stop! 🙂

photo (12)

To make this skirt you will need the following:

8″ x 22″ fabric remnant

10″ piece of 1/2″ wide elastic

all purpose thread

(2) safety pins

seam gauge

scissors

straight pins

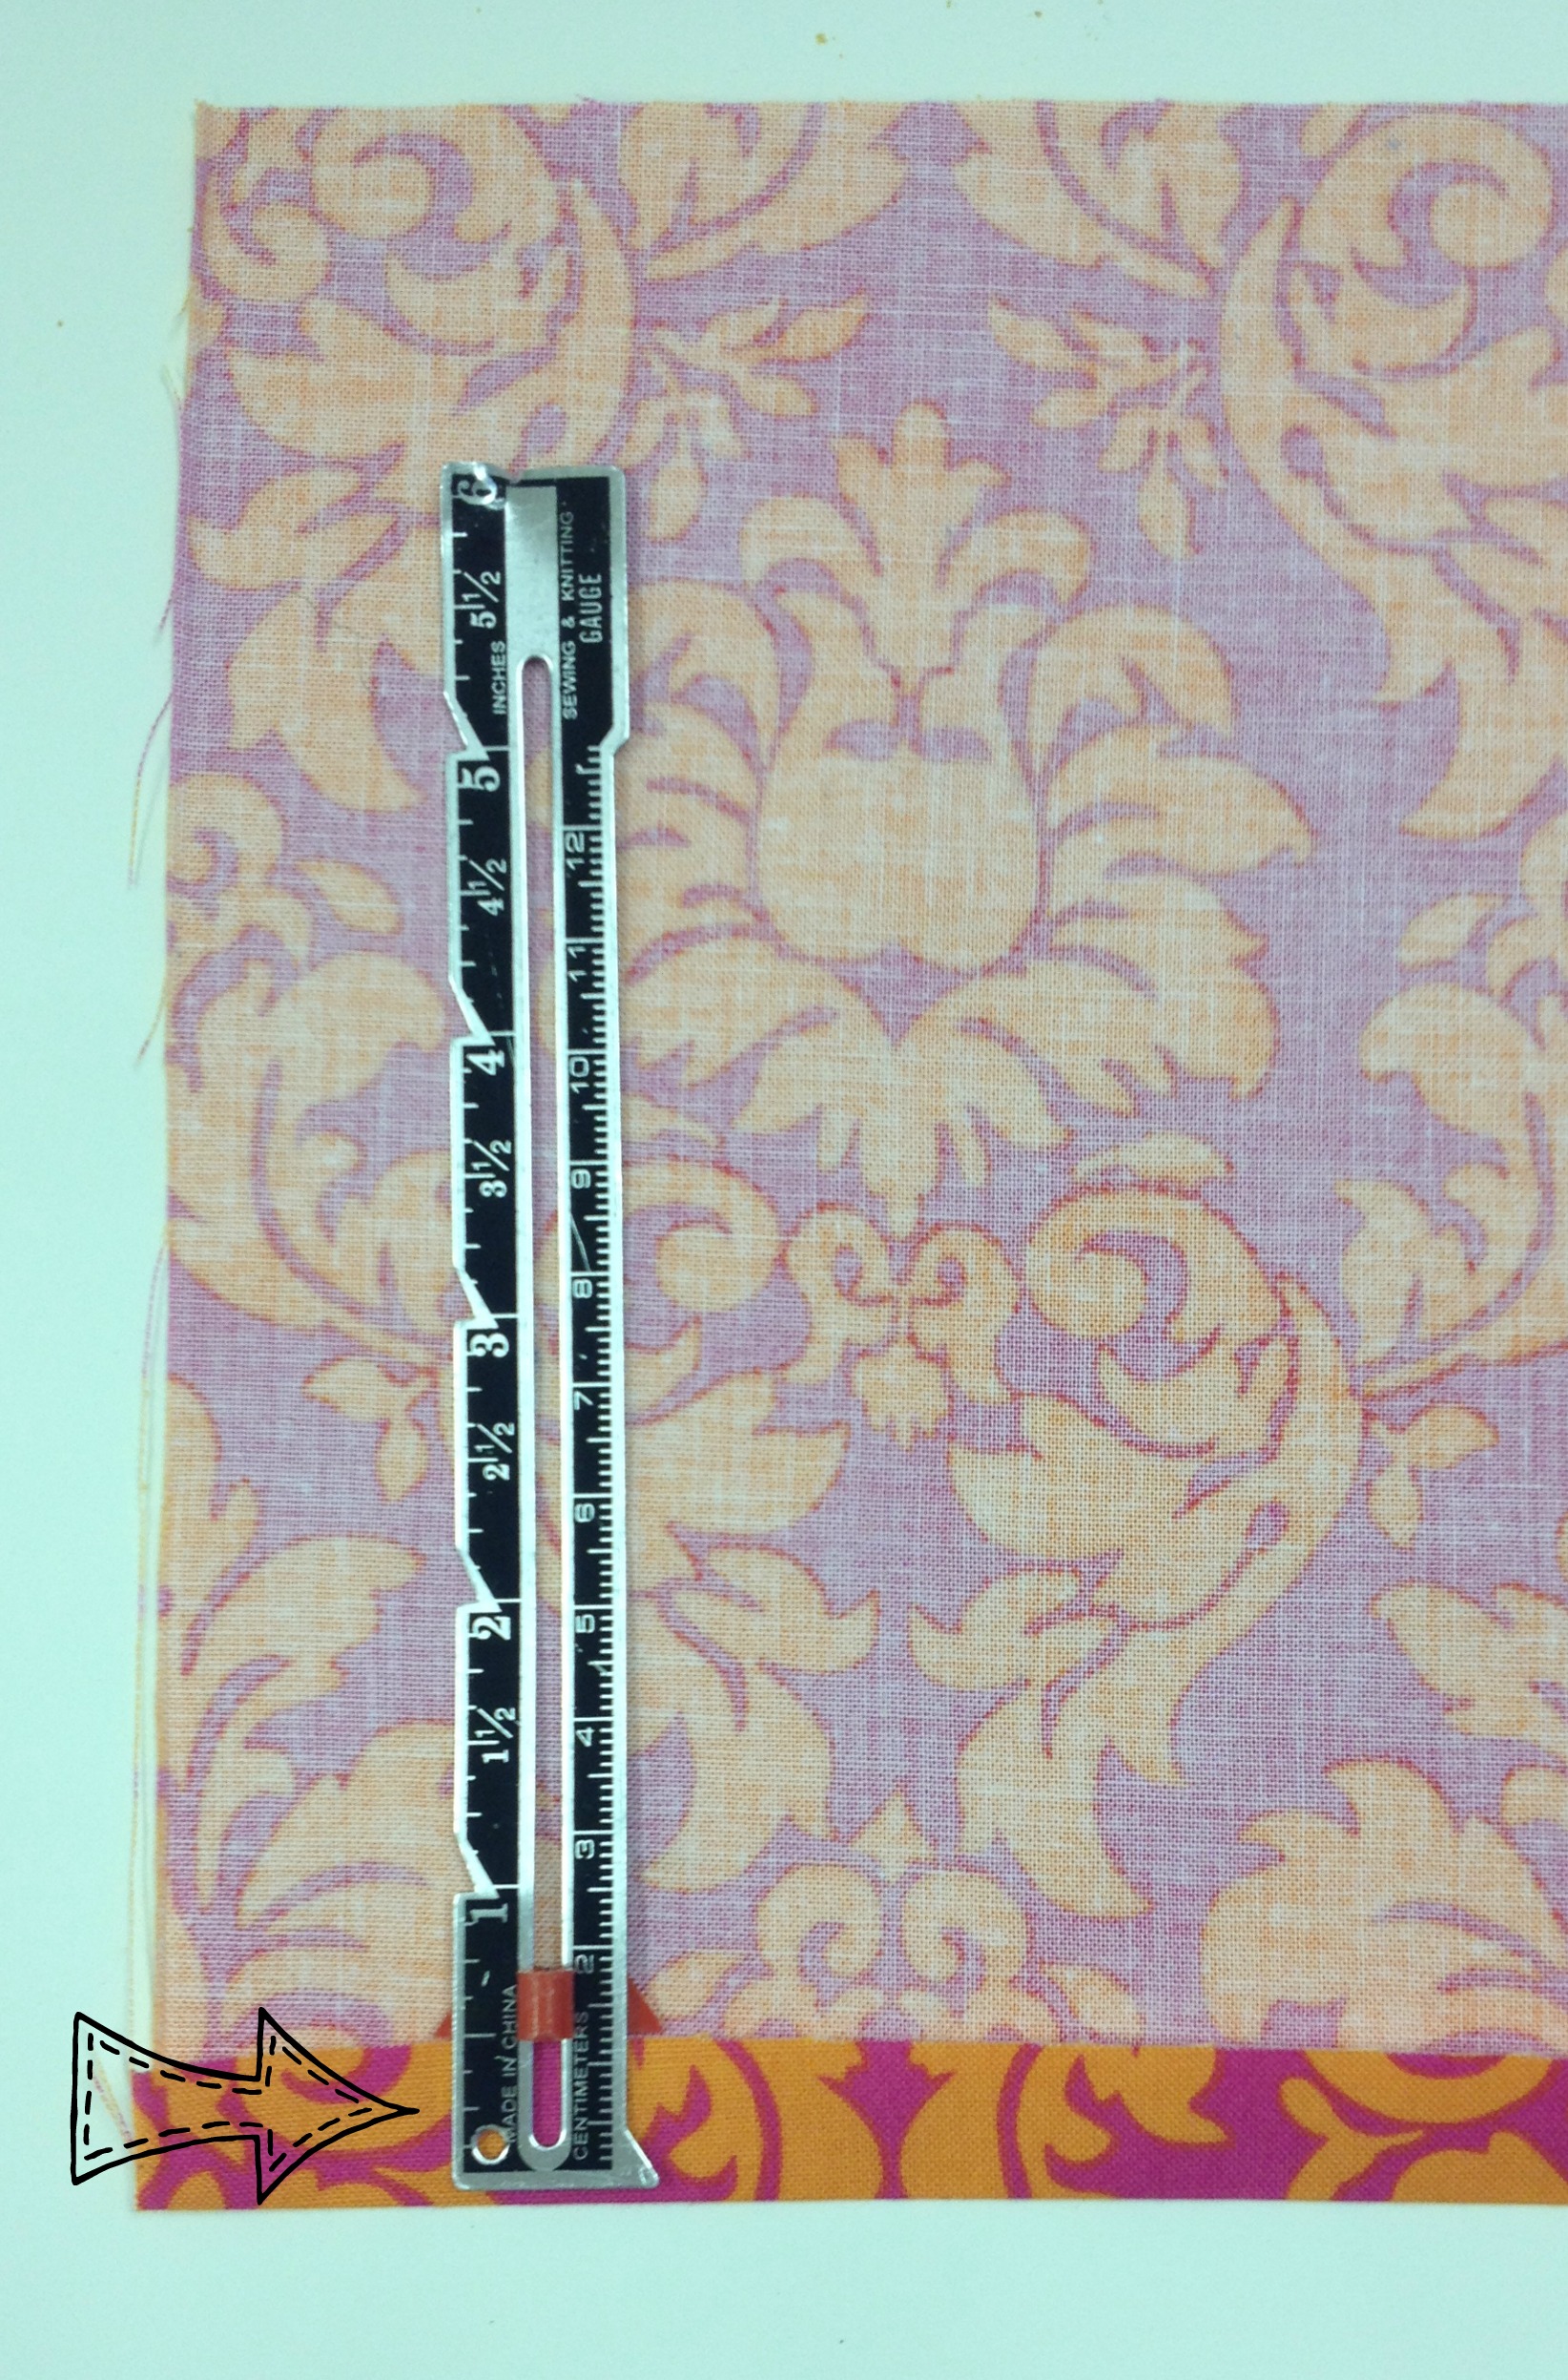
Step 1: Hem the bottom of the skirt.

Using your “seam gauge”, fold up 1/2″ along one LONG edge of the fabric.  Pin in place as you go.

photo 2 (7)

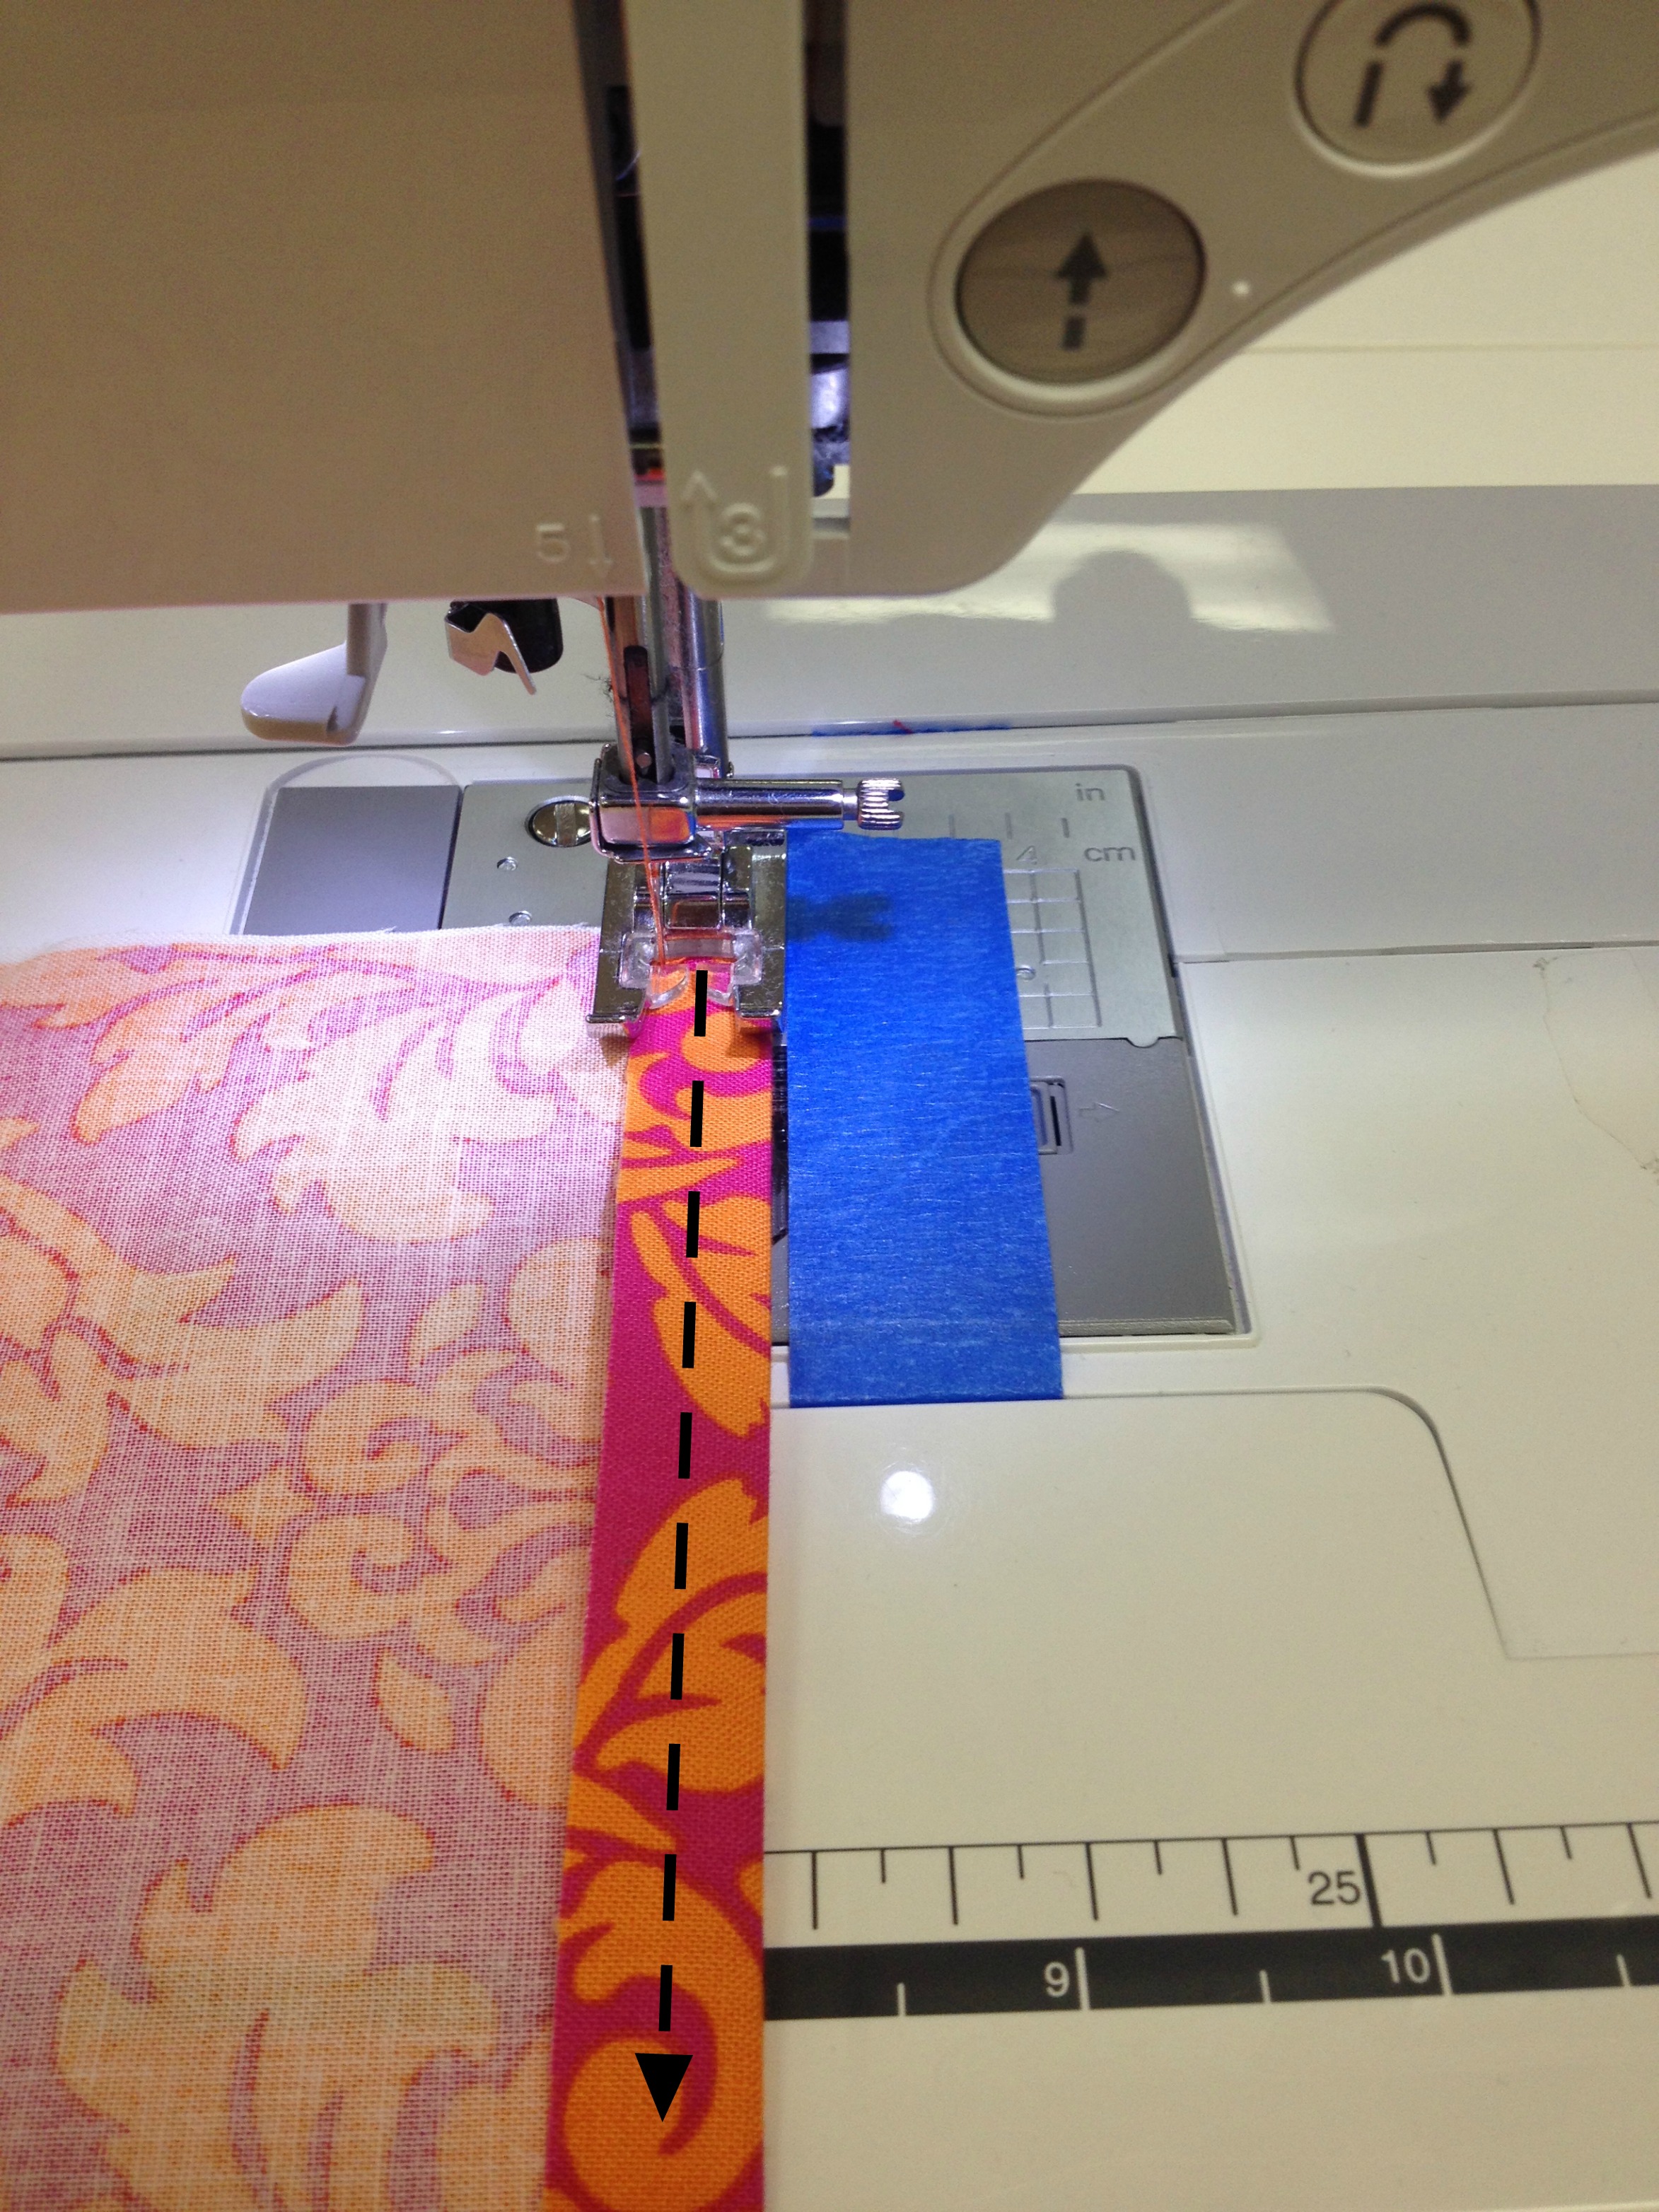
Now, sew this down to hold it in place, try to keep your stitches centered on the pretty part of the fabric.

photo 5 (3)

Clip your threads and iron (press).

Fold this long edge AGAIN 1/2″ and pin.  Use your previous stitches as your sewing guide.  Sew all the way down the long edge.  After sewing, you will have a finished hemline.

Step 2: Elastic Casing

Fold down 1/2″ along the TOP LONG edge of skirt fabric, pinning as you go.  (Use your seam gauge to double check your measurements.)

photo 1 (11)

Stitch this in place to secure, stitching down the center of the pretty part of the fabric edge.

photo 2 (8)

Clip your threads and press (iron) your stitches.  (Ask your parents for help when using the iron, they get super HOT!)

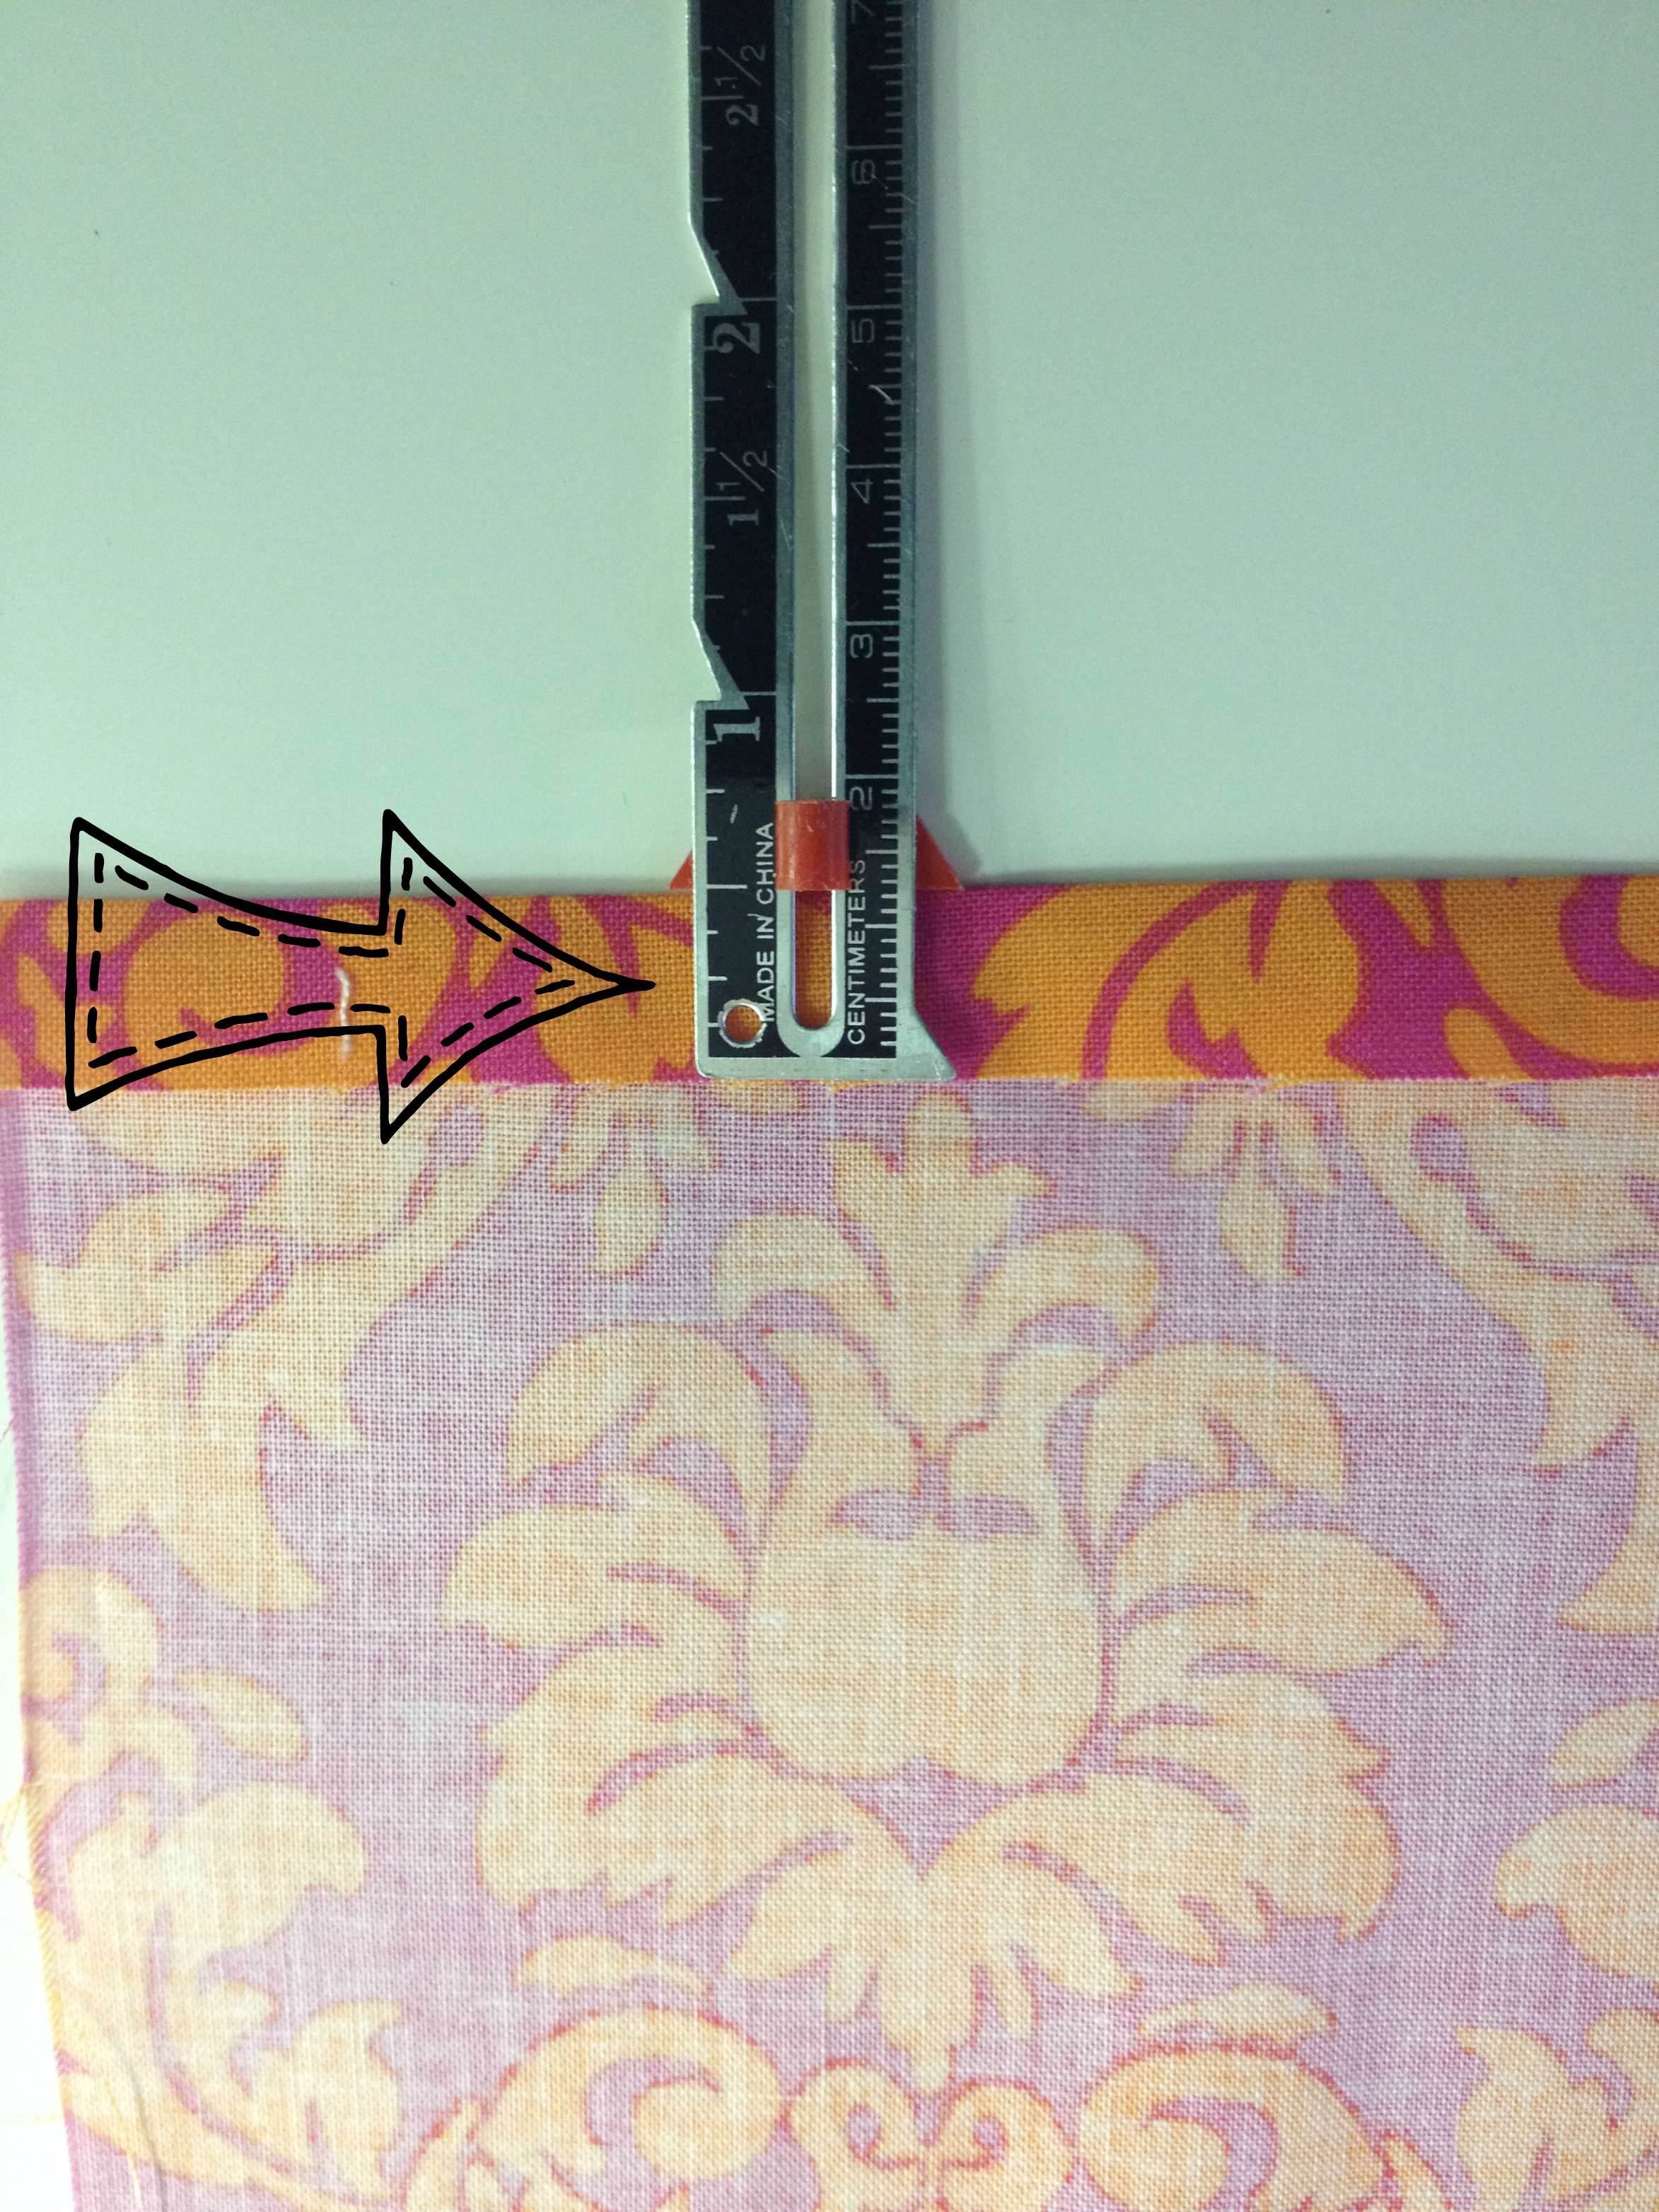
Fold the TOP LONG edge down again, this time turning down 1″, and pin in place.

photo 1 (12)

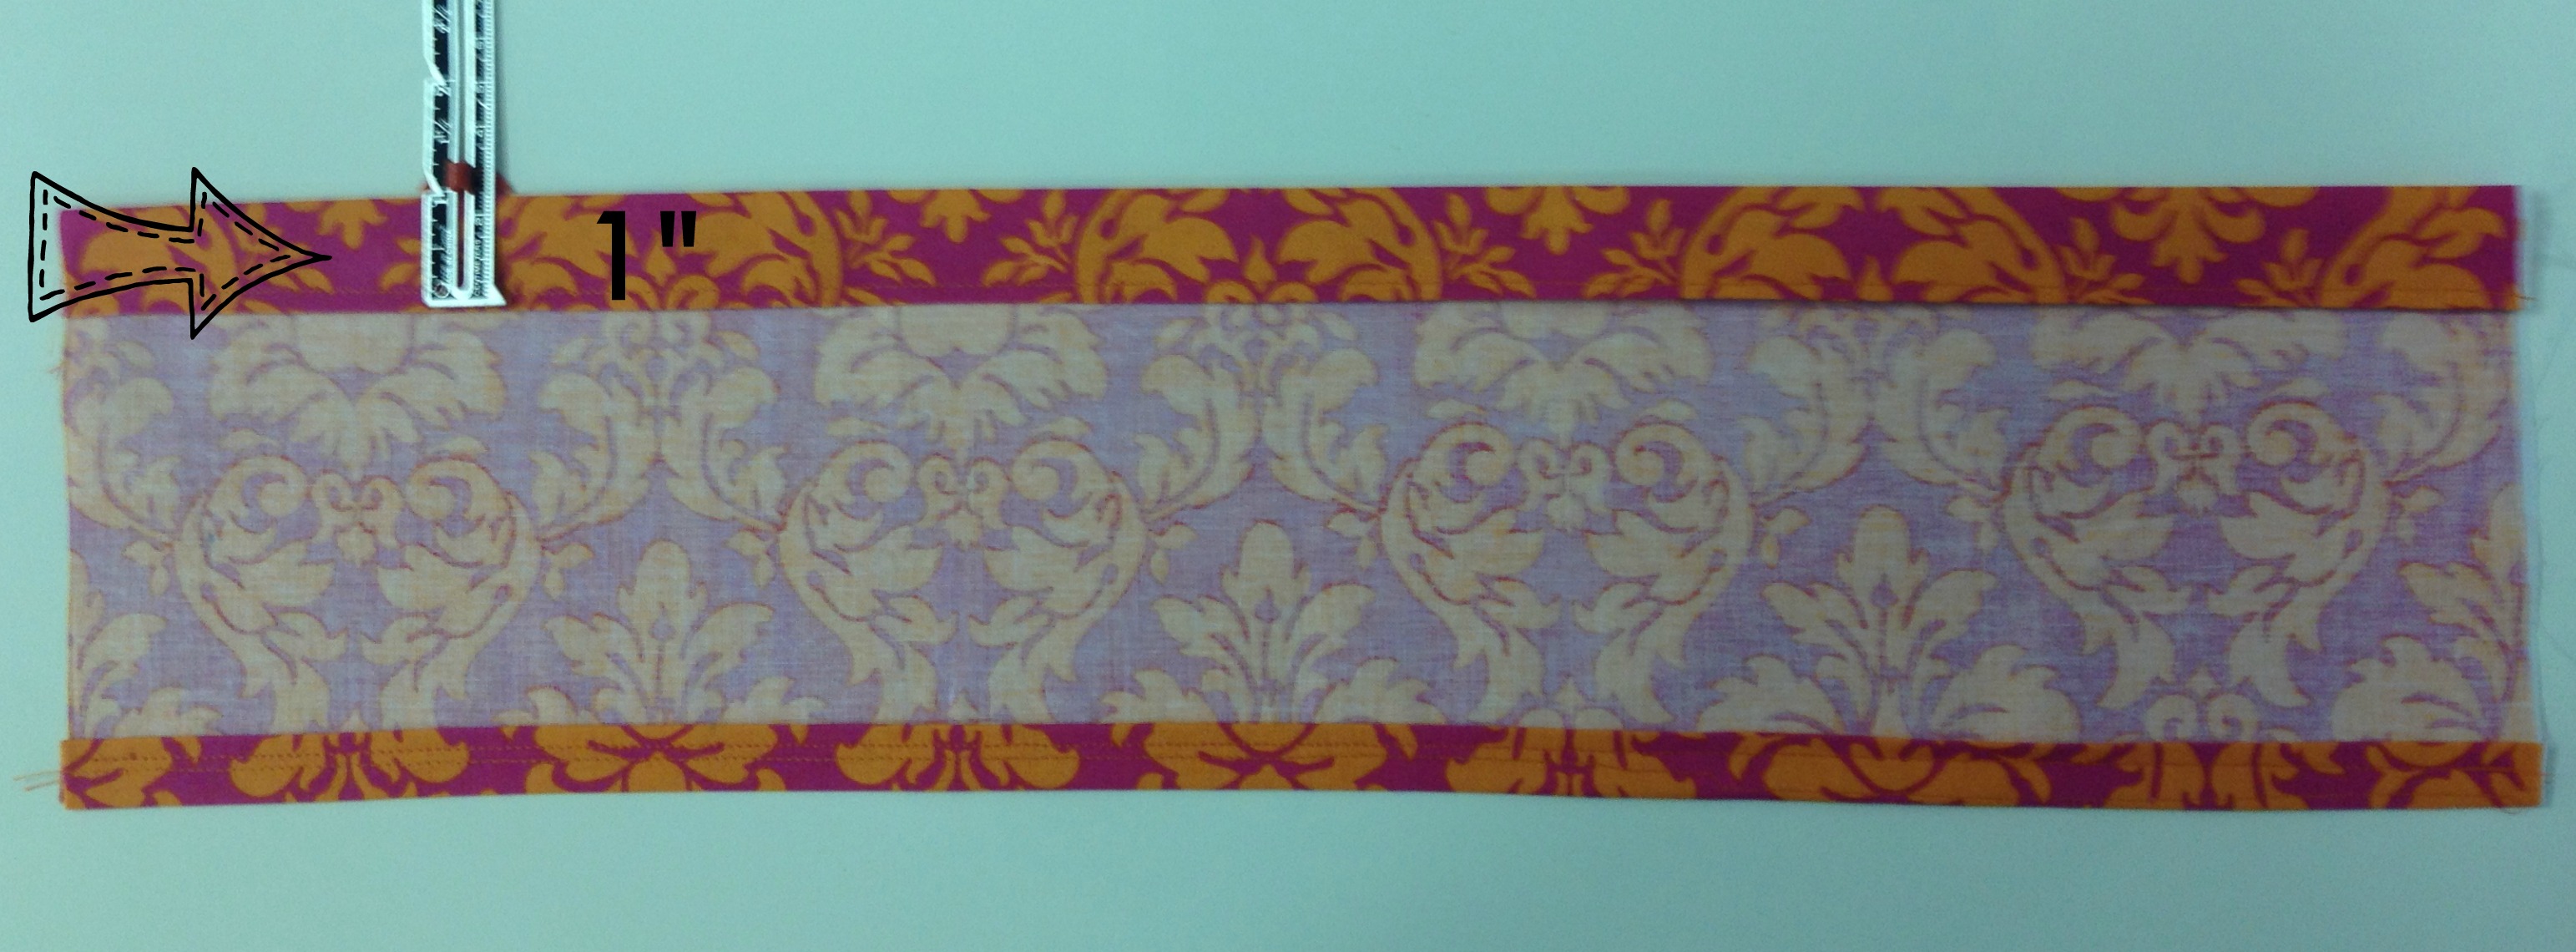
Sew in place following your previous stitching as your guide.  Sew directly on top of your previous stitches, this will leave enough space to insert your elastic.  (And don’t forget to make this seam stronger by back-tacking at the beginning and end!)

photo 2 (9)

Step 3: Inserting Elastic

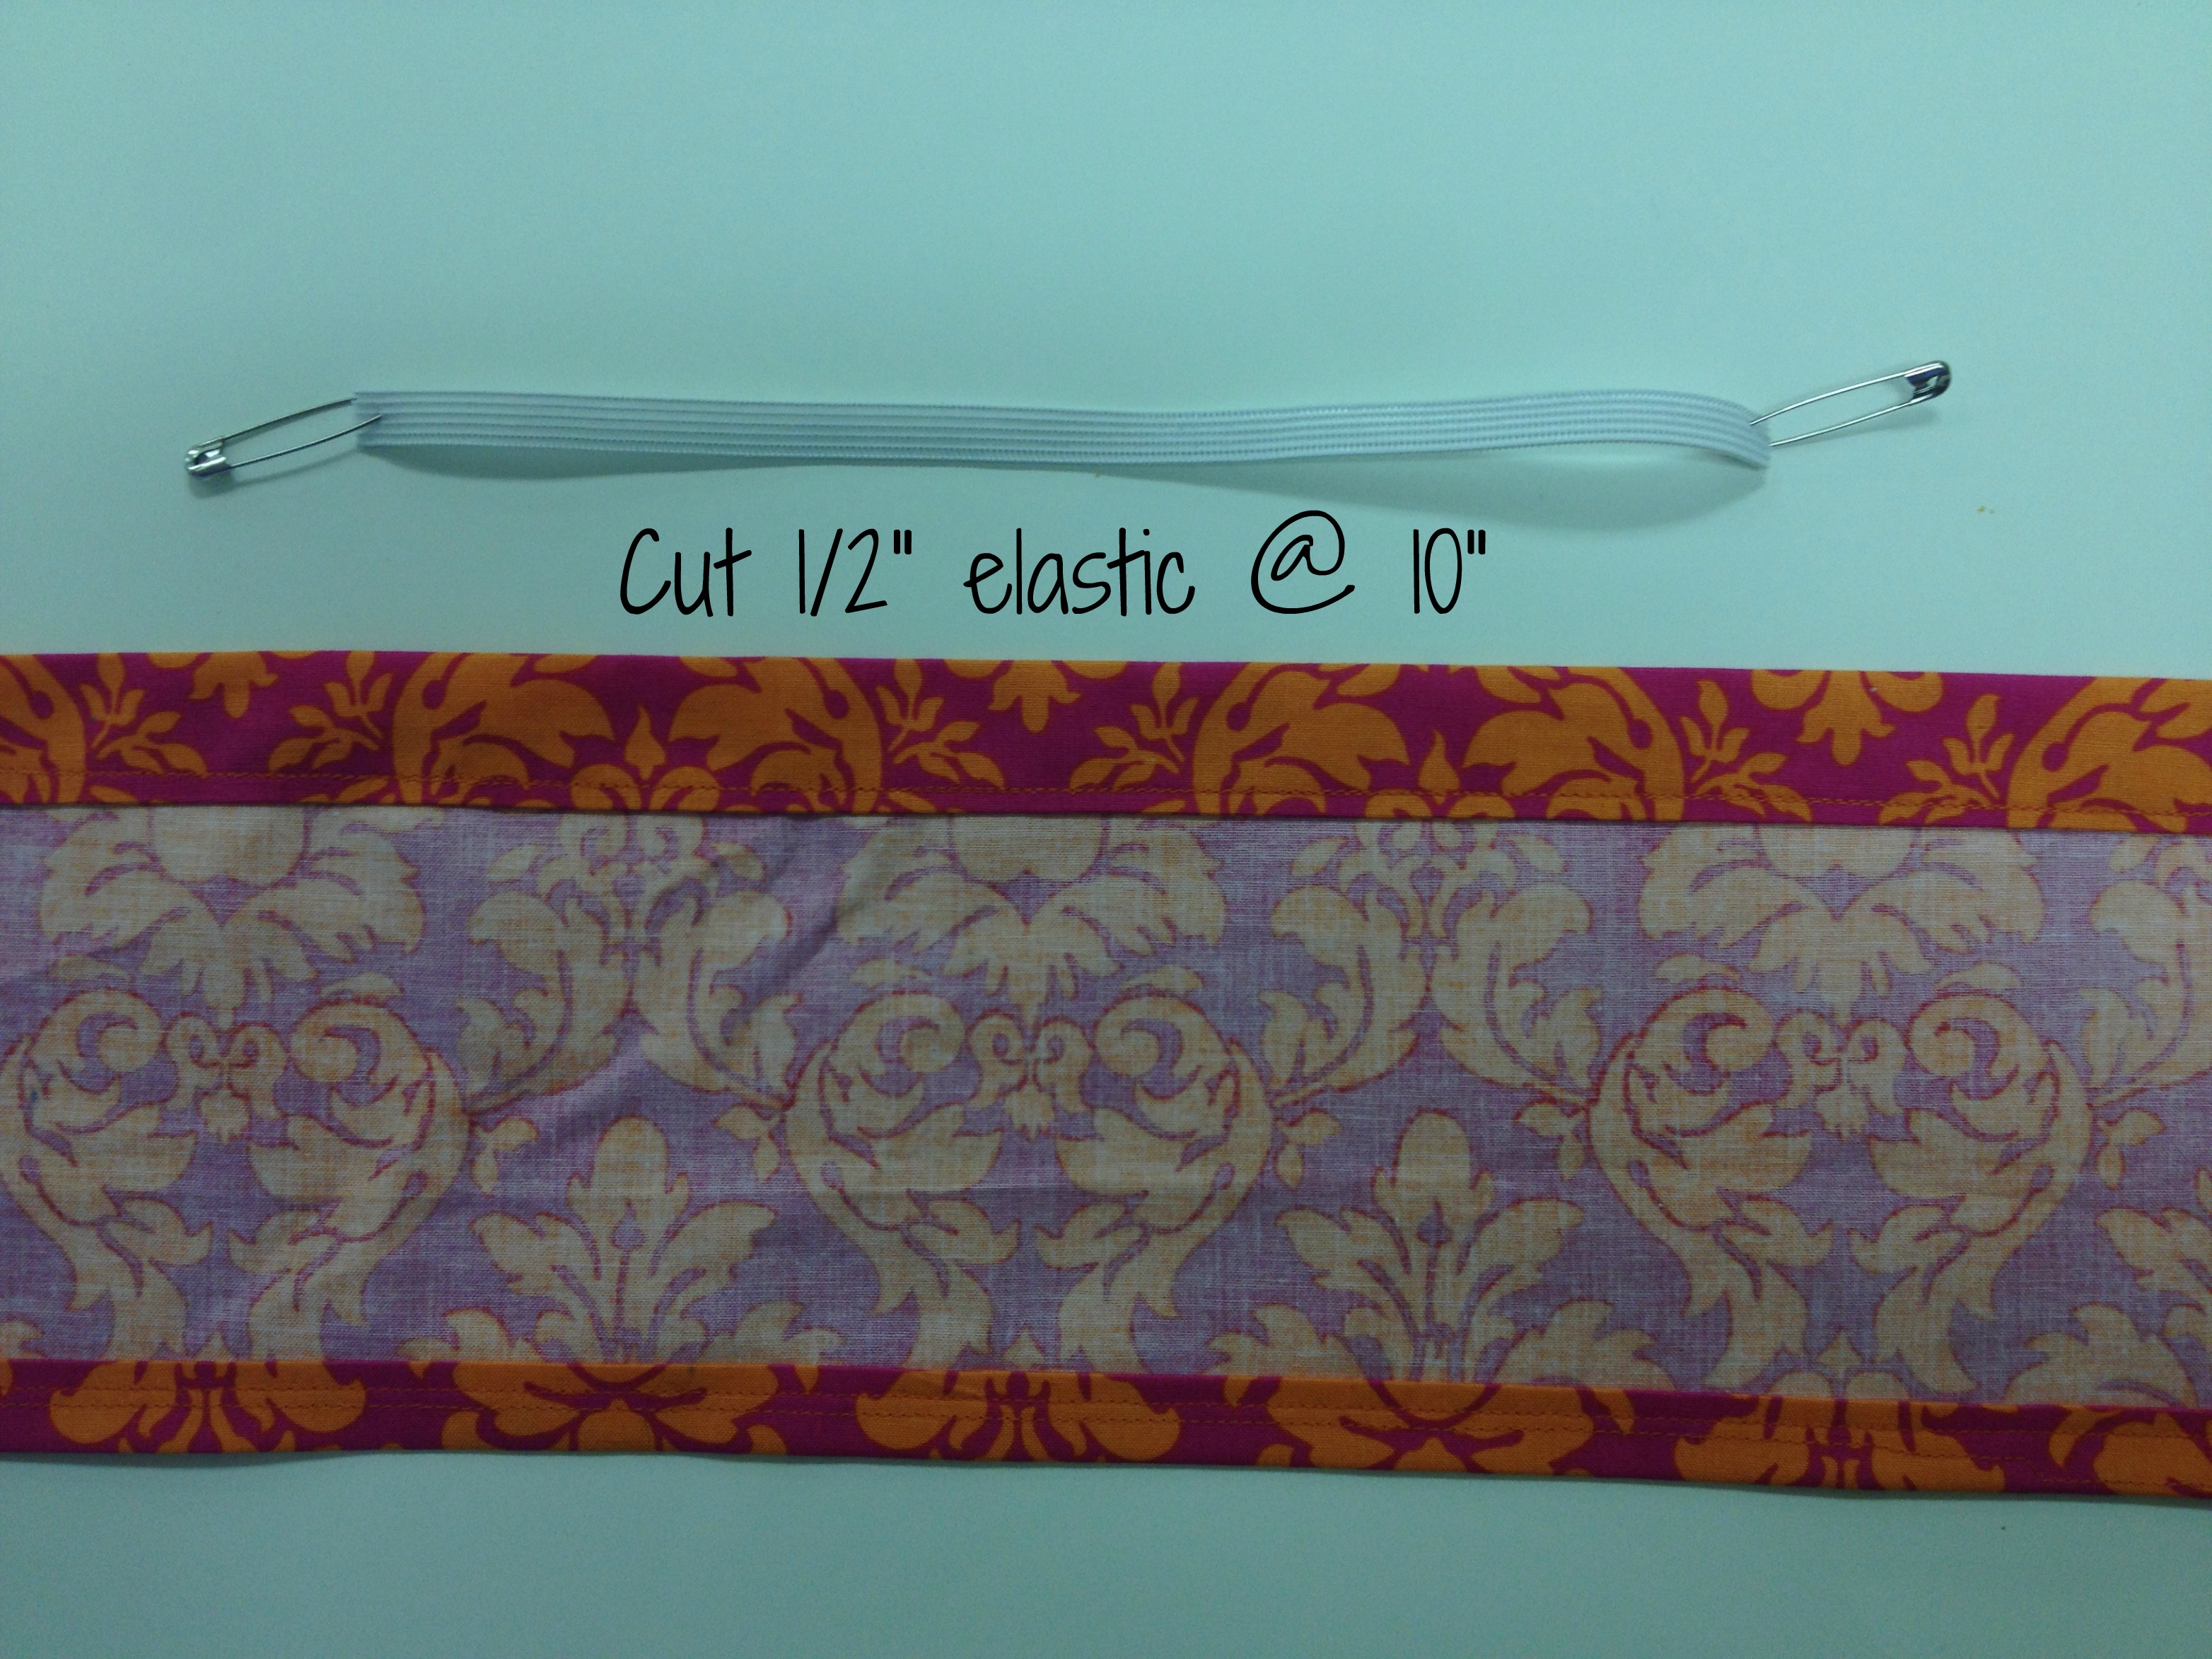
Cut one piece of 1/2″ elastic 10″ long and attach a safety pin to each end.  Be careful not to stick yourself! 🙂

photo 3 (4)

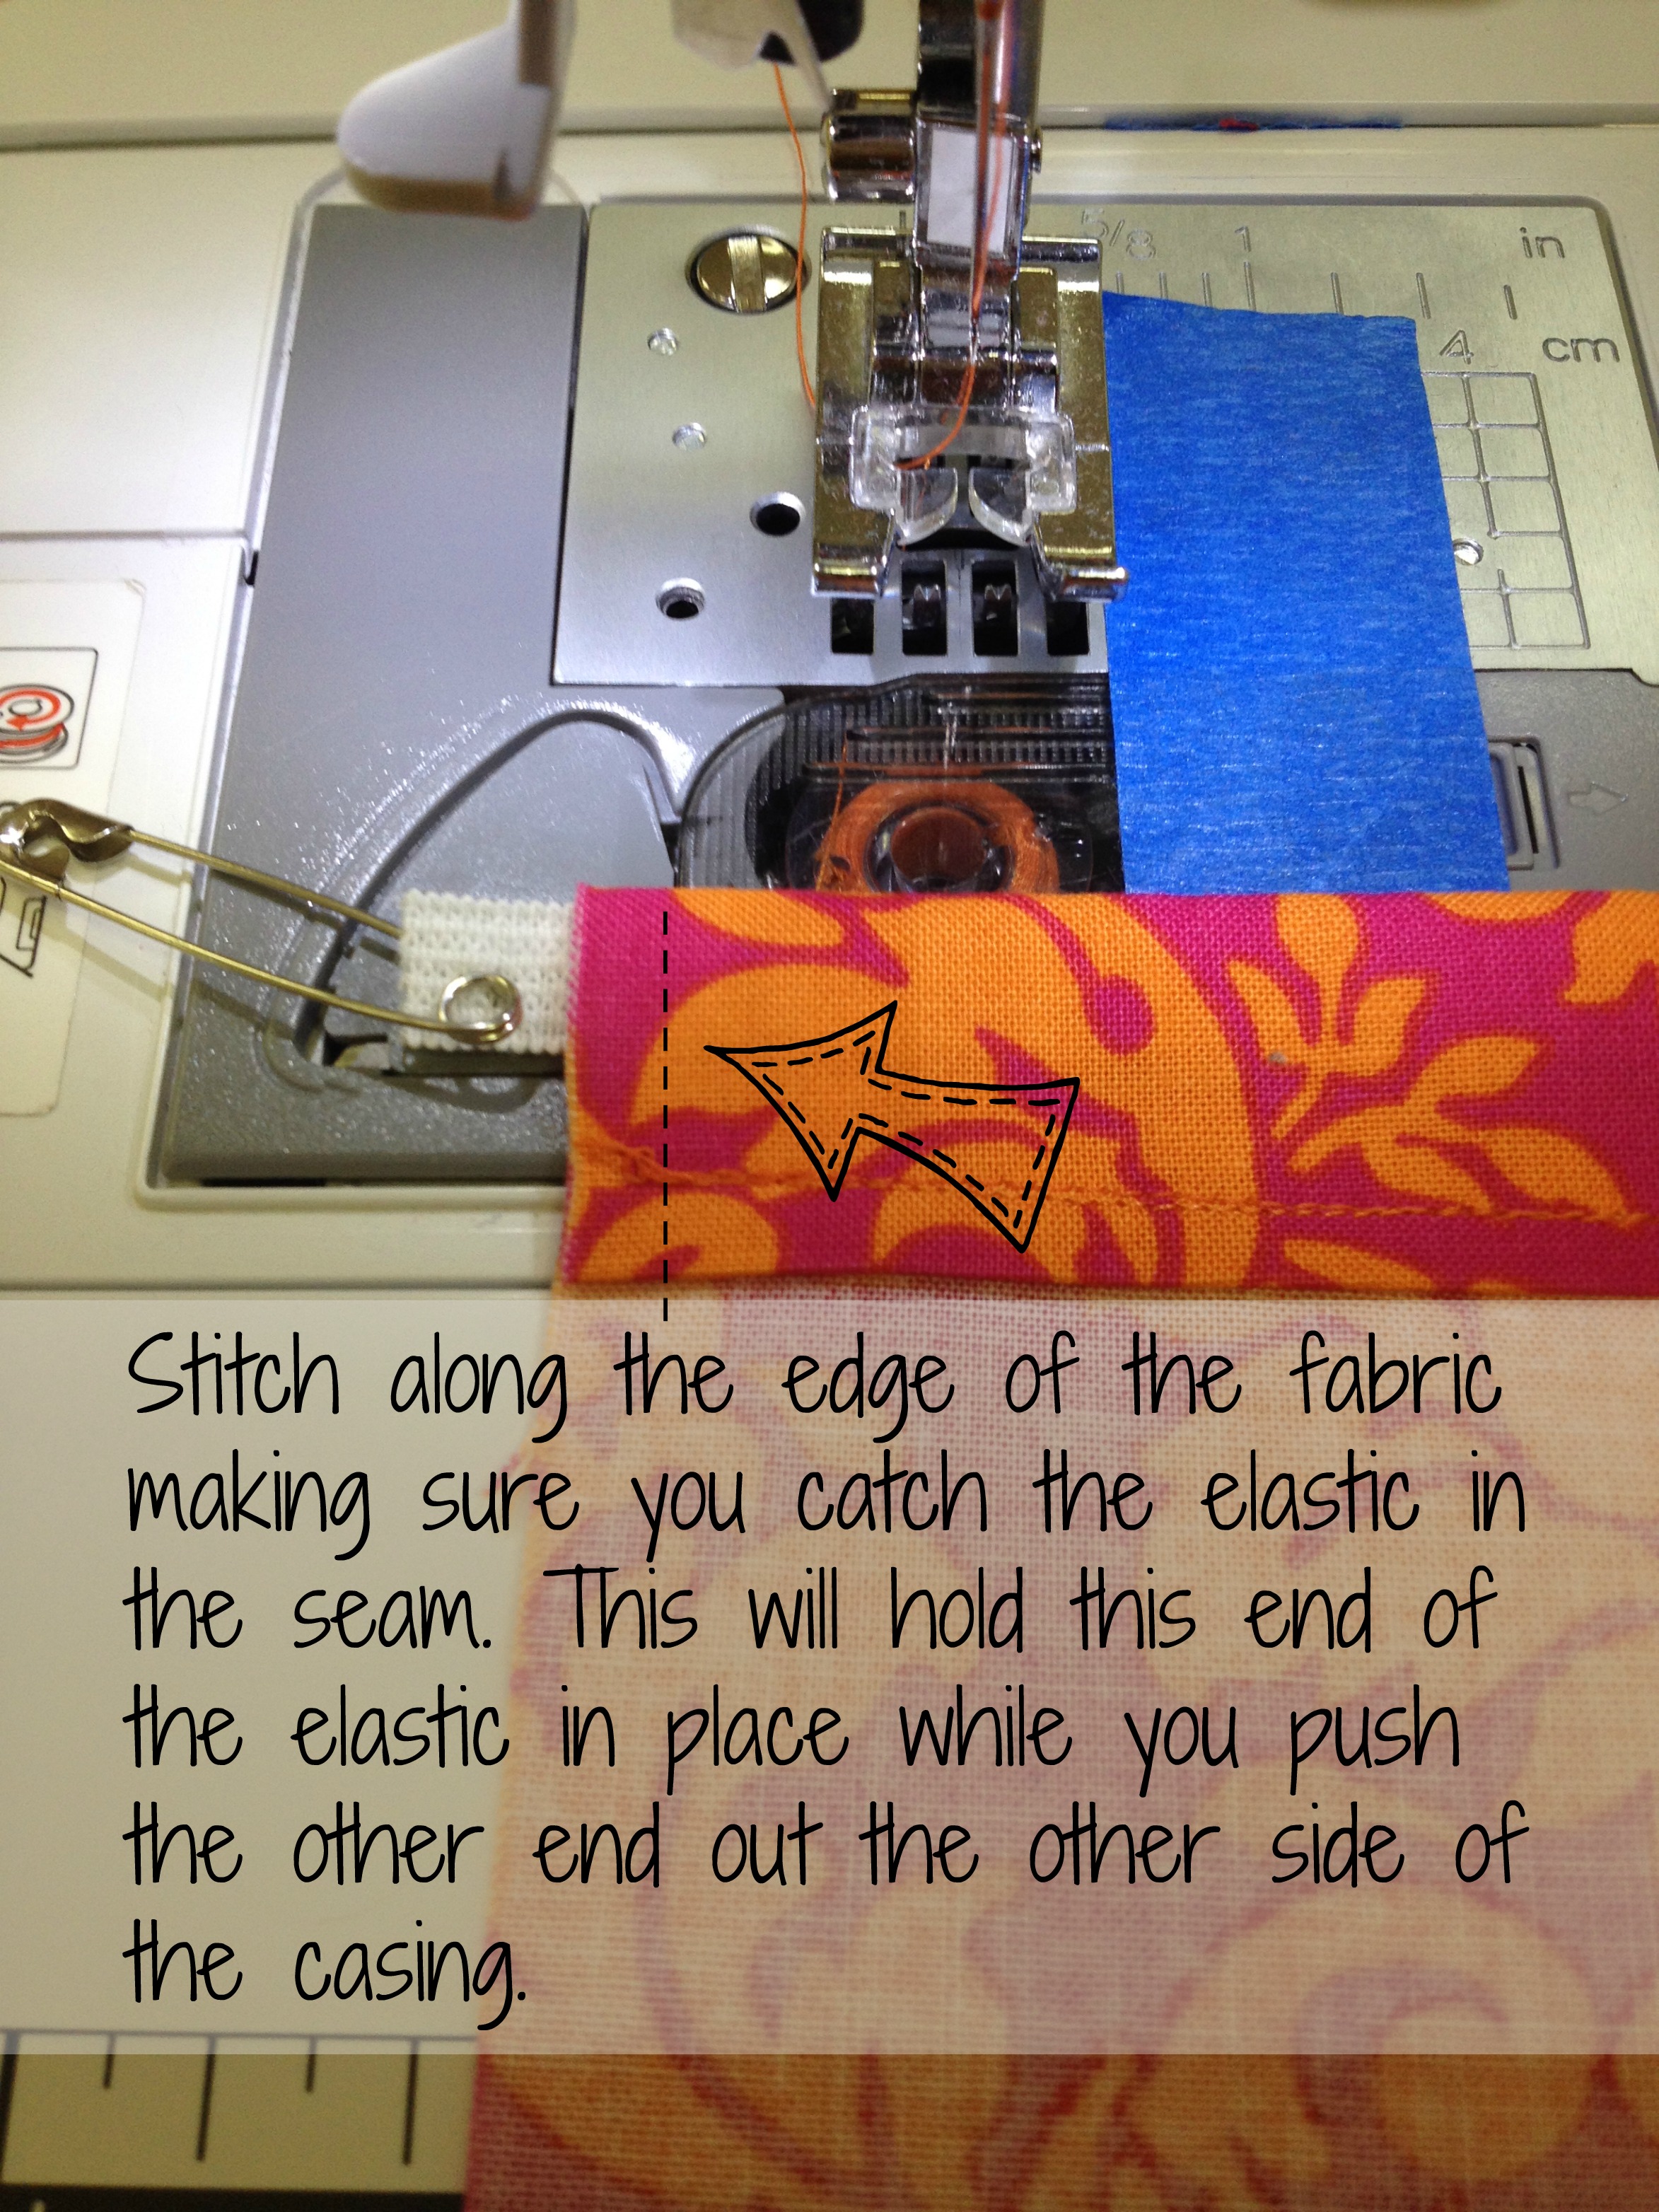
Now, do the “scrunch, scrunch, slide” by pushing and pulling the safety pin through the elastic casing (tunnel).

photo 4 (4)

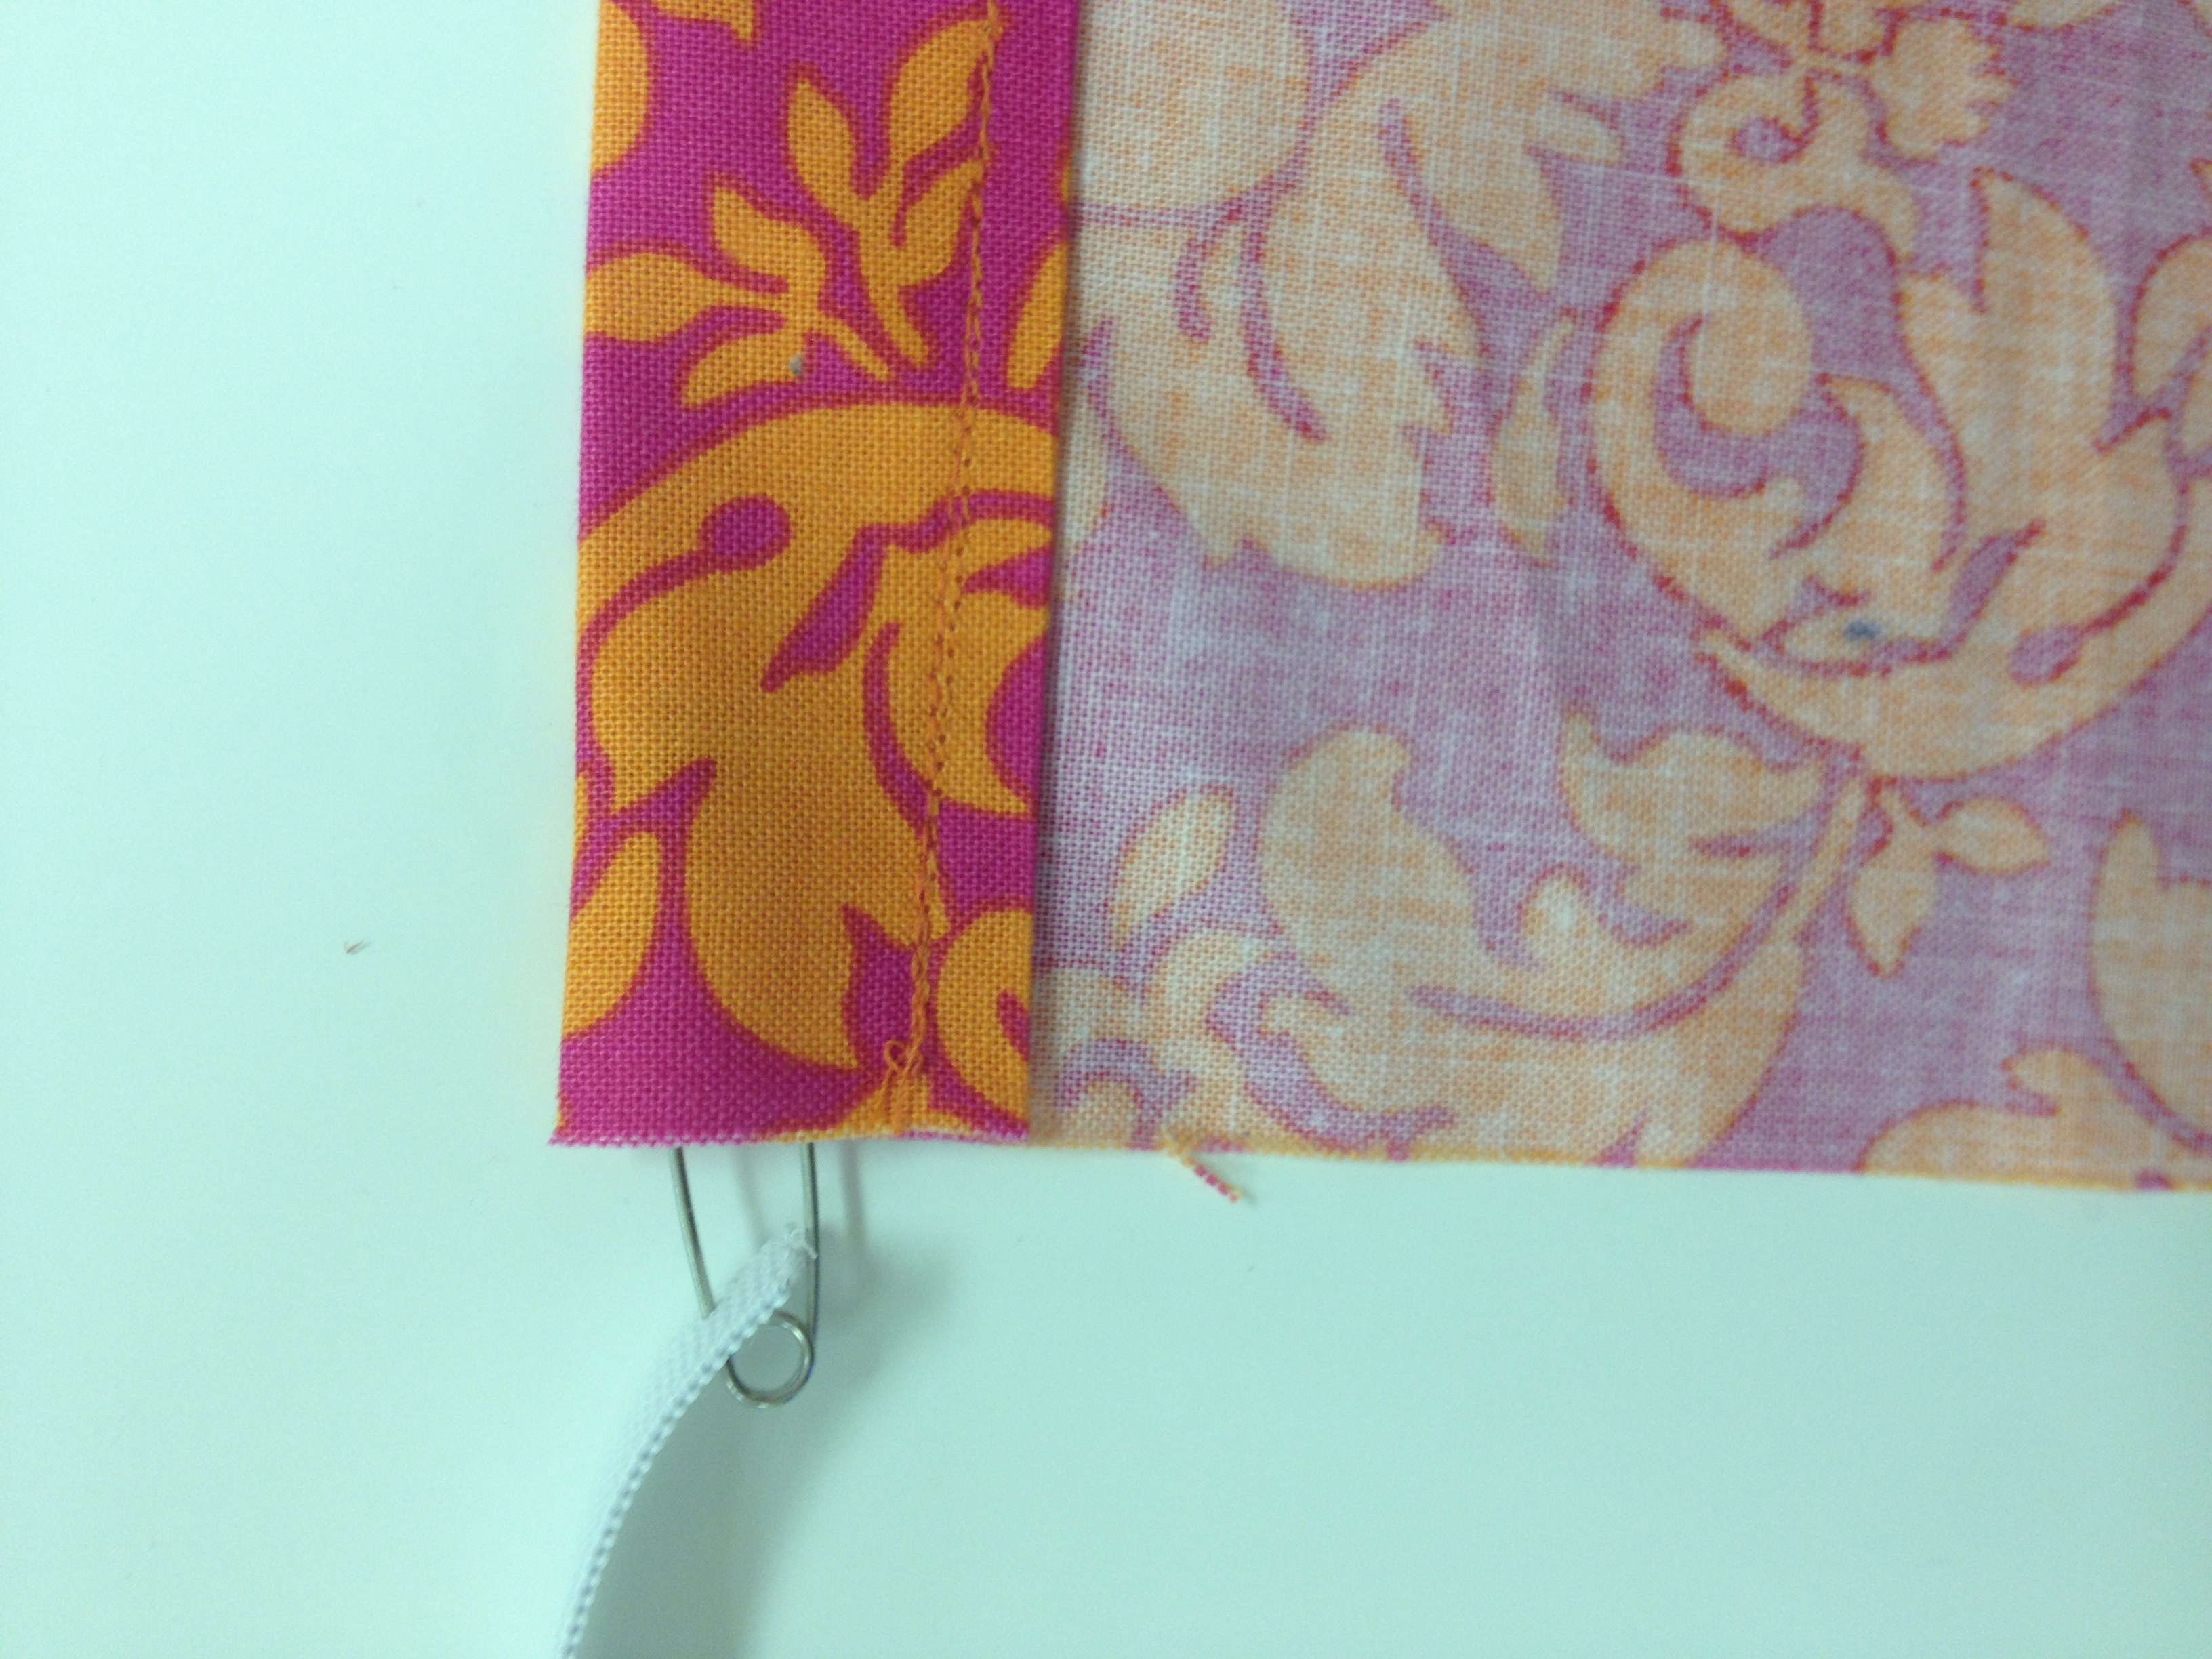
When the opposite end of the elastic is even with the side of the casing, stop pulling through and secure it by stitching it in place.

photo 5 (6)

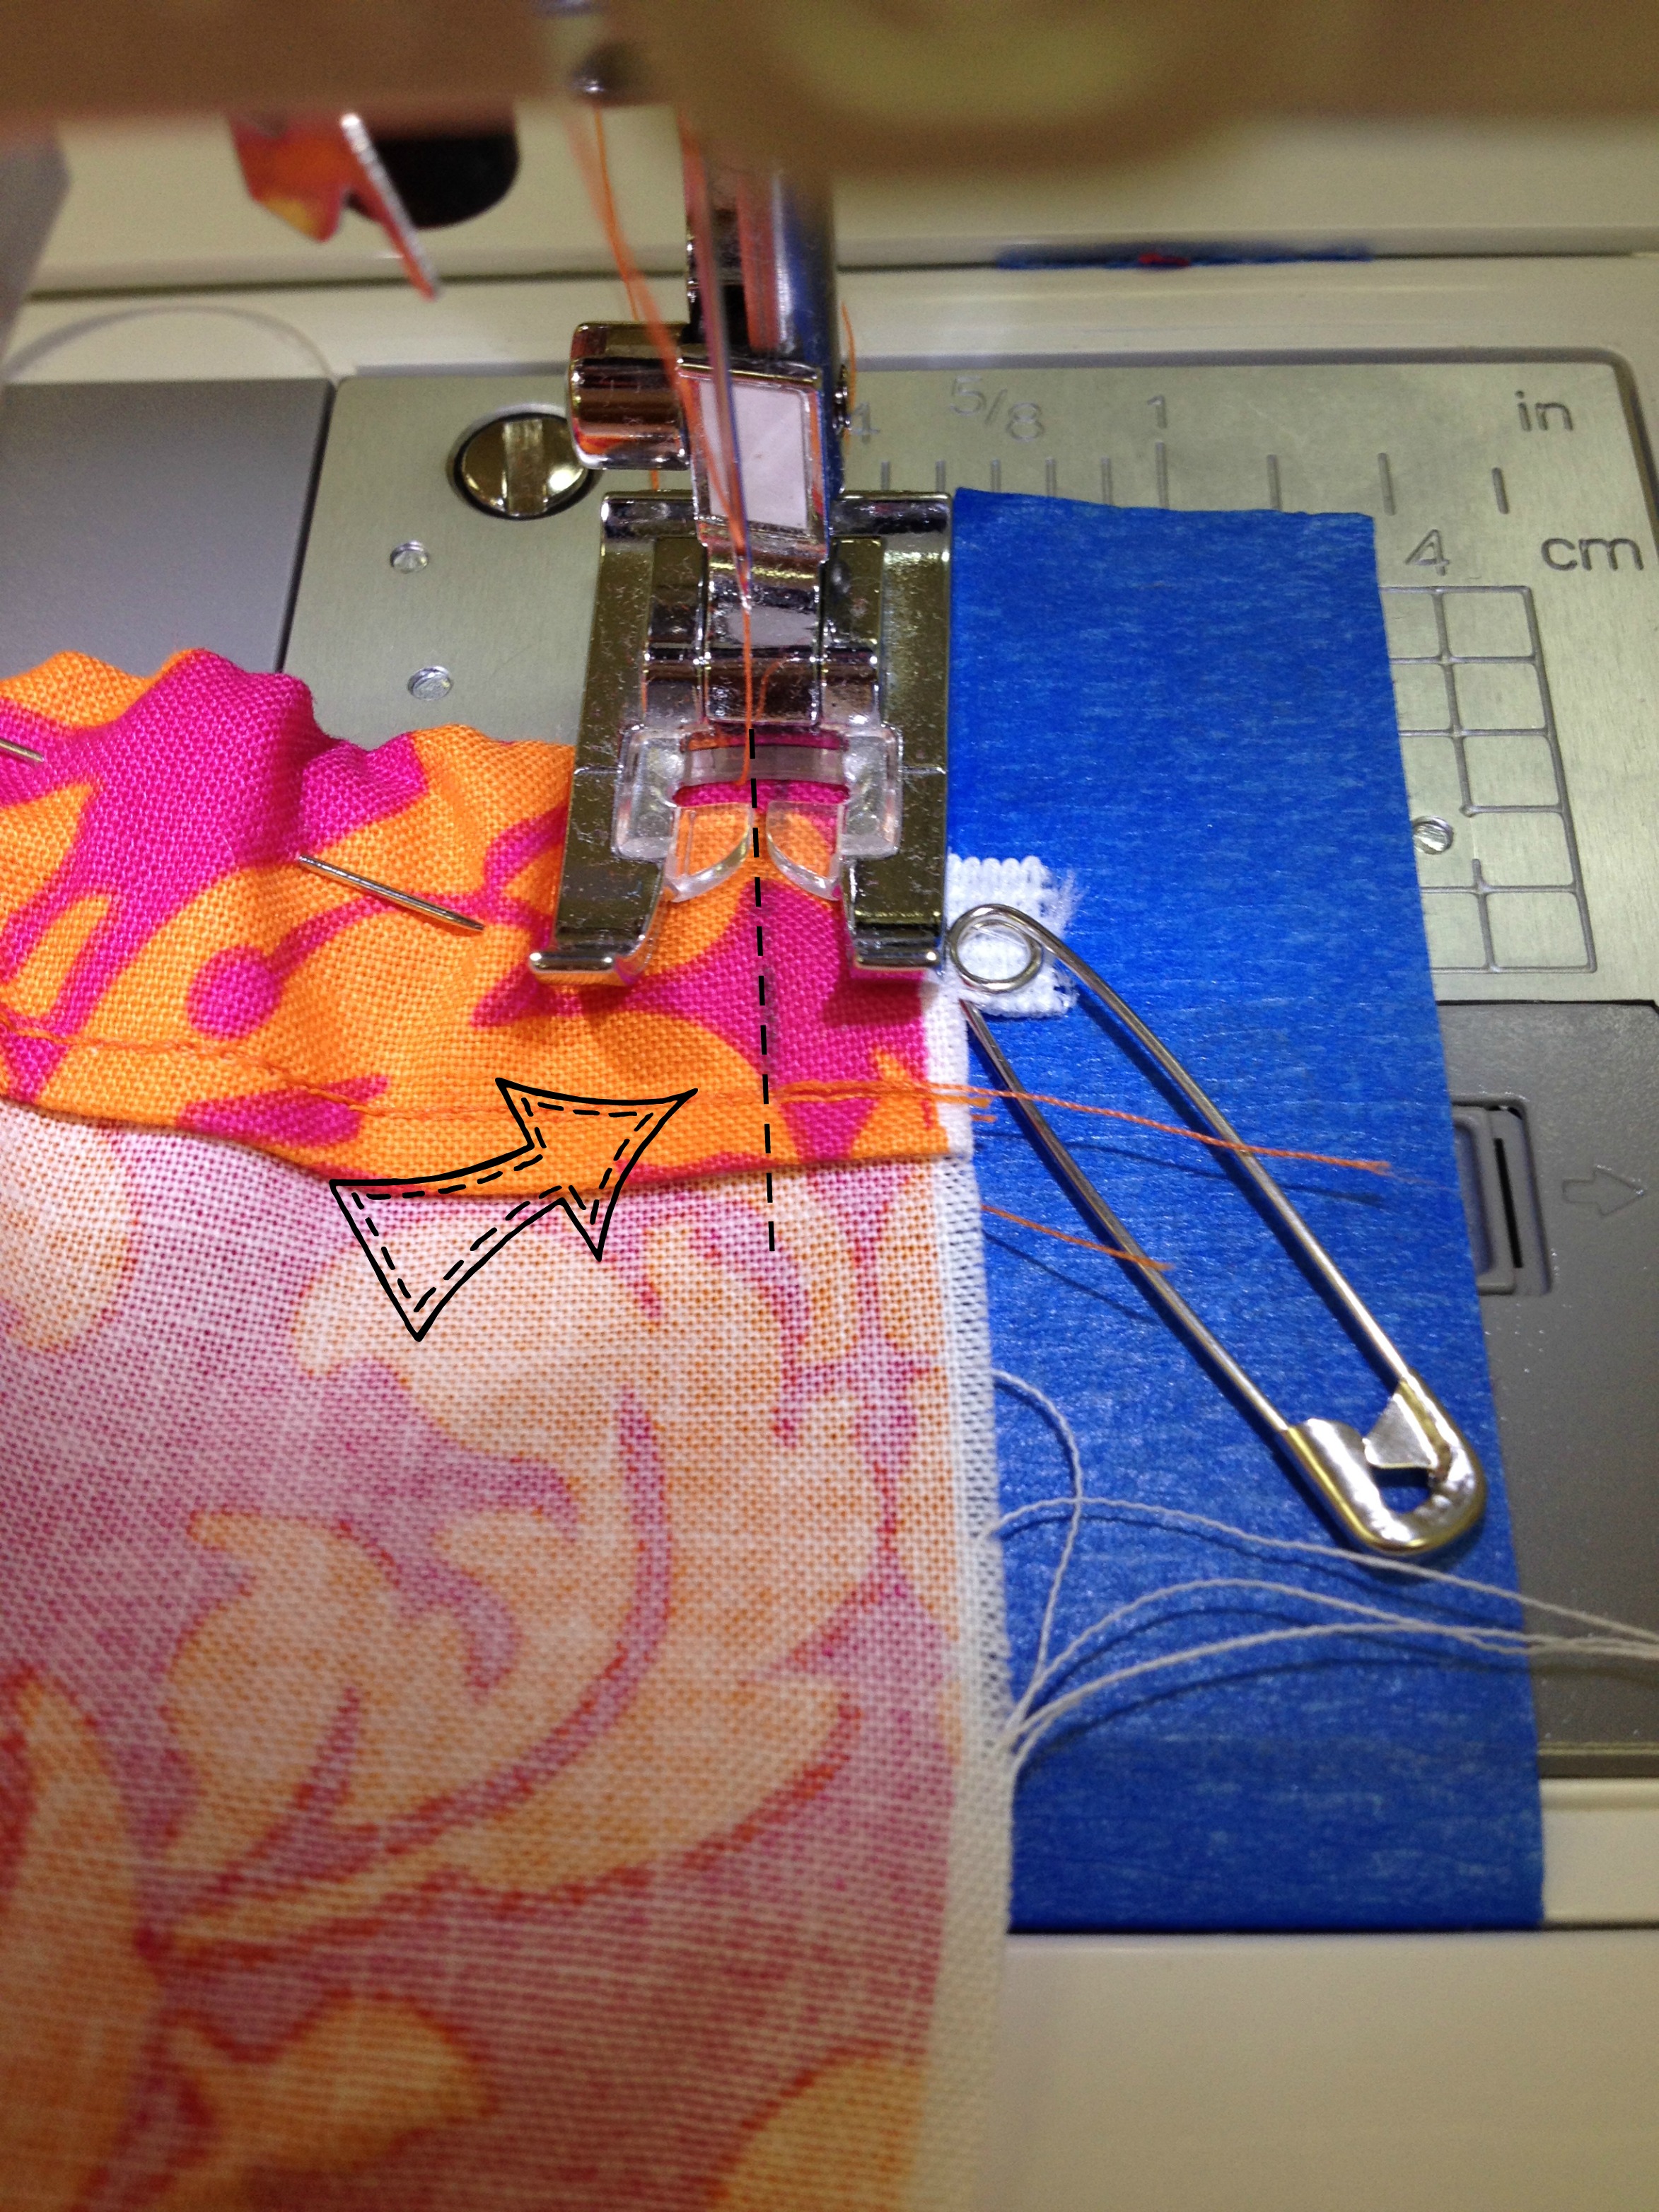
Continue scrunching and sliding the safety pin down to the other end of the casing.  Once you’ve pulled it through, stitch the casing closed to keep the elastic from slipping back inside the casing.
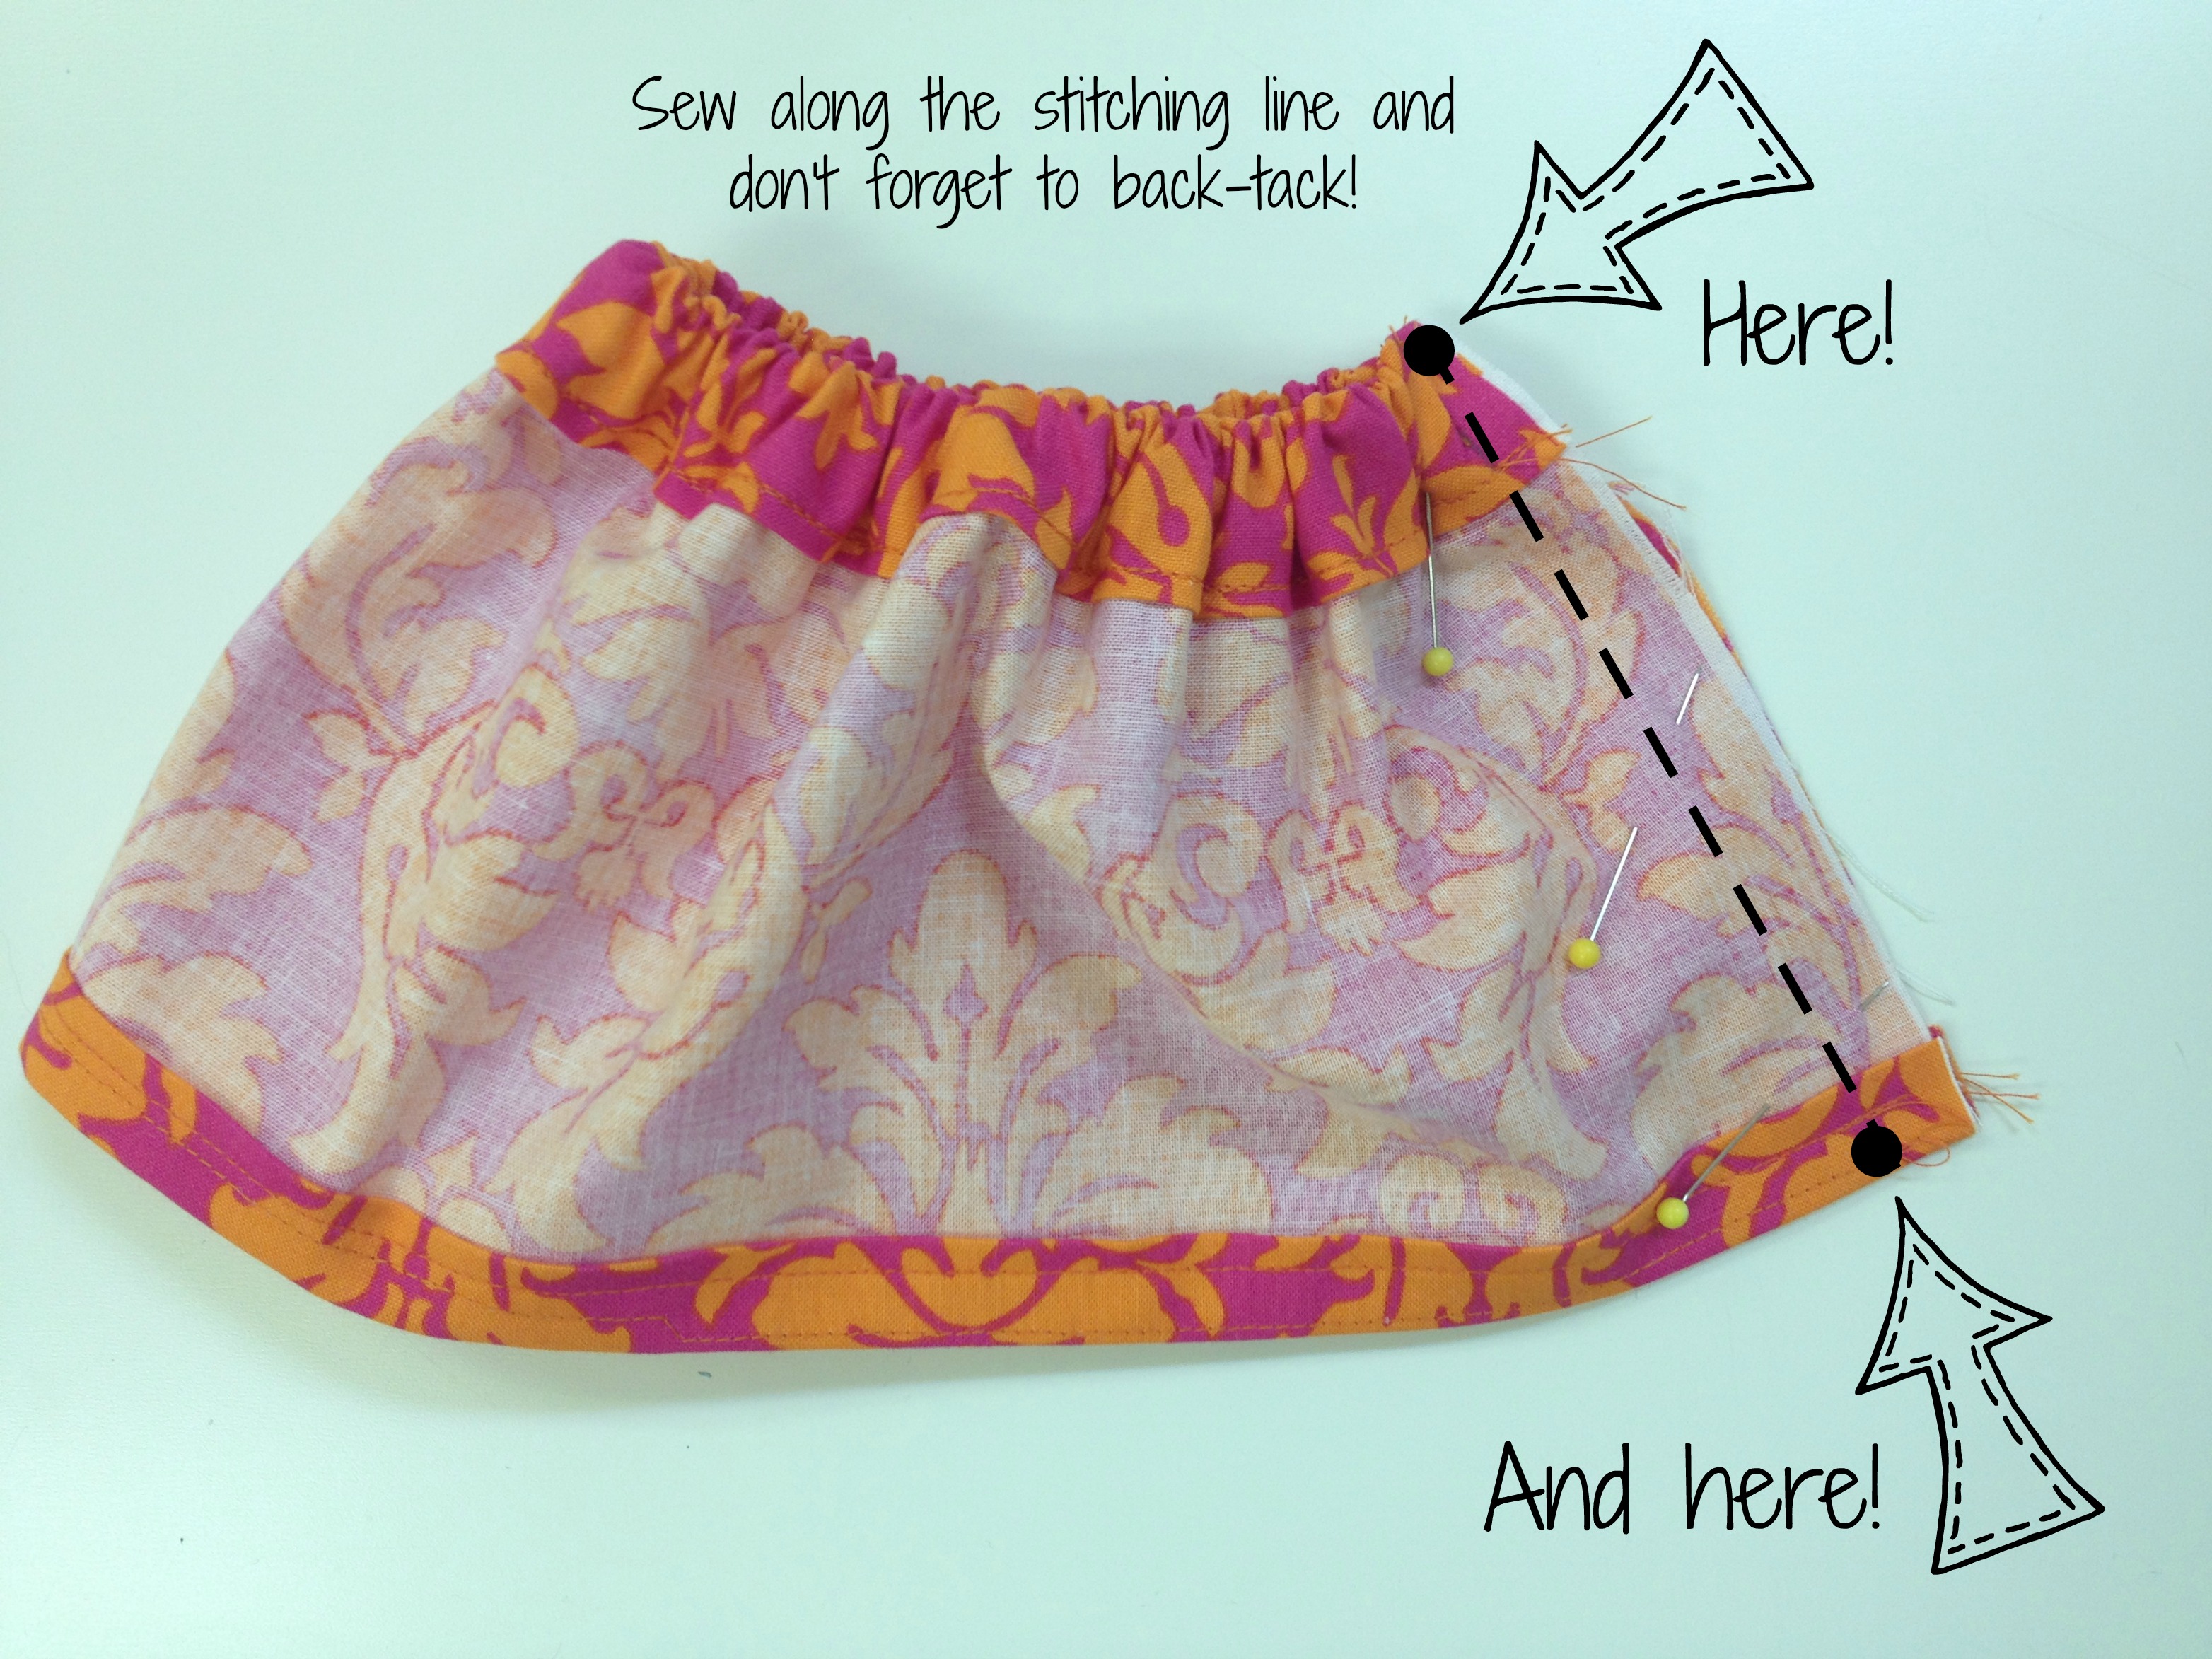
photo 2 (10)

Step 4: Back Seam

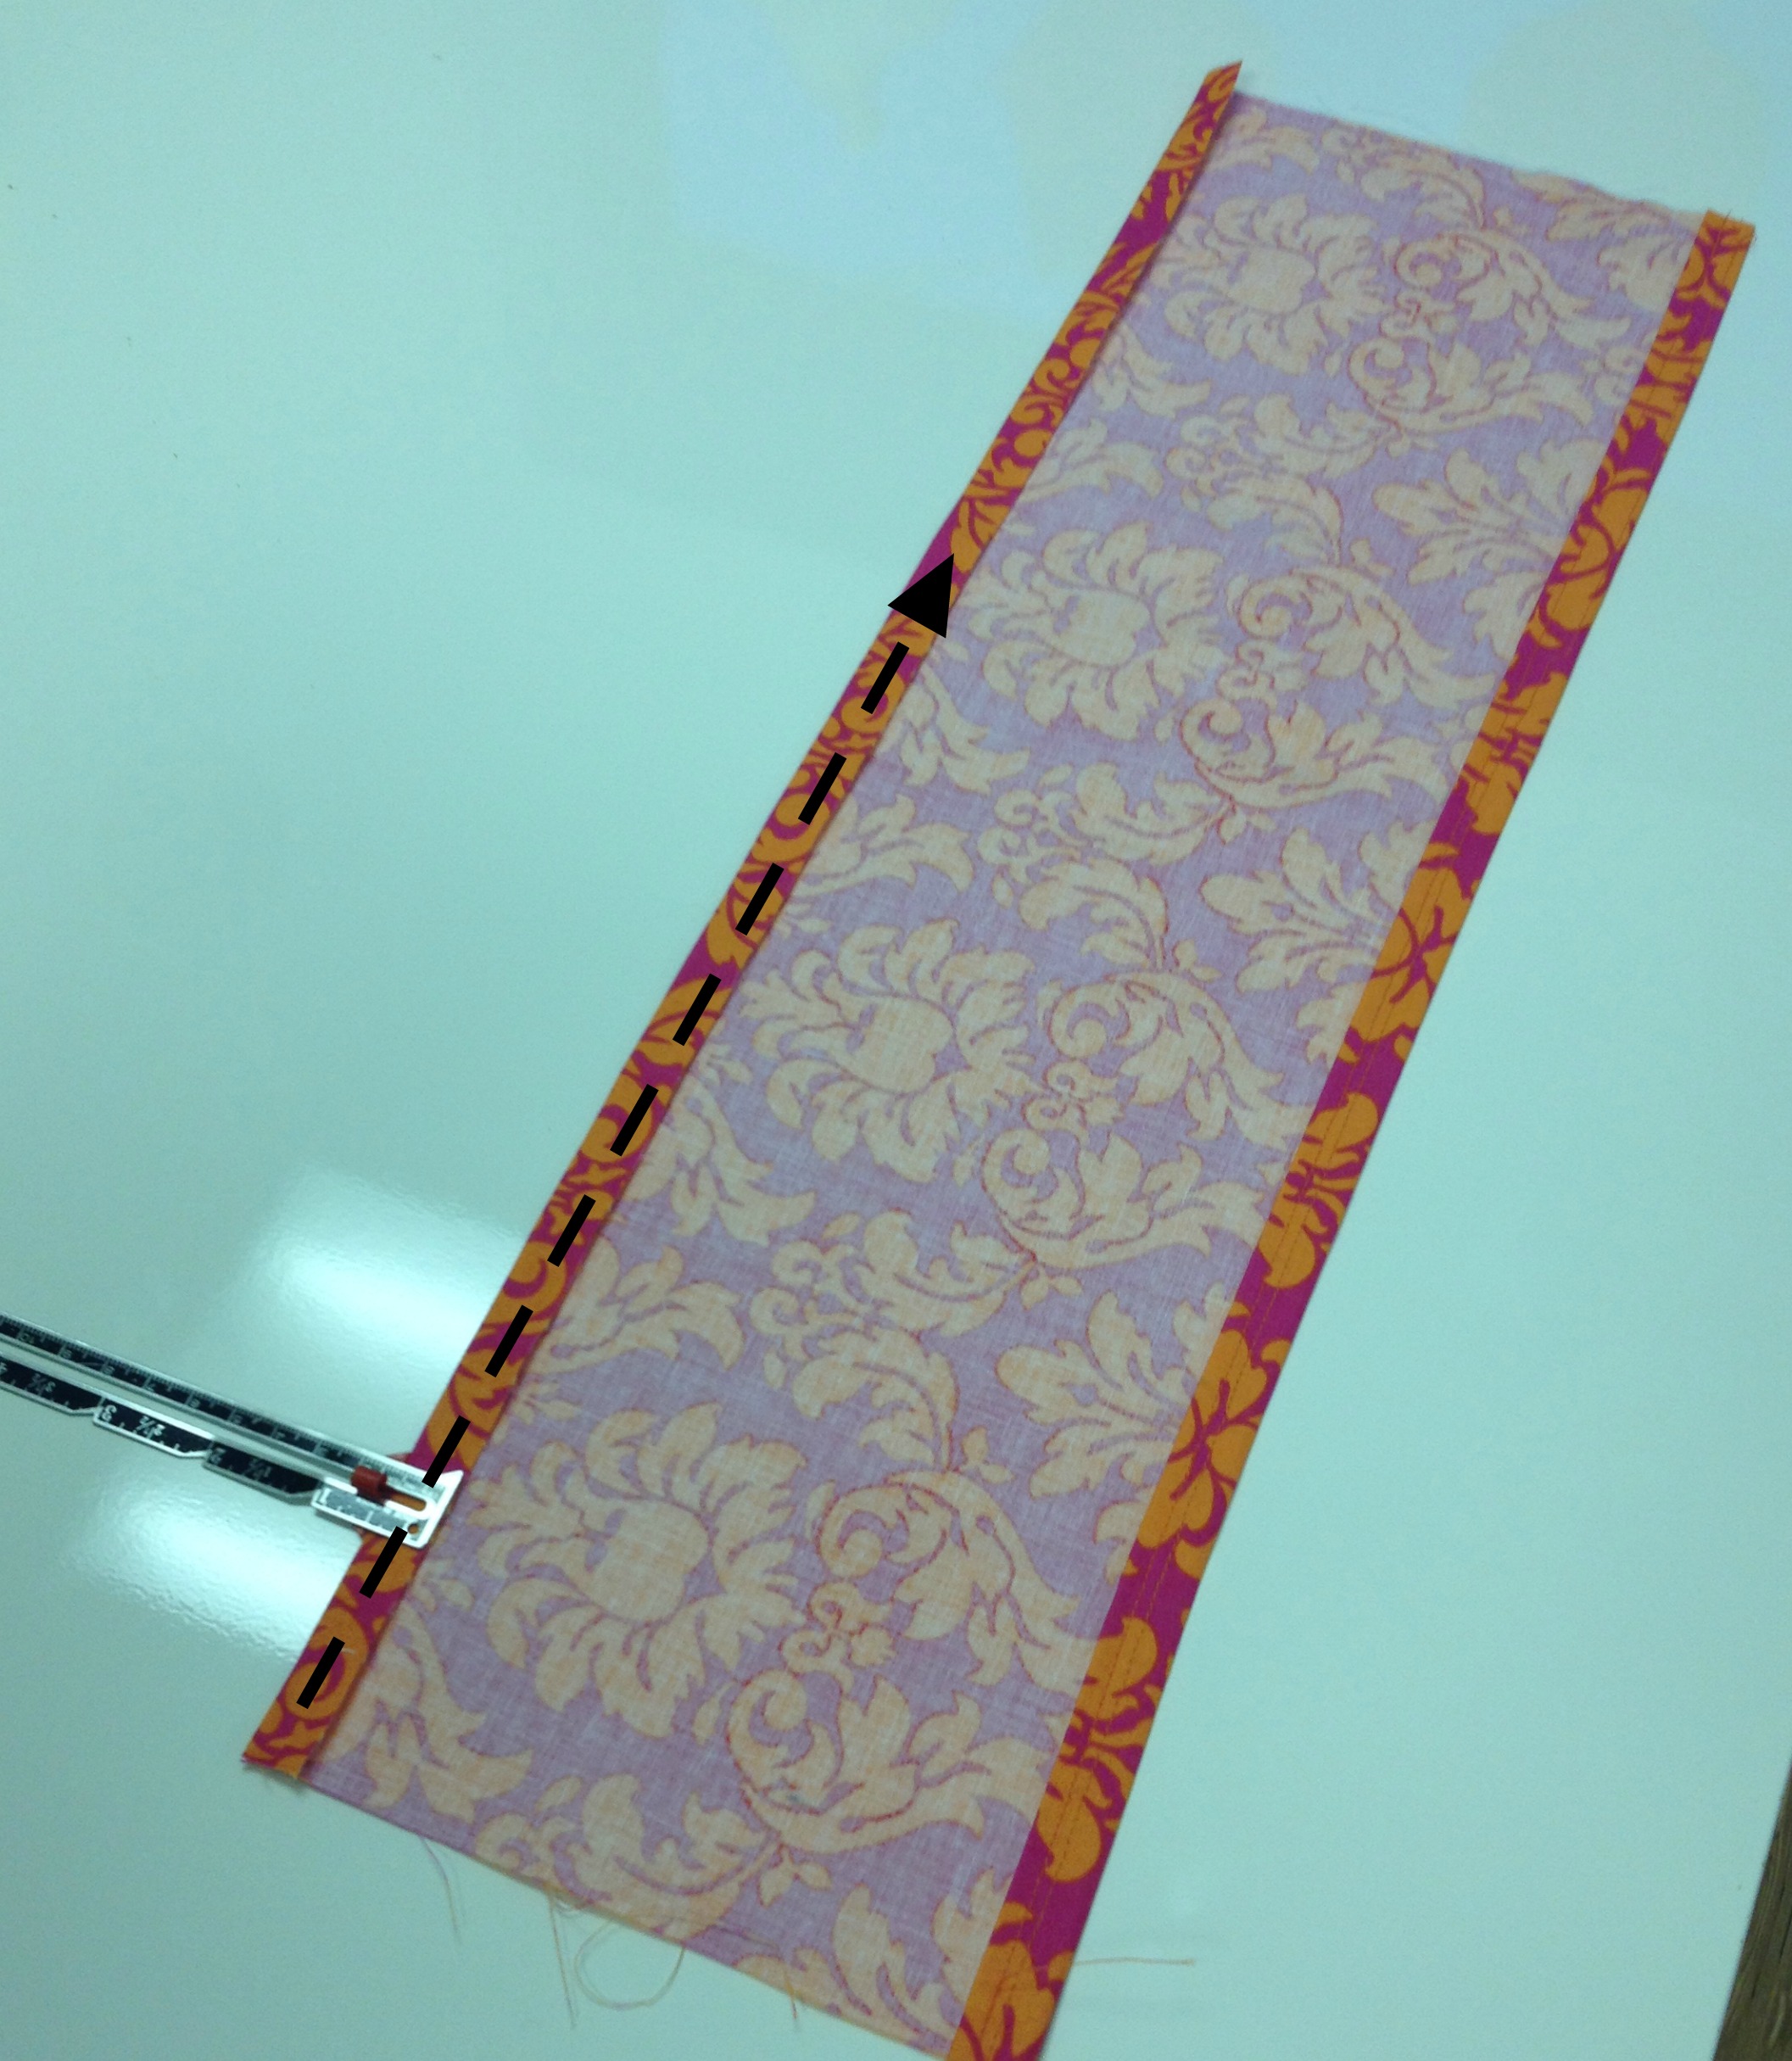
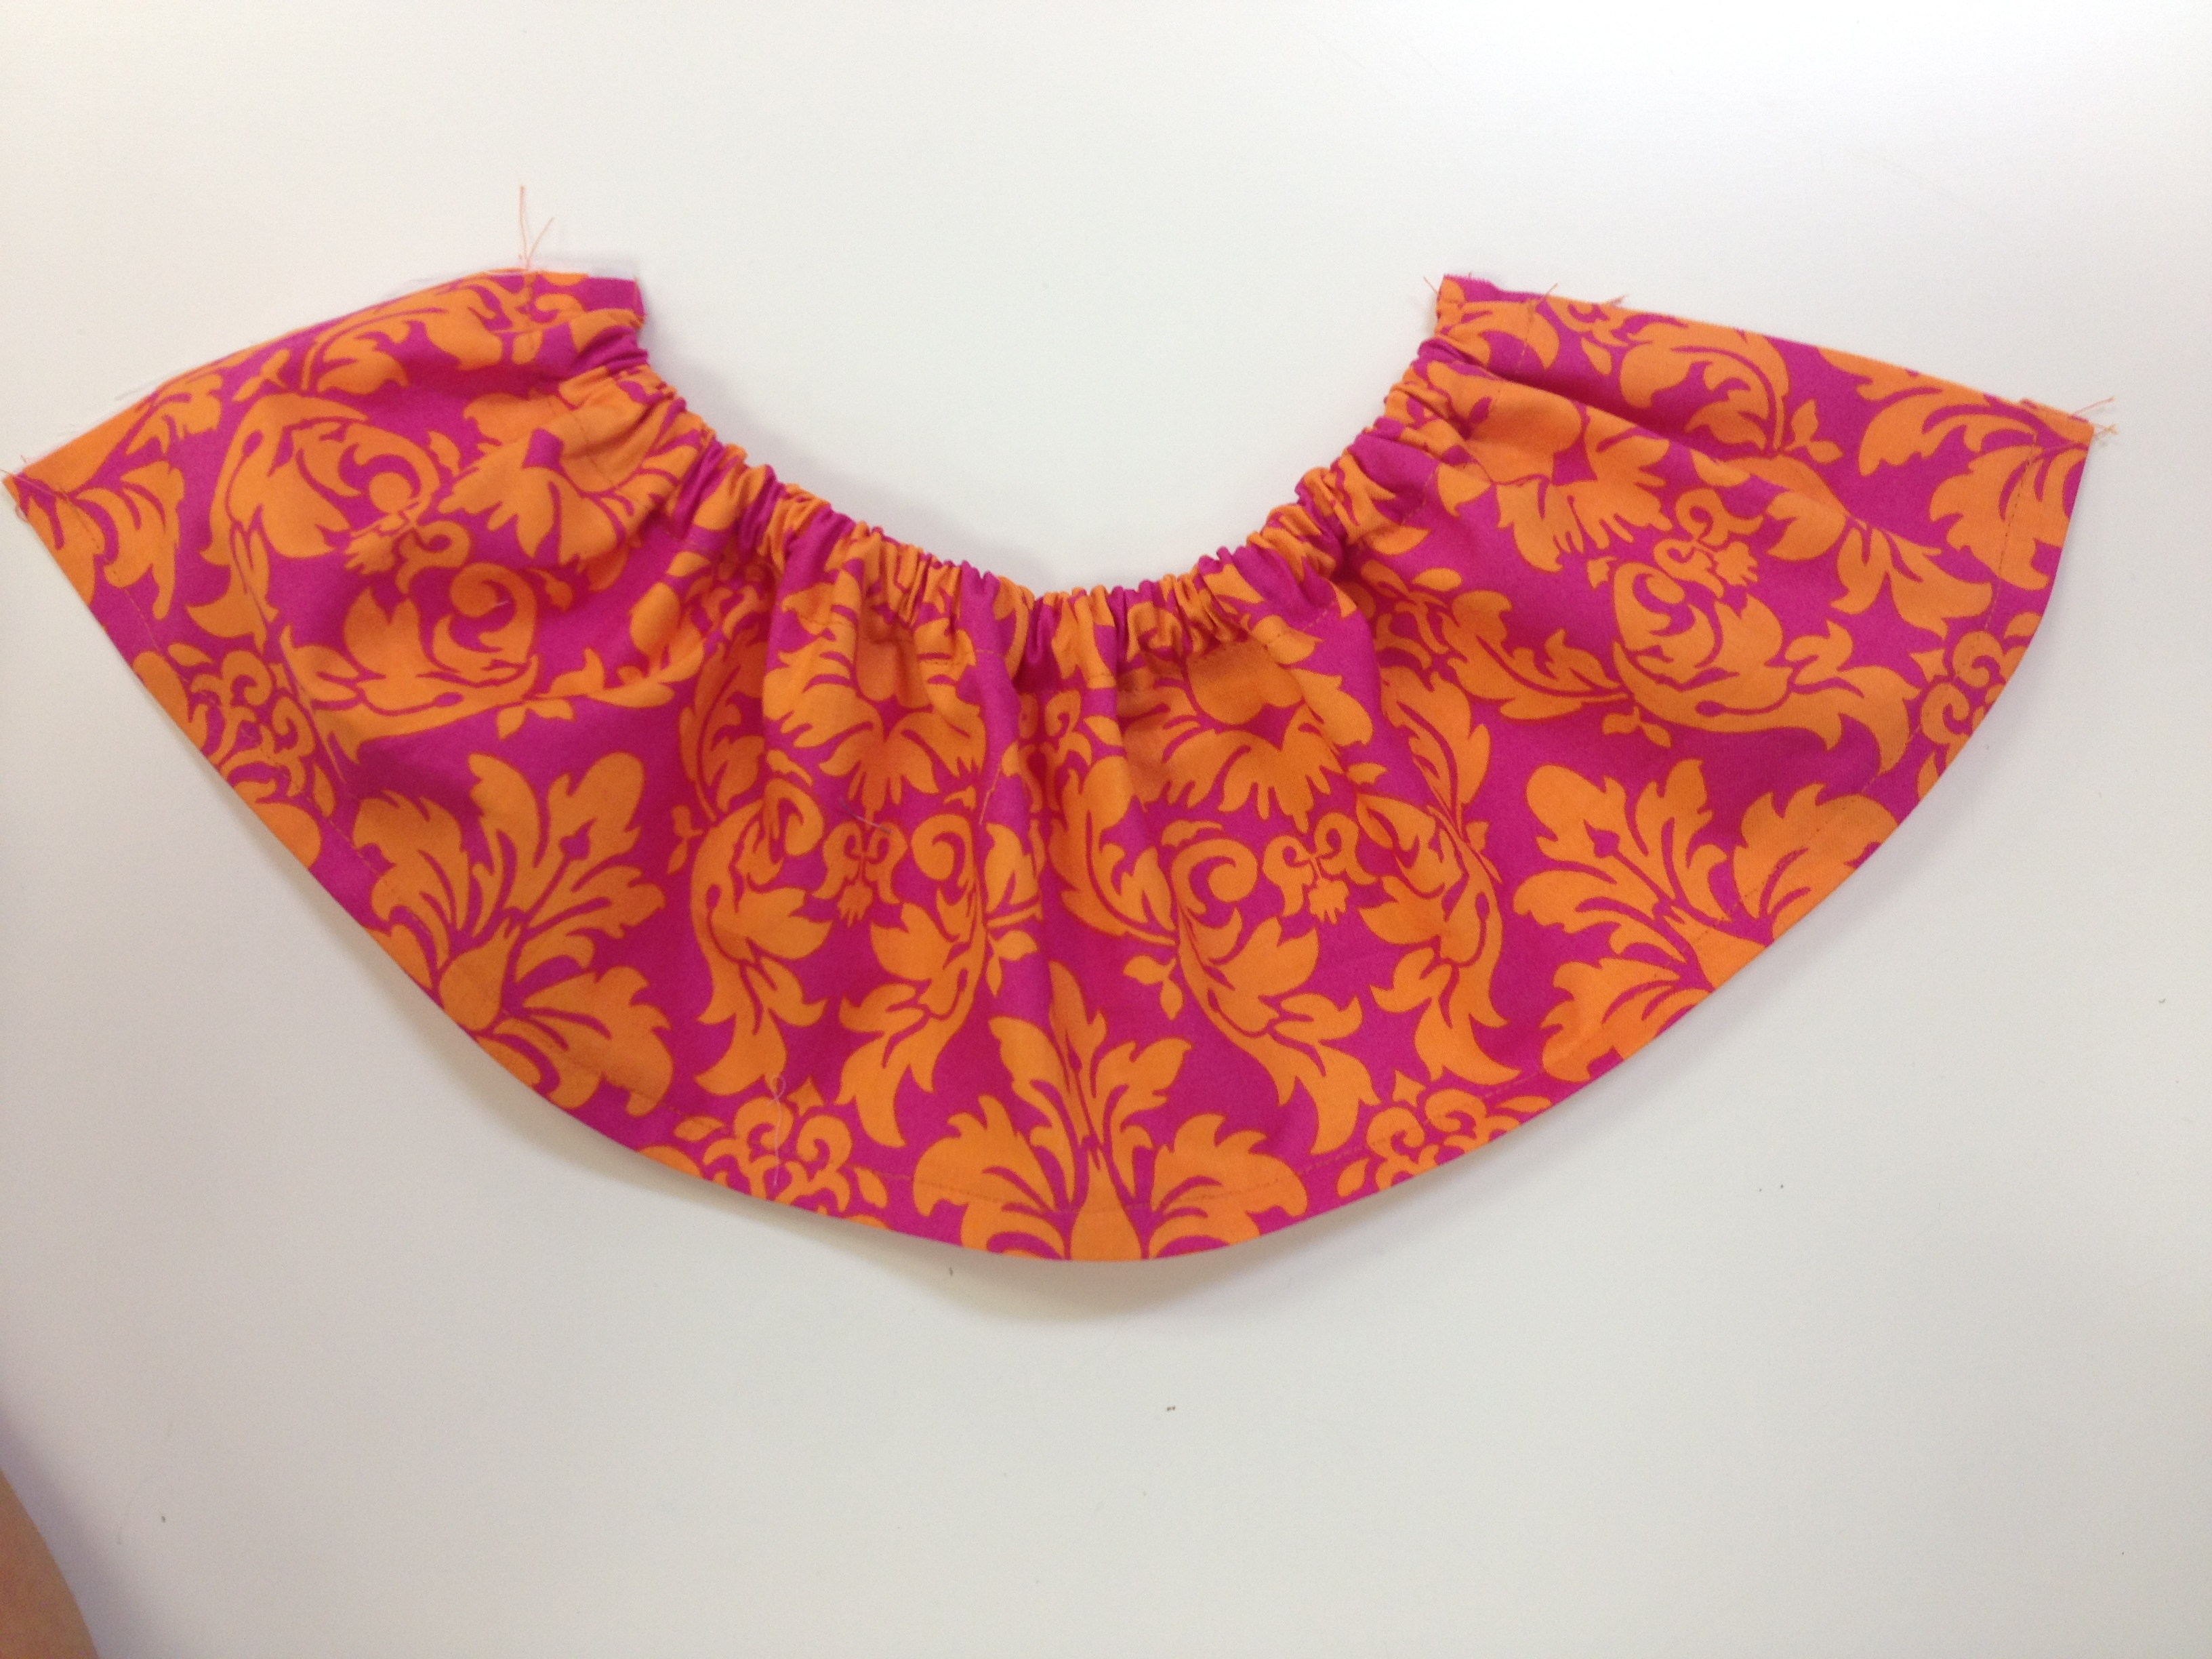
Now your skirt should look like this, you are almost finished. Just one more step left until it’s complete!

photo 4 (5)

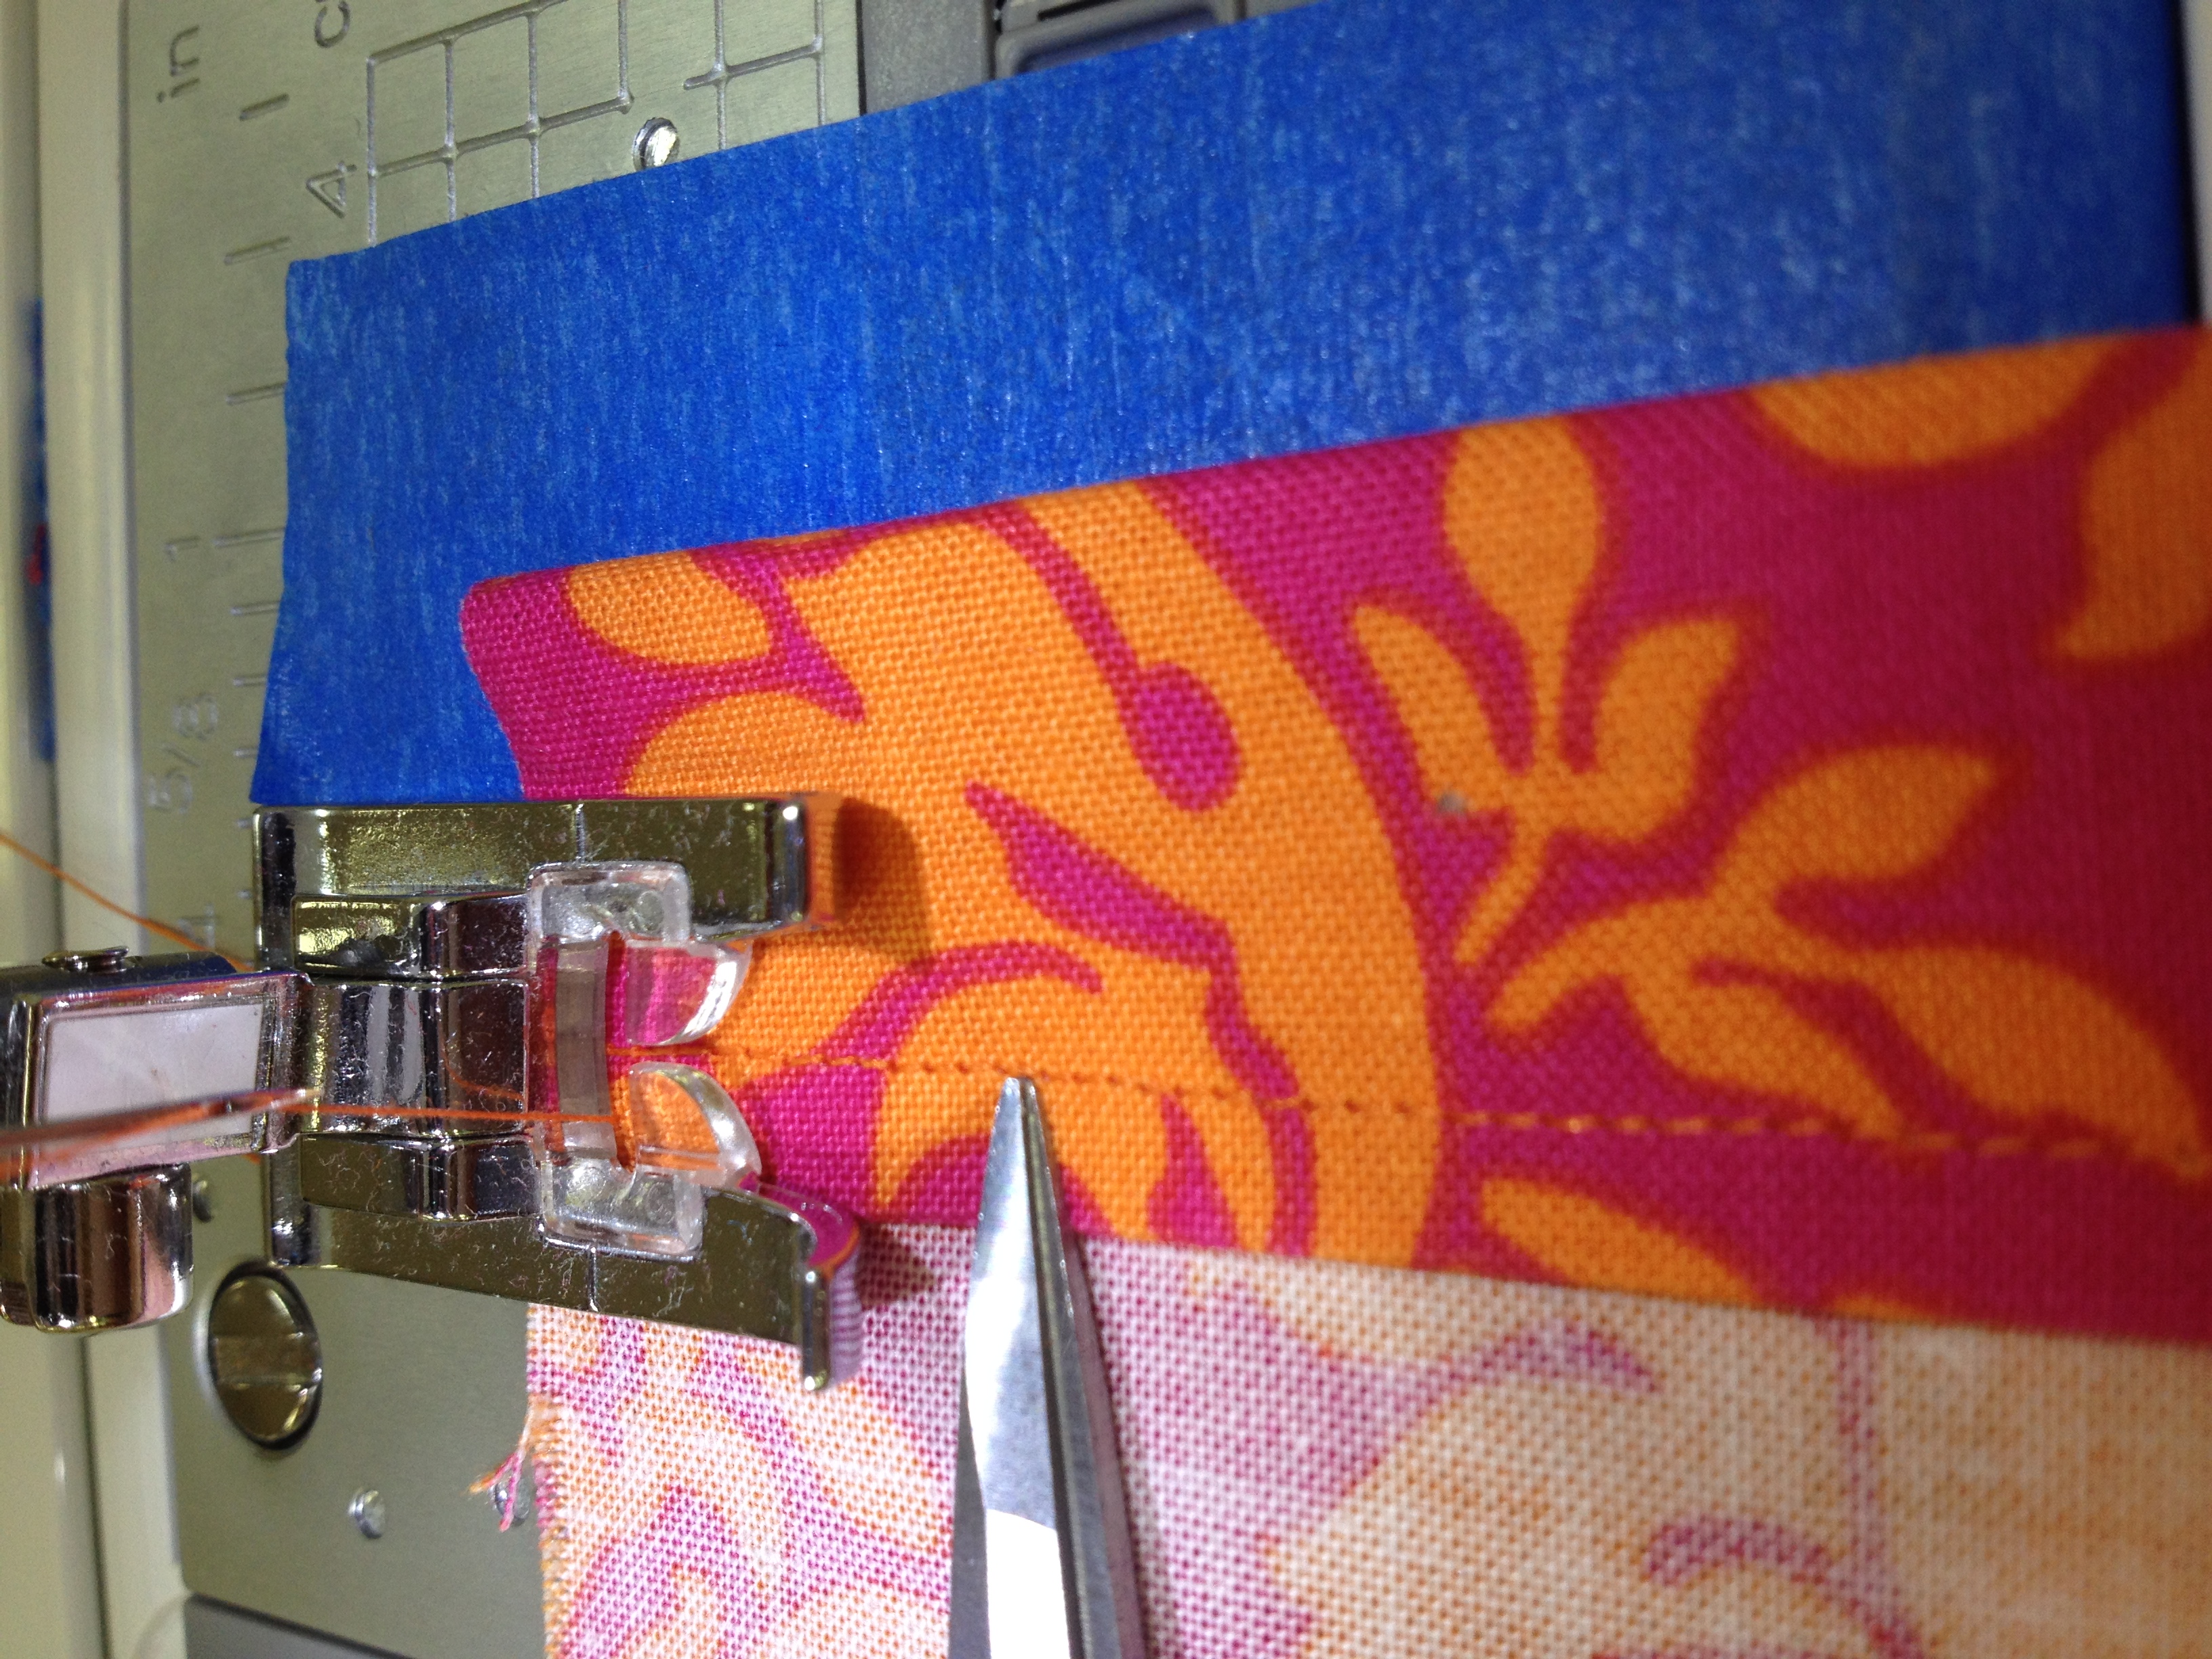
Fold your skirt in half so that the “pretty sides” are facing each other.  Stitch along raw edges (using your presser foot as a sewing guide) making sure to back-tack at the beginning and end of your seam.

photo 5 (7)

Yay, you’re finished! Flip your skirt pretty side out!

photo (12)

photo (13)

Okay girls, there you go! Now, you can make more of these at home!  Don’t forget to embellish, add a bow, add a trim, the sky’s the limit! Have fun creating!

P.S. For a shorter version, follow the same steps above but start with a 6″ x 22″ fabric remnant, or for a maxi length begin with a 12″ x 22″ remnant.

About Jen

About Jen

I started Thimble Bee’s in 2009 to share my love and joy for sewing with the next generation. I’m so blessed to have met so many families in the Charlotte area and I’m glad you’re here. I hope you find Thimble Bee’s a comfortable place to learn, be encouraged, and grow in your skill every day.

Post navigation

Simple Side Satchel (for 18″ Dolls)
Hey, there!

Hey, there!

Jen Taylor, Owner

I started Thimble Bee’s in 2009 to share my love and joy for sewing with the next generation. I’m so blessed to have met so many families in the Charlotte area and I’m glad you’re here. I hope you find Thimble Bee’s a comfortable place to learn, be encouraged, and grow in your skill every day.

Now at the Studio

Join us for one of our fun and creative workshops, classes, or camps!

Register Today Learn More
Now at the Studio

SUBSCRIBE NOW

Stay up to date on our classes and workshops by subscribing to our newsletter!

Select list(s) to subscribe to


By submitting this form, you are consenting to receive marketing emails from: Thimble Bee's Sewing School. You can revoke your consent to receive emails at any time by using the SafeUnsubscribe® link, found at the bottom of every email. Emails are serviced by Constant Contact

Spreading JOY one stitch at a time!

Pages

  • Adult Classes
    • Garment Fundamentals
  • Adult Sewing Workshops
  • Beginner Garment Class
  • Blog
  • Classes
  • Fashion FUNDAMENTALS
  • Fashion Teens
  • Gift Cards
  • Girl Scouts
  • Hi, I’m Jen!
  • Home
  • Homeschool Sewing Classes
  • Kids Sewing Workshops
  • Learn To Sew I Adults
  • Learn To Sew I Kids
  • Learn To Sew II Adults
  • Learn to Sew III Adults
  • Learn to Sew Kids: Beyond the Basics
  • Learn To Sew Series
  • Policies + Procedures
  • Sewing Summer Camp
  • Sewing Workshops
  • Teacher Workday & School Break Camp
  • The Thimble Bee’s Sewciety
  • Thimble Bee’s Learn to Quilt Series: Create Your First Quilt!
  • Virtual Classes
  • About
  • Email Us
  • Blog
  • Gift Cards
Thimble Bee's Sewing School © 2025 | All Rights Reserved | 3512 Providence Rd S, Waxhaw, NC 28173